
Every finished garment starts with a series of decisions, fabric choice, seam type, stitching method, finishing technique. Understanding garment construction basics gives you a real advantage when communicating with factories, evaluating samples, and making production decisions that affect your final product. Whether you're developing your first collection or refining an existing line, knowing how garments are actually built helps you avoid costly mistakes before they hit the cutting table.
Garment construction covers everything from how pattern pieces are cut and joined to how seams are finished and garments are pressed. It's the structural backbone of every piece of clothing, and it directly determines how a garment fits, holds up over time, and looks on a hanger or a body. For brands working with a manufacturing partner, a solid grasp of these fundamentals makes tech pack reviews, sample approvals, and quality control conversations far more productive.
At Manludini, we work with brands through every stage of production, from sample development to bulk manufacturing. This guide breaks down the core steps, seam types, and finishing methods you need to know, so you can approach your next production run with clear expectations and sharper communication.
Why garment construction basics matter
Understanding how a garment is built changes the way you work with factories. When you can speak the same language as your manufacturer, sample revisions get faster and quality issues become easier to identify and describe. Without that foundation, a poor fit or a weak seam finish can cost you time, money, and product that doesn't meet your standard.
It protects your budget
Production mistakes are expensive. Recutting fabric, re-sewing seams, or rejecting a full production run adds costs that most brands don't budget for at the start. When you understand how seams should be constructed and finished for your specific fabric and garment type, you can spot issues at the sample stage rather than after thousands of units are already made.
Getting garment construction basics right at the sample stage is almost always cheaper than correcting errors in bulk.
A buyer who knows the difference between a French seam and a flat-felled seam, for example, can immediately tell whether the factory used the right method for a lightweight woven shirt. That kind of informed review keeps production on track and reduces unnecessary back-and-forth.
It improves your communication with factories
Factories work from instructions, and vague instructions lead to interpretation errors. When you build your knowledge of garment construction, your tech packs, fit comments, and revision notes become precise and actionable. You stop relying on guesswork and start giving factories the specific feedback they need to hit your standard.
At Manludini, we regularly help brands translate their design intentions into clear production language. The brands that move through development fastest are almost always the ones who arrive with a working understanding of how their garments should be built.
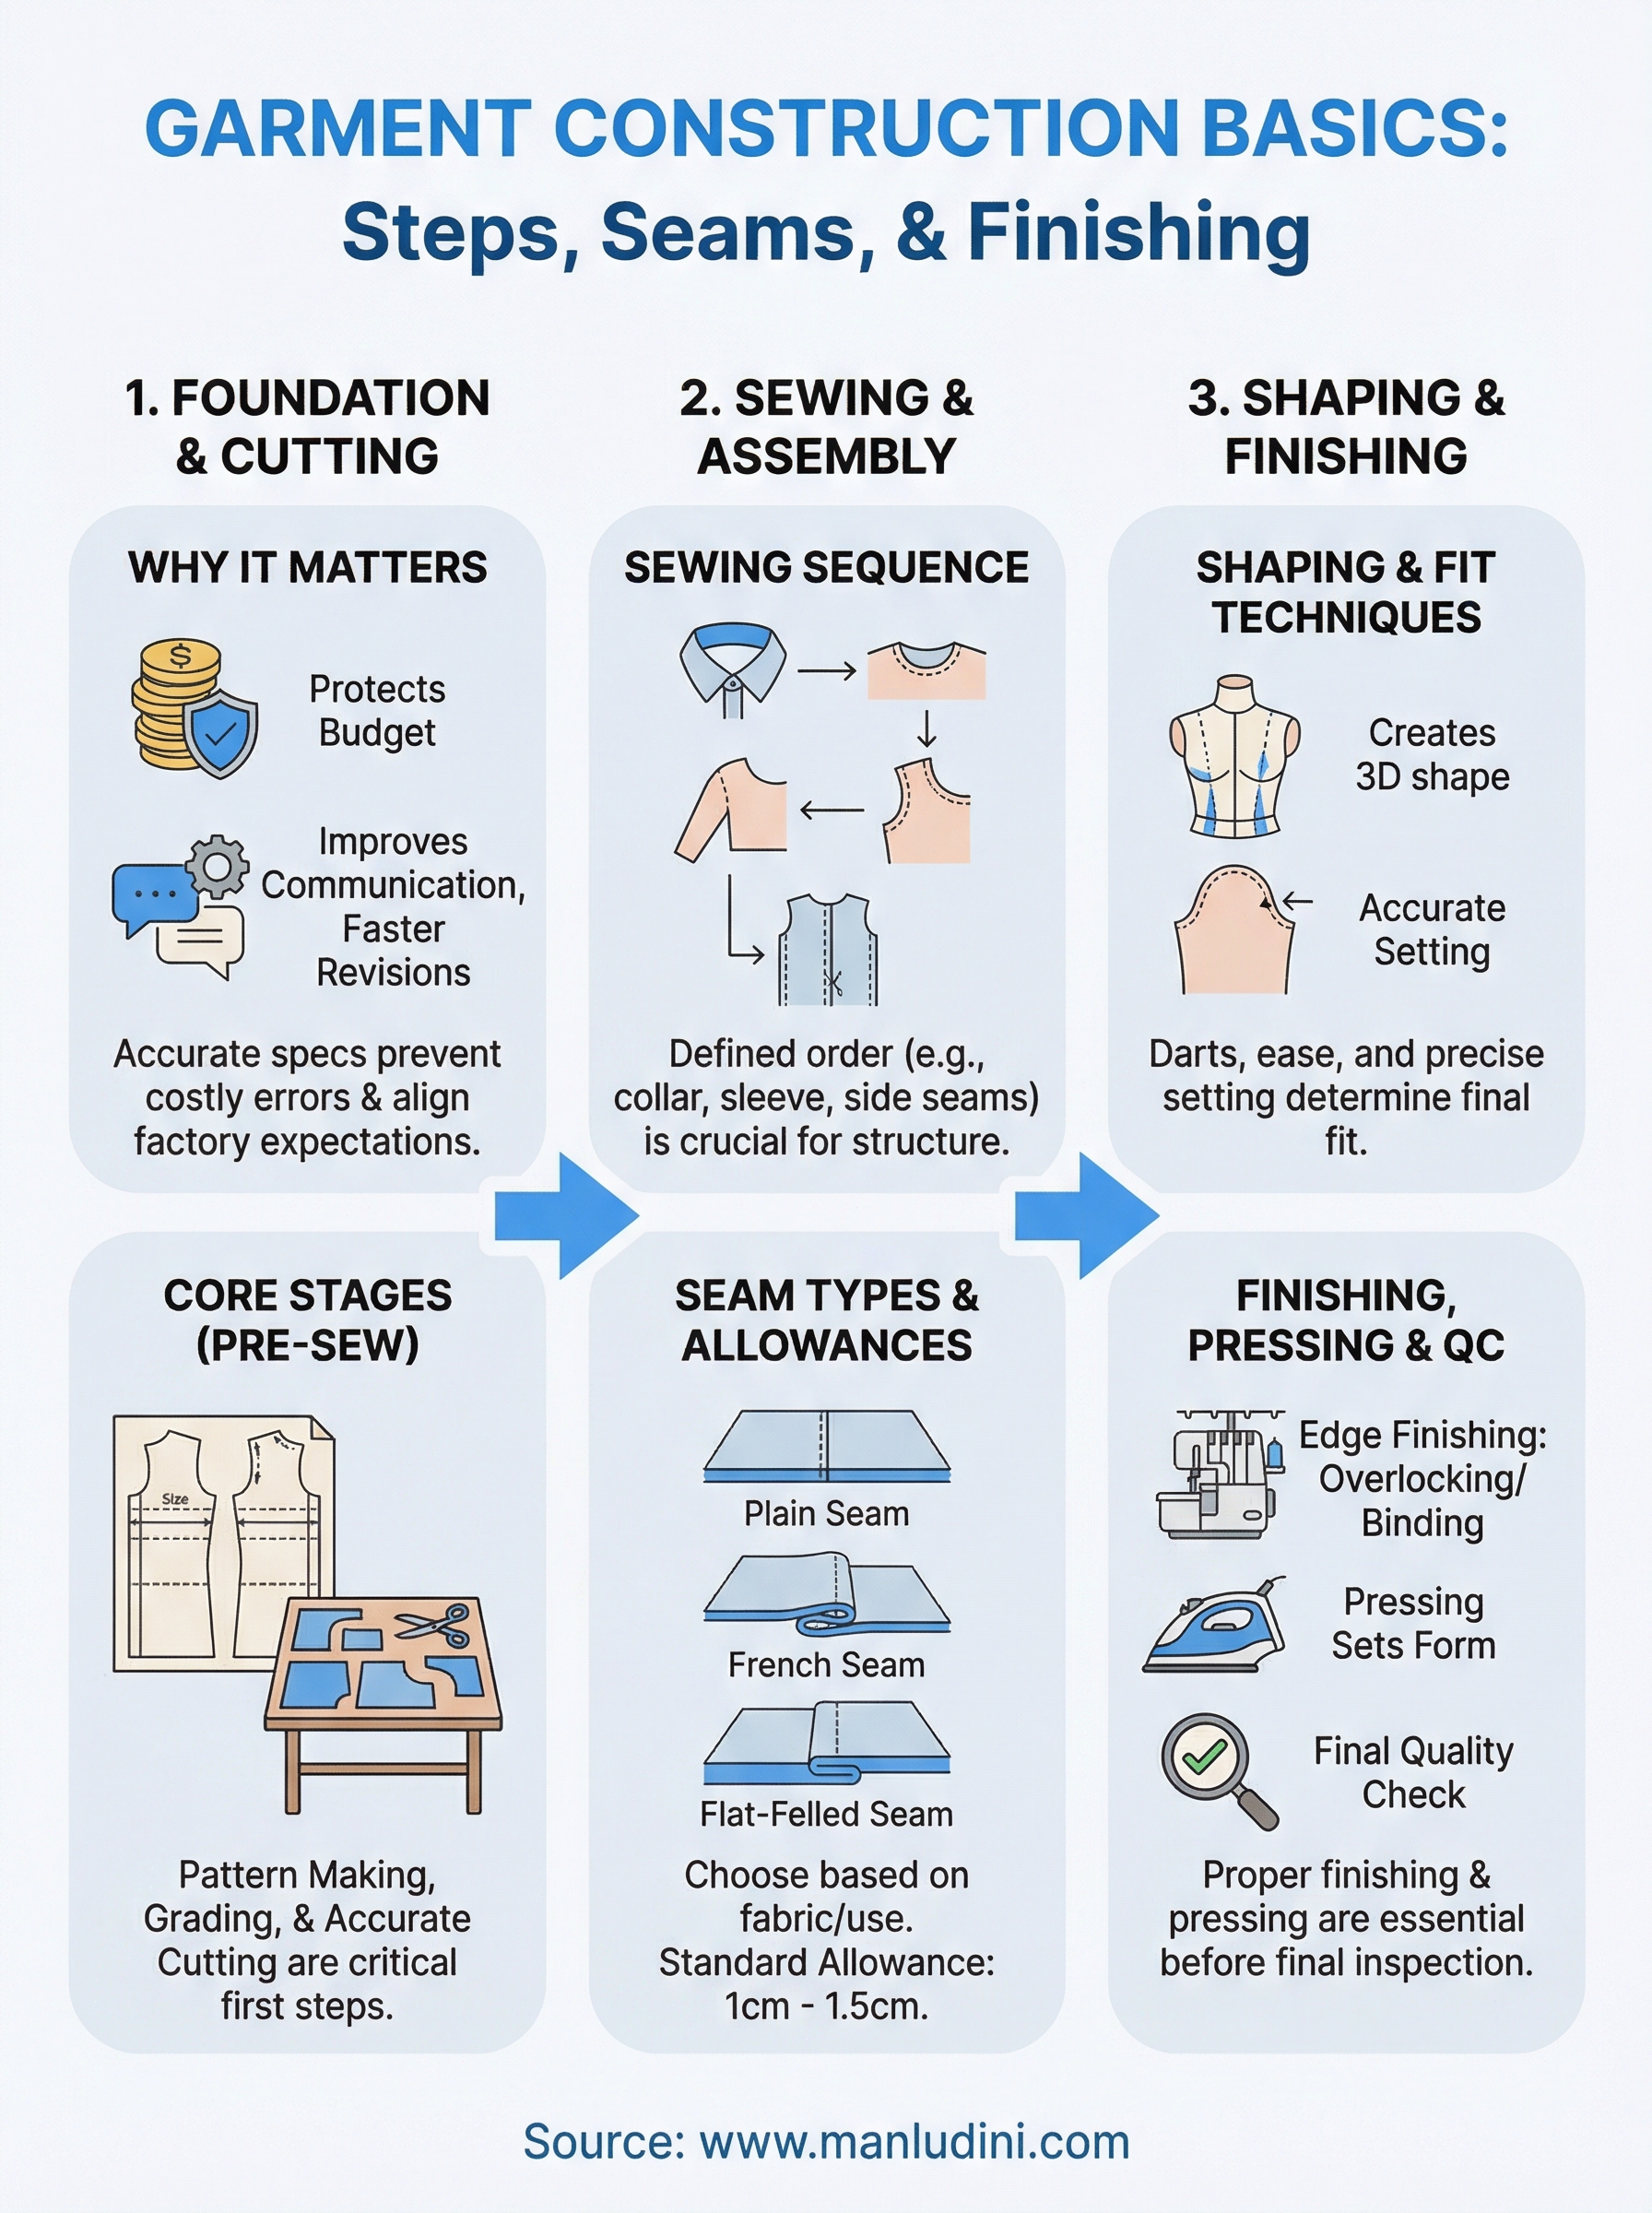
The core stages from fabric to finished garment
Every garment moves through a defined sequence of steps before it reaches your customer. Understanding this sequence helps you track where your product is in development, catch problems before they multiply, and give your factory specific feedback during sample reviews instead of vague comments.
Pattern making and cutting
Pattern pieces are the templates that determine how fabric is cut and assembled into a garment. A factory creates these from your tech pack or a reference sample, then grades them across your size range. Accurate grading at this stage is critical because any error affects fit across every size in your run, not just one.
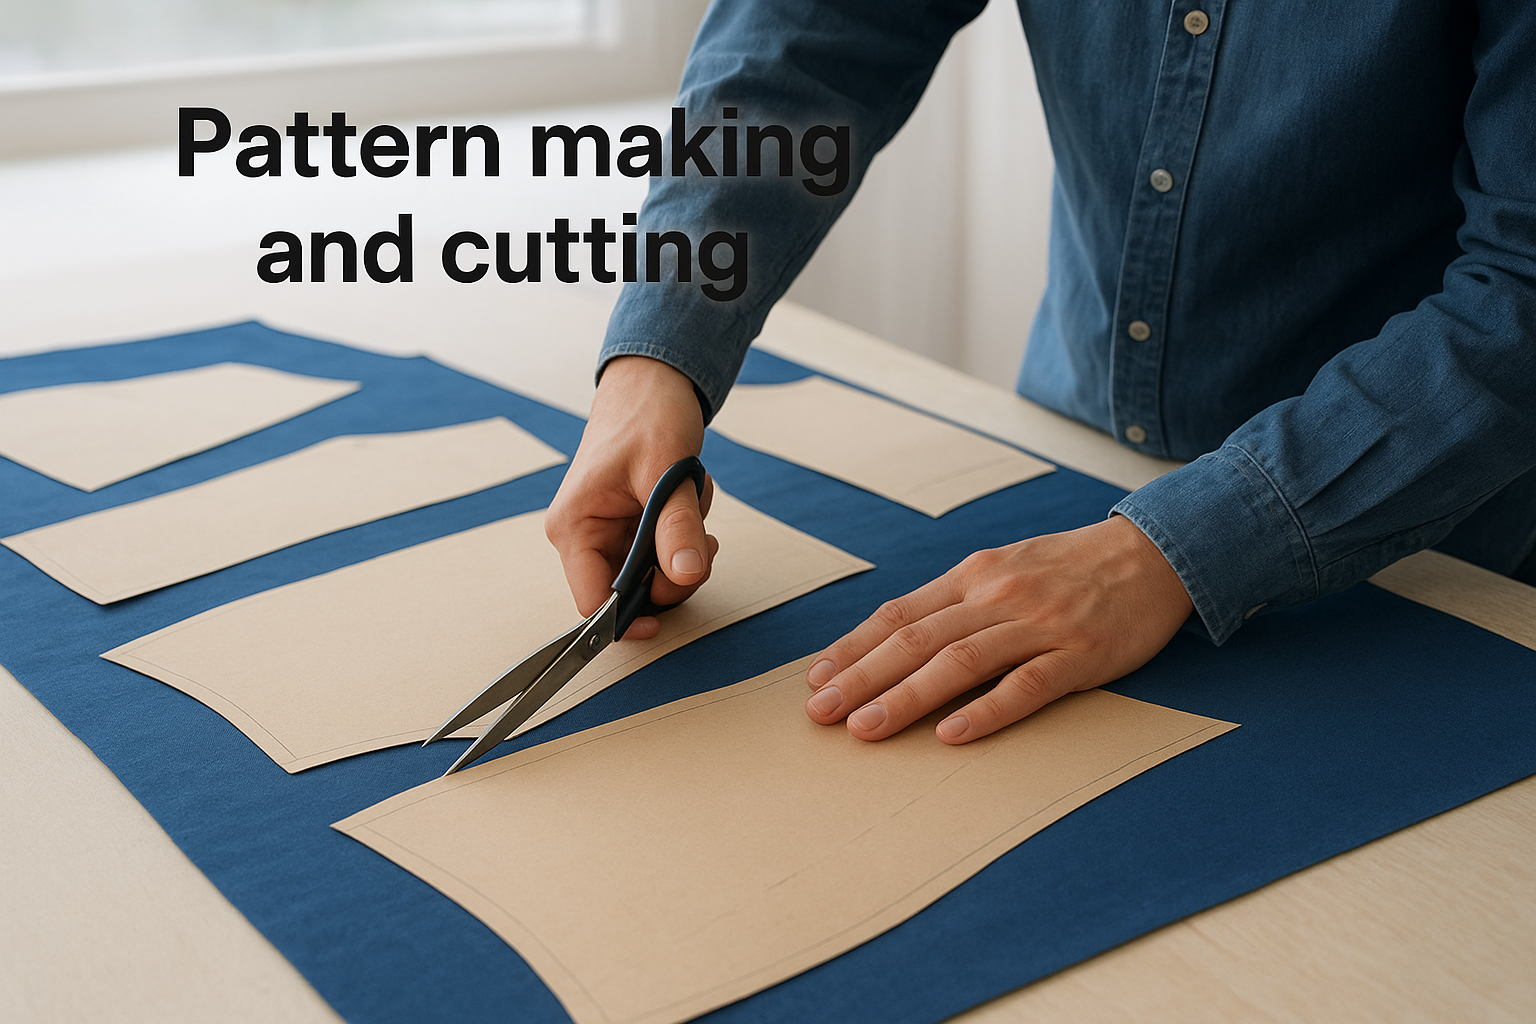
Getting your patterns confirmed before bulk cutting is one of the most cost-effective steps in garment construction basics.
Sewing and assembly
Once fabric is cut, operators sew the pieces together in a defined order, typically called a sewing sequence. This sequence matters because some seams must be closed before others can be joined. Collar setting, sleeve attachment, and side seam joining each happen at specific stages, and reordering these steps creates structural problems that are difficult and costly to correct once a garment is fully assembled. Knowing this sequence also helps you review sewing specifications more accurately in your tech pack.
Seams, stitches, and seam allowances you must know
Seams are the joints that hold a garment together, and choosing the wrong type for your fabric or end use creates fit problems, fraying, and structural failures. Understanding your seam options is one of the most practical parts of garment construction basics to master before you review your first sample.
Common seam types
Each seam type serves a different function, and factories expect you to specify which one in your tech pack. The three types brands use most often are:

- Plain seam - basic join used on most woven garments
- French seam - encloses raw edges fully, best for lightweight or sheer fabrics
- Flat-felled seam - topstitched flat on both sides, ideal for denim and workwear
Specifying your seam type in your tech pack removes ambiguity and gives your factory a clear standard to match.
Seam allowances
Seam allowance is the gap between the stitch line and the cut edge of the fabric. Most factories default to a standard allowance of 1 cm to 1.5 cm, but this shifts based on fabric weight, garment type, and finishing method.
Confirm your allowance with your factory early in development so your fit and finished dimensions stay consistent across your full size run.
Shaping and assembly techniques that affect fit
How fabric gets shaped and joined during assembly has a direct impact on how a garment sits on the body. These techniques go beyond basic sewing and get into the structural decisions that separate a well-fitting garment from one that pulls, bunches, or hangs awkwardly. Garment construction basics include understanding these methods so you can read a sample critically and give your factory clear fit feedback.
Darts, tucks, and ease
Darts and tucks are folded and stitched sections that create three-dimensional shape in flat fabric. A dart in a shirt back or a trouser front controls how the garment curves around the body. Ease allowance is the extra room built into a pattern beyond actual body measurements, and it determines whether a garment feels fitted, relaxed, or structured.
Getting ease values confirmed during your first sample fit saves significant revision time before bulk.
Sleeve and collar setting
Setting a sleeve correctly requires matching the sleeve cap to the armhole at precise notch points. Any rotation or tension mismatch creates pulling at the shoulder or restricted arm movement. Collar attachment follows similar logic: the collar must lie flat and symmetrical, which depends on accurate notch placement and consistent seam tension from your factory.
Finishing, pressing, and quality checks
Finishing and pressing complete the garment before it moves to your buyer. Proper edge finishing prevents fraying, while pressing sets seams and shapes the garment into its final form. Both steps are non-negotiable if you want consistent, professional results across your production run.
Finishing methods
Edge finishing secures raw seam allowances and prevents fabric from unraveling. Your factory will typically use overlocking, binding, or a Hong Kong finish depending on fabric weight and garment type. Specifying your preferred method in your tech pack removes guesswork and keeps your finish consistent across the run.
Confirming your finishing method during sampling means your bulk production matches your approved standard from the start.
Pressing and final inspection
Pressing at the correct temperature sets seams flat, opens collar construction, and gives each garment a clean, finished silhouette. Your factory should press before final inspection, not after.
During final quality checks, inspectors measure against your approved sample, verify stitching consistency, and confirm finishing quality. Applying your knowledge of garment construction basics at this stage helps you read inspection reports accurately and flag non-conforming units before they leave the factory.
Next steps for your first production run
Now that you have a working understanding of garment construction basics, the next move is putting that knowledge into action. Start by reviewing your tech pack or reference sample against the stages, seam types, and finishing methods covered in this guide. If gaps show up, fill them in before you submit to a factory. Clear, complete documentation at the start of development saves you revision rounds, budget, and time.
Your manufacturing partner plays a significant role in how smoothly your first production run goes. A factory with direct communication and practical development support helps you move from sampling to bulk production without the delays that come from unclear specs or mismatched expectations. At Manludini, we work with brands at every stage, from initial sample development through to export-ready bulk manufacturing. If you're ready to move forward, reach out to our team to discuss your first project.
0 comments