
Most people who want to learn how to start a clothing brand from scratch already have the creative spark, a style direction, a niche they care about, or a product idea they can't stop thinking about. What they don't have is a clear path from that idea to actual garments they can sell. And that's exactly where things tend to fall apart.
The reason is simple: building a clothing brand involves dozens of moving parts. You need a business plan, a budget, a brand identity, a product development process, a manufacturer, an online store, and a marketing strategy, all before your first sale. Skip a step or get the order wrong, and you'll burn through time and money with nothing to show for it. That's not meant to scare you. It's meant to prepare you for what's ahead.
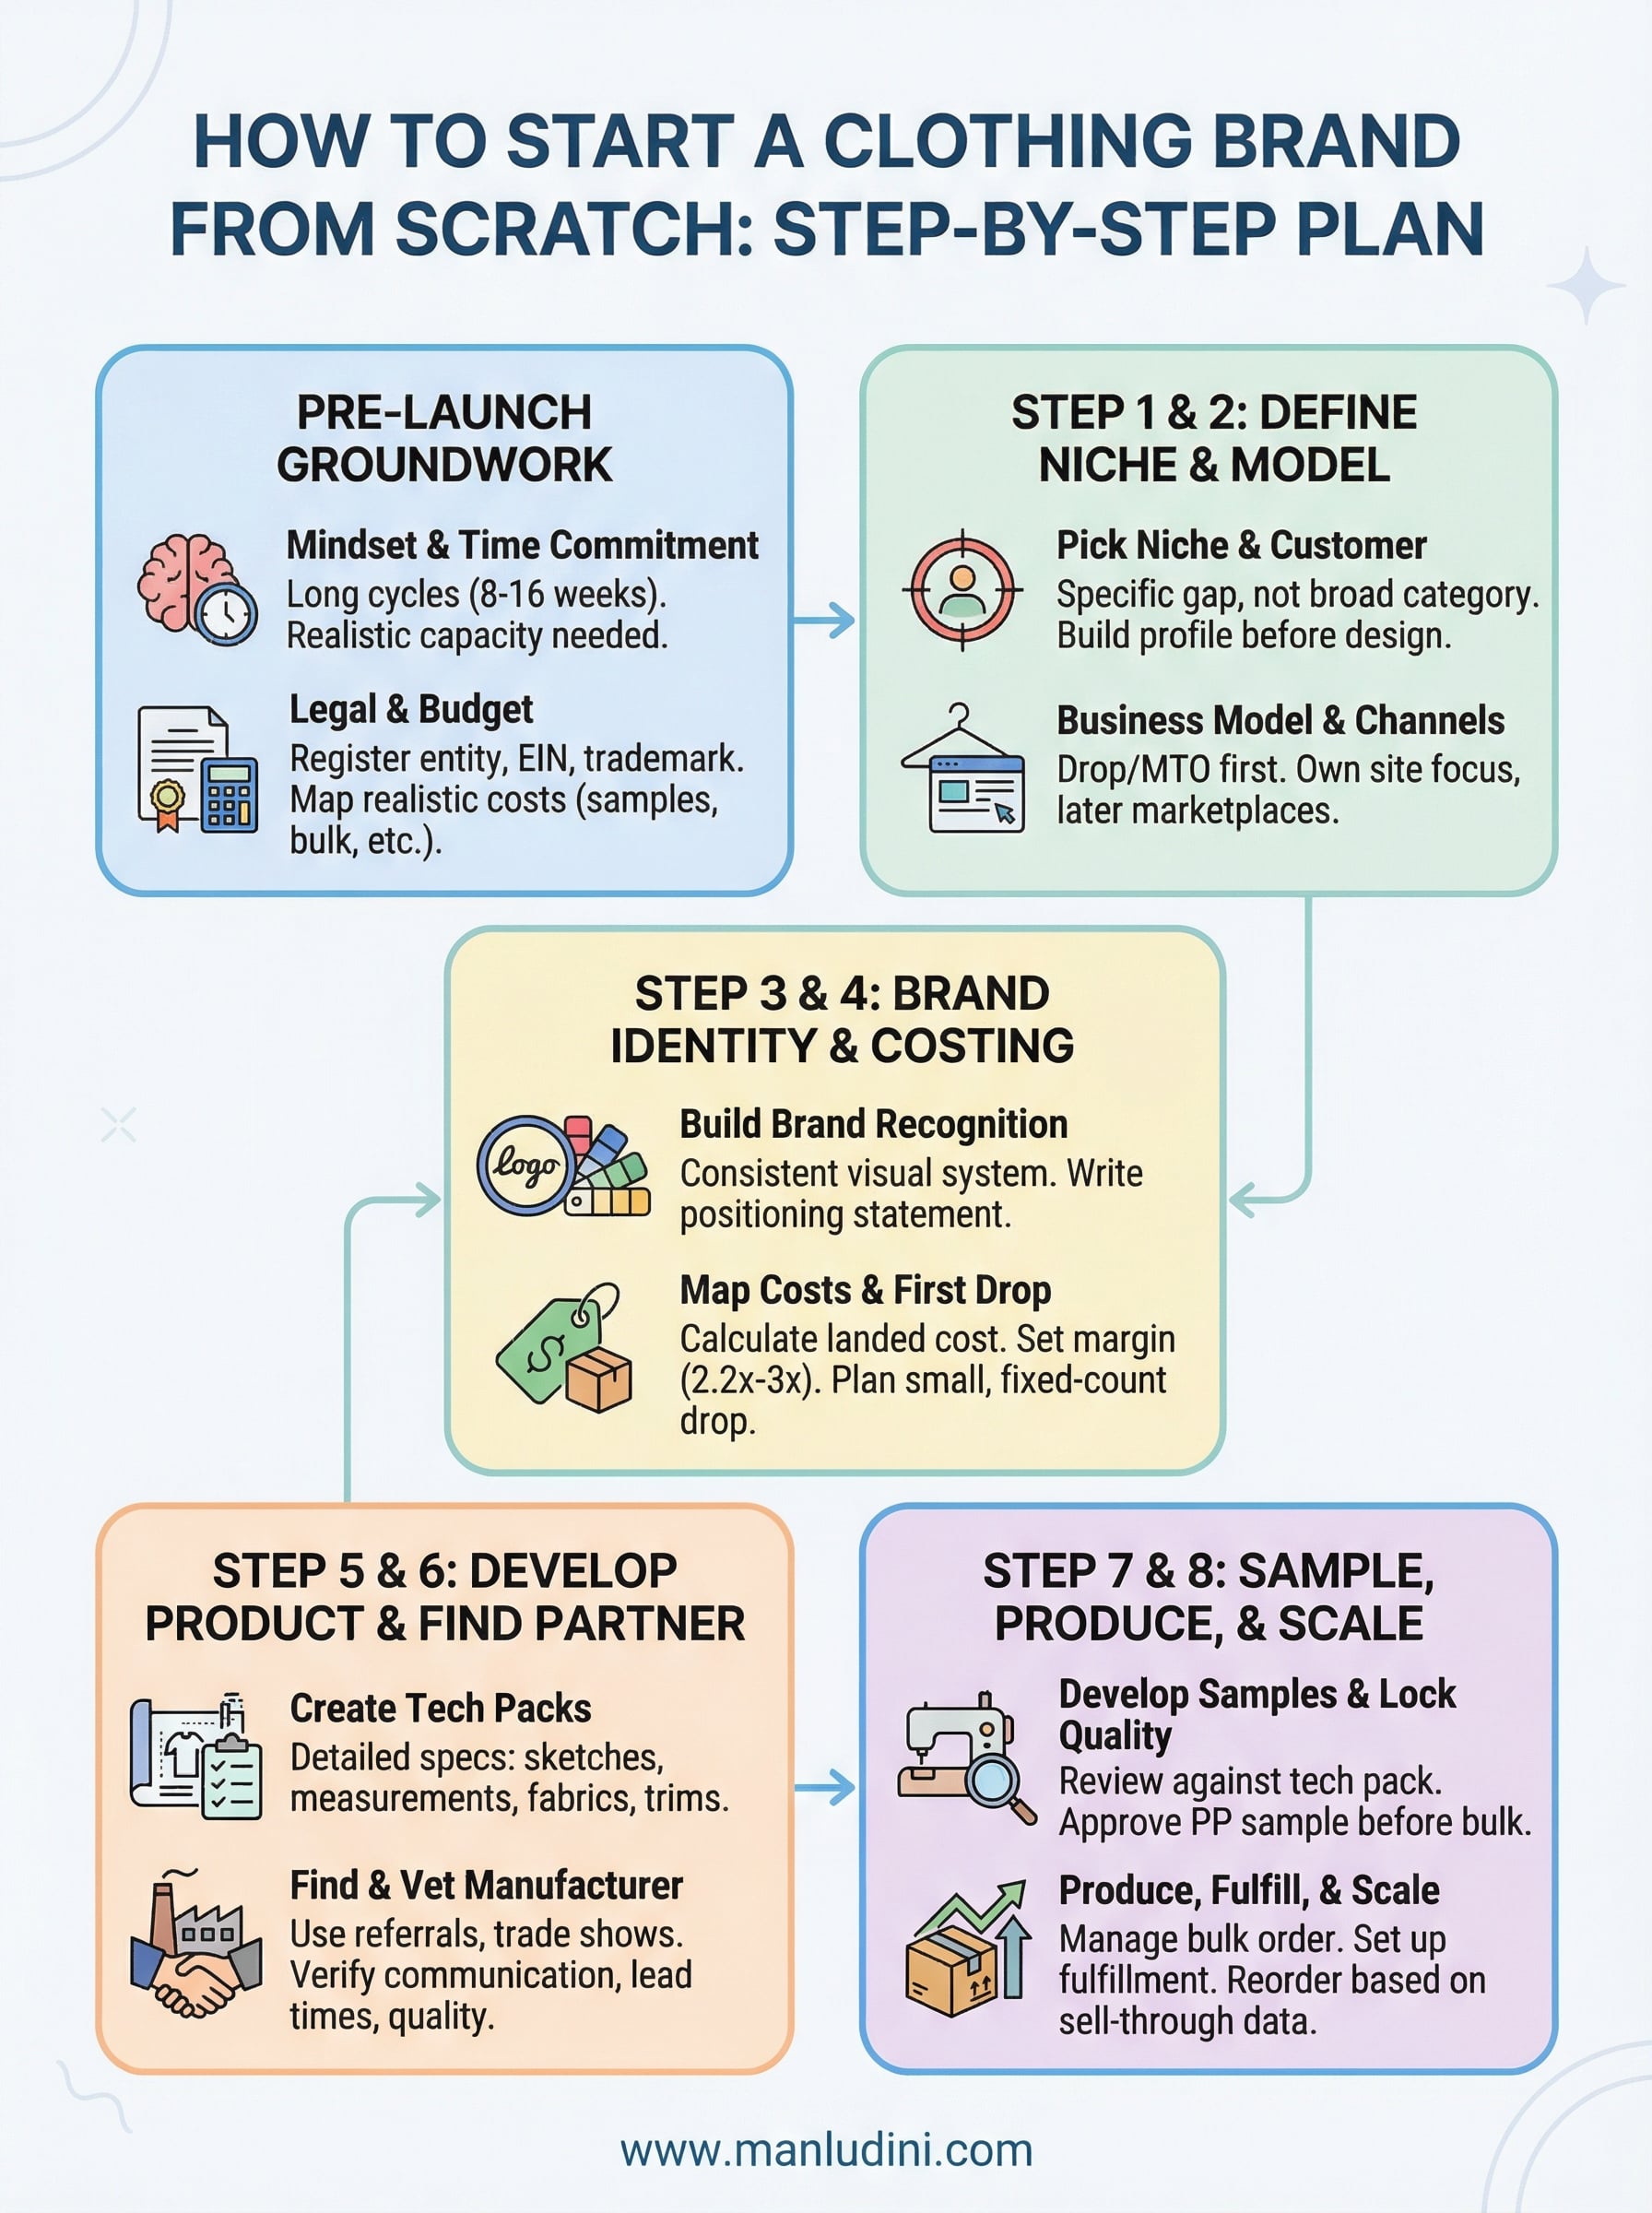
This guide breaks the entire process into concrete, actionable steps, from defining your niche and registering your business to developing samples, sourcing production, and launching your store. At Manludini, we work with fashion brands and startups every day, helping them move from concept to bulk manufacturing with sample development, fabric sourcing, private labeling, and production support. We've seen what works, what stalls brands out, and what separates the ones that launch from the ones that don't. Everything in this guide reflects that hands-on experience.
What you need before you start
Before you dive into how to start a clothing brand from scratch, take stock of a few fundamentals. Brands that launch cleanly are the ones that handle the groundwork before they touch product development, not after. Skipping this part doesn't speed anything up. It creates problems that catch up with you mid-development when you have the least capacity to deal with them.
Mindset and time commitment
Building a clothing brand is not a weekend project. Most founders underestimate how long development cycles take, especially when working with overseas manufacturers. From the moment you place your first sample request to the day you receive approved production-ready samples, you're typically looking at 8 to 16 weeks, sometimes longer depending on fabric sourcing, revision rounds, and shipping logistics.
Getting your first product right takes longer than you expect. Build that time into your plan before you commit to a launch date.
You also need a realistic picture of your own capacity. If you're building this brand while working a full-time job, map out how many hours per week you can actually dedicate to it. Founders who treat the early stage like a casual side project often stall out mid-development and never ship.
Legal setup and business registration
You don't need a law degree to start, but you do need a registered business entity before you start spending money, signing contracts, or working with manufacturers. At minimum, register your business in your state and apply for an EIN (Employer Identification Number) through the IRS. The application is free and takes less than an hour.
Here are the key legal steps to complete before production begins:
- Choose a business structure: Most small brands start as an LLC for the liability protection it provides over a sole proprietorship.
- Register your business name: Check your state's business registry and run a trademark search through the USPTO to confirm your brand name is available before you spend money on branding.
- Open a dedicated business bank account: Keep your personal and brand finances fully separate from day one.
- Obtain a sales tax permit: Required if you sell directly to customers in states where you have a tax nexus.
Skipping the legal setup doesn't save you time. It creates friction when you try to open merchant accounts, take payments from customers, or bring on partners later.
A realistic starting budget
You don't need tens of thousands of dollars to launch a clothing brand, but you do need a clear view of what your actual startup costs will look like. The number varies depending on your business model, product type, and how many styles you start with. Here's a realistic cost range for a focused first launch:
| Expense | Estimated Cost Range |
|---|---|
| Sample development (per style) | $100 - $400 |
| Bulk production (per style, small run) | $1,500 - $5,000+ |
| Branding (logo, labels, hangtags) | $200 - $1,000 |
| E-commerce setup | $30 - $100/month |
| Photography and content | $300 - $1,500 |
| Shipping and fulfillment setup | $100 - $500 |
Start with one or two styles rather than launching a full collection. This keeps your risk manageable, lets you test real customer demand before committing to large orders, and gives you the budget to fix quality issues that sampling always surfaces. Brands that overextend in round one tend to run out of money before they can iterate, and iteration is where the product actually gets good.
Step 1. Pick a niche and define your customer
One of the biggest mistakes new founders make is trying to build a brand for everyone. Broad appeal sounds like an advantage, but in clothing it's a liability. Without a defined niche, your product decisions become guesswork, your marketing has no clear direction, and your brand identity stays vague. A tight niche makes every downstream decision easier, from what fabrics you source to how you write product descriptions to which manufacturers you approach.
How to choose a niche that actually works
Your niche sits at the intersection of what you genuinely understand and what a specific group of people actively buys. You're not just picking a category like "streetwear" or "activewear." You're identifying a specific customer with a specific set of needs that existing brands aren't fully serving, and positioning your product as the answer to that gap.
Here are three niche angles worth evaluating before you move forward:
- Problem-based: You solve something specific, such as workwear designed for tall men, or activewear built for postpartum women returning to fitness.
- Identity-based: Your brand speaks directly to a community or lifestyle, such as outdoor climbers, independent musicians, or urban cyclists.
- Aesthetic-based: You offer a distinct visual direction that isn't already saturated in the market, with a clear point of view that sets your product apart visually.
The more specific your niche, the easier it is to build a loyal customer base before you scale into broader product lines.
Pick one angle and pressure-test it. Search the category on major retail platforms, look at what's already selling well, read customer reviews on competing products, and identify the gap your brand fills. If you can't name the gap in one clear sentence, the niche needs more refinement.
Build a customer profile before you design anything
Once you know your niche, define your customer in writing before you design a single garment. This isn't a marketing exercise. It's a product development tool. Knowing your customer's age, income range, lifestyle, and shopping habits directly affects your fabric choices, price points, sizing range, and the kind of brand experience you build around the product.
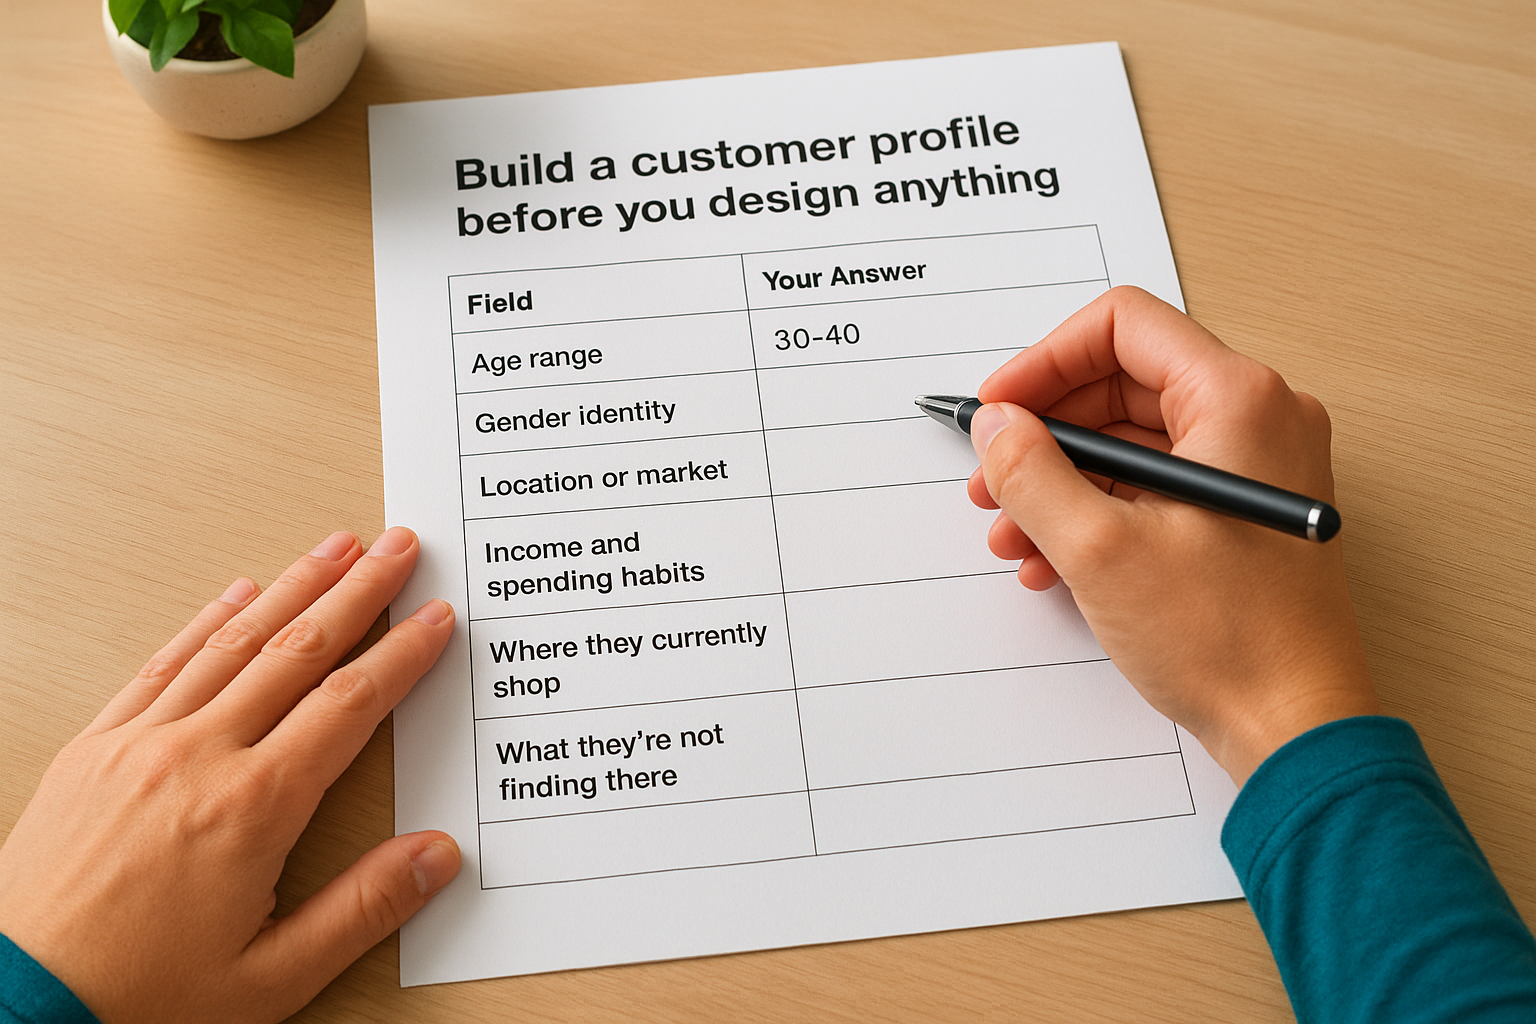
Use this simple profile template to get started:
| Field | Your Answer |
|---|---|
| Age range | |
| Gender identity | |
| Location or market | |
| Income and spending habits | |
| Where they currently shop | |
| What they're not finding there | |
| What problem your product solves |
Fill this out before you move to branding or production. When you understand how to start a clothing brand from scratch by anchoring every decision to a real person, your product choices stop being abstract guesses and start reflecting something your customer actually wants to buy.
Step 2. Choose a business model and sales channels
Your business model determines how you produce, hold inventory, and generate revenue. Get this wrong early on, and you'll either sit on unsold stock or be unable to fulfill orders fast enough. Before you think about marketing or branding, you need to lock in how your brand actually makes money and where you plan to sell.
Production models: what they are and how to choose
The most common production models for new clothing brands are make-to-stock, made-to-order, and drop-based releases. Each carries a different risk profile and inventory commitment, and choosing one shapes how you work with your manufacturer from the start.
| Model | How it works | Best for |
|---|---|---|
| Make-to-stock | You produce a fixed run and hold inventory | Brands with predictable demand and startup capital |
| Made-to-order | You produce only after a customer buys | Brands testing styles with low upfront risk |
| Drop-based | You release limited quantities in planned batches | Brands building hype and managing cash flow |
Most founders starting out do best with a drop-based or made-to-order approach. Both limit your exposure on the first run and let you test real demand before committing to larger quantities. As you work through how to start a clothing brand from scratch, matching your production model to your available cash flow is one of the most practical decisions you'll make early on.
Your production model is not permanent. Start with the approach that limits your financial risk, then scale into larger runs once demand proves consistent.
Sales channels worth starting with
Where you sell directly affects your margins, your customer relationship, and how much control you have over your brand experience. Selling through your own website keeps margins higher and gives you direct access to customer data. Selling through third-party marketplaces trades that margin for built-in traffic, which comes with tradeoffs you need to understand before committing.
Here are the main channels to evaluate for your first launch:
- Own website: Gives you full brand control, direct customer relationships, and higher profit margins per sale.
- Marketplaces: Platforms like Amazon or Etsy provide existing traffic but take fees and reduce your brand visibility.
- Wholesale to retailers: Moves larger quantities but cuts your margin significantly and requires higher minimum orders.
- Pop-ups and markets: Useful for validating product-market fit in person, especially for local or regional brands.
Start with one primary channel and build your systems around it before you expand. Splitting your attention across too many channels early means you execute none of them well.
Step 3. Build a brand people recognize
Your brand is not your logo. Brand identity is the full system of visual and verbal choices that signals what your business stands for before a customer reads a single word of copy. When working through how to start a clothing brand from scratch, many founders treat branding as something to figure out after the product is ready. That sequence costs you, because the way customers perceive your product determines whether they buy, come back, or tell someone else about it. Build your brand identity before you shoot product photos, name files, or set up your store.
Define your visual identity system
Picking a color you like is not a visual identity. A real identity system stays consistent across your website, packaging, labels, hang tags, and every piece of content you put out. Consistency is what builds recognition, and recognition is what turns a first-time browser into a repeat buyer. Every time a customer encounters your brand, a consistent visual system should tell them exactly who you are without any explanation attached to it.
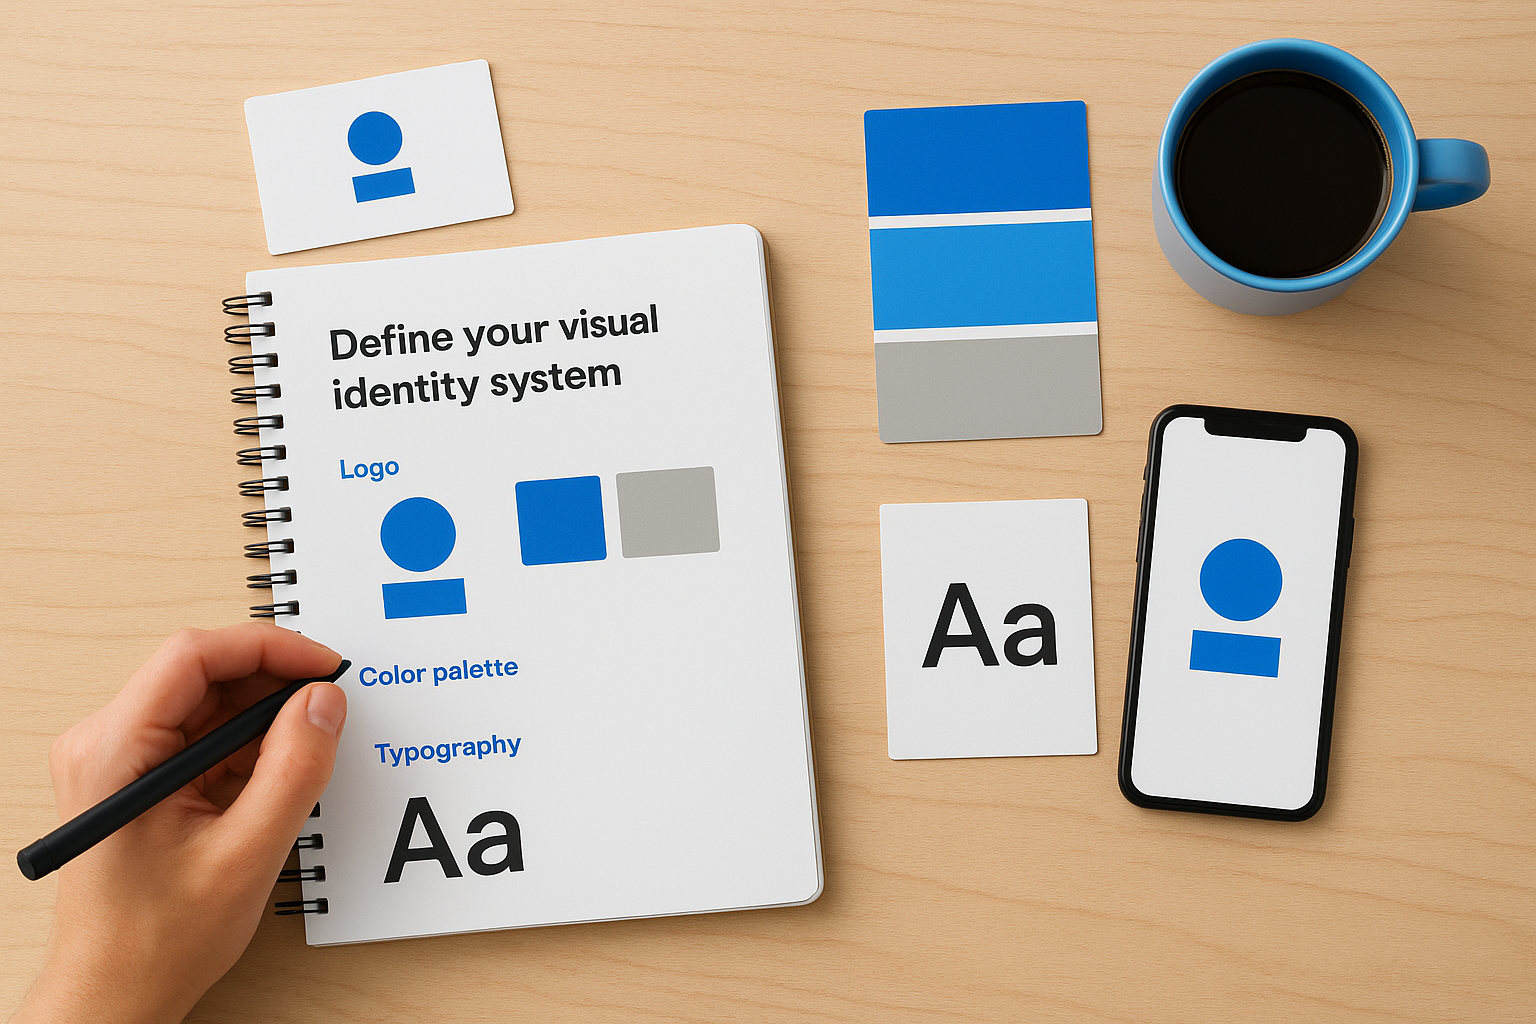
Build your system around these four core elements before you develop product or brief any designer:
- Logo: Create a primary version and a simplified mark for small-format applications like inside labels, icons, and embroidery.
- Color palette: Limit yourself to two or three core colors and apply them without exception across every channel.
- Typography: Choose one typeface for headlines and one for body text, both chosen to reflect the tone your brand is going for.
- Photography style: Define a visual direction and shoot every image to that standard. Mixing styles across your product catalog confuses customers and weakens recognition.
Consistency across every customer touchpoint builds recognition faster than any single design decision you make.
For free typefaces you can use across both digital and print applications, Google Fonts offers a well-organized library that works across most design tools.
Write a brand positioning statement
A positioning statement is a single internal sentence that defines who you sell to, what you offer, and why it's meaningfully different from what already exists. You don't publish this statement directly, but it becomes the filter for every brand decision you make from this point forward, from how you name a product to how you write a caption. If something doesn't fit the positioning statement, it doesn't move forward.
Use this template to write yours:
For [target customer], [brand name] offers [product or category] that [key benefit], unlike [alternative], because [reason to believe].
Here's a concrete example: "For independent musicians with an anti-mainstream aesthetic, Darkyard offers heavyweight streetwear that refuses to blend in, unlike mass-produced alternatives, because every piece drops in limited quantities with no restock." That one sentence tells you what to make, who to talk to, and how to position your product against everything else competing for your customer's attention and money.
Step 4. Map costs, pricing, and your first drop
Many founders figure out their pricing after they've already committed to a manufacturer and a production run. By that point, the margin is locked in and often wrong. When you're working through how to start a clothing brand from scratch, cost mapping needs to happen before samples, not after. Get your numbers in order early, and every decision from production quantity to launch strategy gets cleaner and more deliberate.
Know your actual cost per unit
Your cost per unit is not just the factory price. Every expense that touches that garment before it reaches a customer needs to be included in your landed cost calculation. Founders who skip this step routinely underprice their products and watch their margins disappear by the time they account for shipping, duties, and returns.
Build your landed cost from these line items:
| Cost Component | What It Includes |
|---|---|
| FOB factory price | The manufacturer's price at point of shipment |
| Freight and shipping | International or domestic shipping to your warehouse |
| Import duties and taxes | Country-specific tariff rates for your product category |
| Labels, hangtags, packaging | Private label trims and branded packaging per unit |
| Quality control | Inspection fees if applicable |
| Payment processing | Card processing fees from your sales platform |
Add all of these together before you set a single retail price. If you're importing garments into the United States, check current duty rates for your product category through the U.S. International Trade Commission.
Set a price that protects your margin
Most clothing brands target a retail markup of 2.2x to 3x the landed cost at minimum. Direct-to-consumer brands often push higher because they're not sharing margin with a wholesaler. If your landed cost per unit comes out to $22, your retail price should sit somewhere between $48 and $66 to keep the business viable after returns, discounts, and customer acquisition costs.
Price based on your cost structure first, then check how that price positions you against comparable products in your niche.
Use this formula as your starting point:
Retail price = Landed cost x markup multiplier
Example: $22 landed cost x 2.8 = $61.60 retail price
Plan your first drop with a fixed unit count
Your first production run should have a ceiling, not just a floor. Ordering 300 units of an untested style before you know how demand responds is how brands end up with dead inventory and no cash left to iterate. Start with a small, defined quantity, sell through it, and use the sell-through data to justify your next order size.
A focused first drop plan looks like this:
- One to two styles maximum to limit production complexity
- One or two colorways per style to reduce SKU count and inventory risk
- A fixed unit count based on a realistic sell-through projection, not optimistic forecasting
- A defined drop window so customers know when stock is available and when it runs out
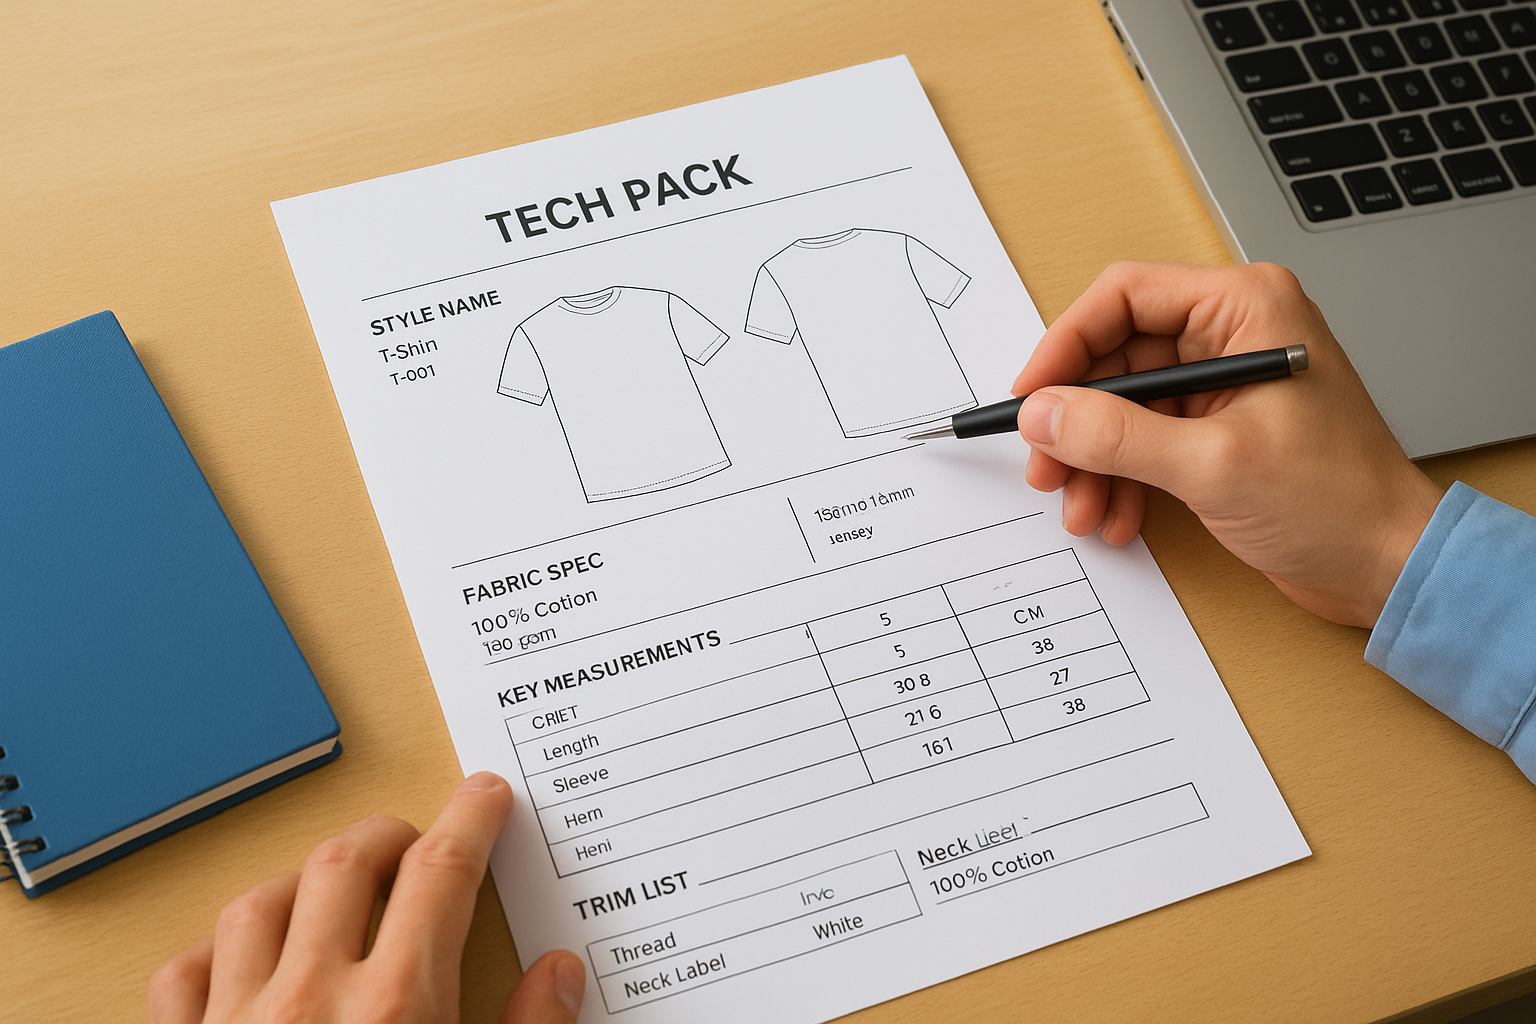
Step 5. Create product specs and tech packs
Before you contact any manufacturer, you need a tech pack for each style you plan to produce. A tech pack is a structured document that tells a factory exactly what you want, covering construction details, measurements, materials, trims, and finish requirements. Without it, your manufacturer is guessing, and guessing produces samples that miss the mark, cost you revision rounds, and delay your timeline. This step is where learning how to start a clothing brand from scratch gets technical, and getting it right saves you significant money and back-and-forth communication down the line.
What goes into a tech pack
Every tech pack covers the same core areas, regardless of garment type. If you leave any of these sections incomplete, expect questions from your manufacturer that could have been answered upfront, or worse, a sample built on wrong assumptions.
A complete tech pack includes the following:
- Technical flat sketches: Front, back, and side views drawn to scale with callouts pointing to every seam, stitch, and construction detail
- Measurement spec sheet: A size-graded chart with measurements for every key point on the garment, listed by size
- Fabric and material specs: Fabric composition, weight (GSM), weave or knit structure, and any stretch or finish requirements
- Trim details: Every trim used, including thread color, zipper type, button size, label placement, and hardware specs
- Colorways: Pantone color references or approved color standards for each version of the style
- Stitching and construction notes: Stitch type, stitch count per inch, seam allowance, and any reinforcement points
- Artwork and print files: Placement diagrams and high-resolution files for any embroidery, print, or applique
The more complete your tech pack, the more accurately a manufacturer can price and produce your garment from the first sample onward.
A simple tech pack template to start with
If you've never built a tech pack before, start with a one-page spec sheet per style and expand it as you gather feedback from your manufacturer. The goal at this stage is clarity, not perfection. Use this basic structure as your starting point:
| Section | What to Include |
|---|---|
| Style name and number | A unique identifier for each style |
| Flat sketch | Front and back technical drawing |
| Fabric spec | Composition, GSM, and finish |
| Key measurements | Chest, length, sleeve, hem, etc. by size |
| Trim list | Every component with exact specs |
| Colorways | Pantone references per color option |
| Special instructions | Construction notes, label placement, artwork files |
Fill in every row before you send the document to a factory. Blank fields are where miscommunication starts, and miscommunication in production always costs more to fix than it would have cost to prevent.
Step 6. Find and vet a clothing manufacturer
Finding a manufacturer is one of the most consequential steps in learning how to start a clothing brand from scratch. The right factory partner can move your product from sample to bulk without constant back-and-forth. The wrong one costs you time, money, and the kind of quality problems that damage your brand before it even has a real customer base. Vetting thoroughly before you commit to a sample order is always worth the extra effort upfront.
Where to find potential manufacturers
You have several sourcing options depending on your production volume, budget, and how hands-on you want to be in the development process. Offshore manufacturing, particularly in countries like Bangladesh, Vietnam, India, and China, tends to offer lower per-unit costs and a wide range of garment capabilities. Domestic manufacturing in the United States costs more per unit but often means shorter lead times and easier communication.
Here are the most reliable places to start your manufacturer search:
- Trade shows: Events like Magic Las Vegas or Texworld USA connect you with vetted factories and sourcing agents in one place
- Industry referrals: Other brand founders are often the best source of honest factory recommendations, especially within niche apparel categories
- Direct outreach: If you know a brand whose product quality you respect, contact them and ask who manufactures for them
- B2B sourcing platforms: Platforms like Alibaba allow you to browse supplier profiles, but require additional vetting before you commit to any order
A manufacturer referral from someone who has already produced with them is worth more than any platform rating or sales pitch.
How to vet a manufacturer before you commit
Before you send a tech pack or pay a sample deposit, run every potential factory through a consistent set of qualification questions. You're not just checking whether they can produce your garment type. You're evaluating whether they communicate clearly, hold realistic timelines, and handle problems transparently when things don't go to plan.
Use this vetting checklist for every factory you consider:
| Question | What a good answer looks like |
|---|---|
| What garment categories do you specialize in? | Direct answer matching your product type |
| What is your minimum order quantity? | A number that fits your first run budget |
| Can you share photos of recent production? | Yes, with specific examples on request |
| What is your standard sample lead time? | A clear timeline, not a vague estimate |
| How do you handle sample revisions? | A defined revision process with clear costs |
| Do you have export documentation experience? | Yes, with references to prior overseas shipments |
Send this list in writing before any call or sample order. A manufacturer that answers these questions clearly and specifically is worth pursuing. One that deflects or gives non-answers rarely improves once production starts.
Step 7. Develop samples and lock quality
Once your tech pack is complete and you've chosen a manufacturer, the sample development phase begins. This is where the specs on paper become an actual garment, and where you discover gaps between what you specified and what the factory interpreted. Every round of sampling is a quality checkpoint, and treating it seriously at this stage is one of the clearest ways to protect your brand before bulk production starts.
How the sample process works
Most manufacturers follow a two-to-three round sample sequence before a style is approved for production. The first sample, often called a proto sample, gives you a rough version of the garment built to your spec sheet. It's rarely perfect, and it's not meant to be. Your job is to review it against your tech pack line by line, note every deviation, and send consolidated written feedback before the next round begins.
Clear, written feedback after each sample round shortens your revision cycle and reduces the risk of the factory repeating the same errors.
Here is a typical sample progression to expect as you work through how to start a clothing brand from scratch:
| Sample Stage | Purpose |
|---|---|
| Proto sample | First physical interpretation of your tech pack |
| Fit sample | Corrected version focusing on measurements and construction |
| Pre-production (PP) sample | Final approved version used as the bulk production standard |
Never approve a style for bulk production without a signed-off PP sample in hand. The PP sample becomes the physical reference your factory uses throughout the entire production run, and any deviation from it during bulk is a legitimate quality rejection you can act on.
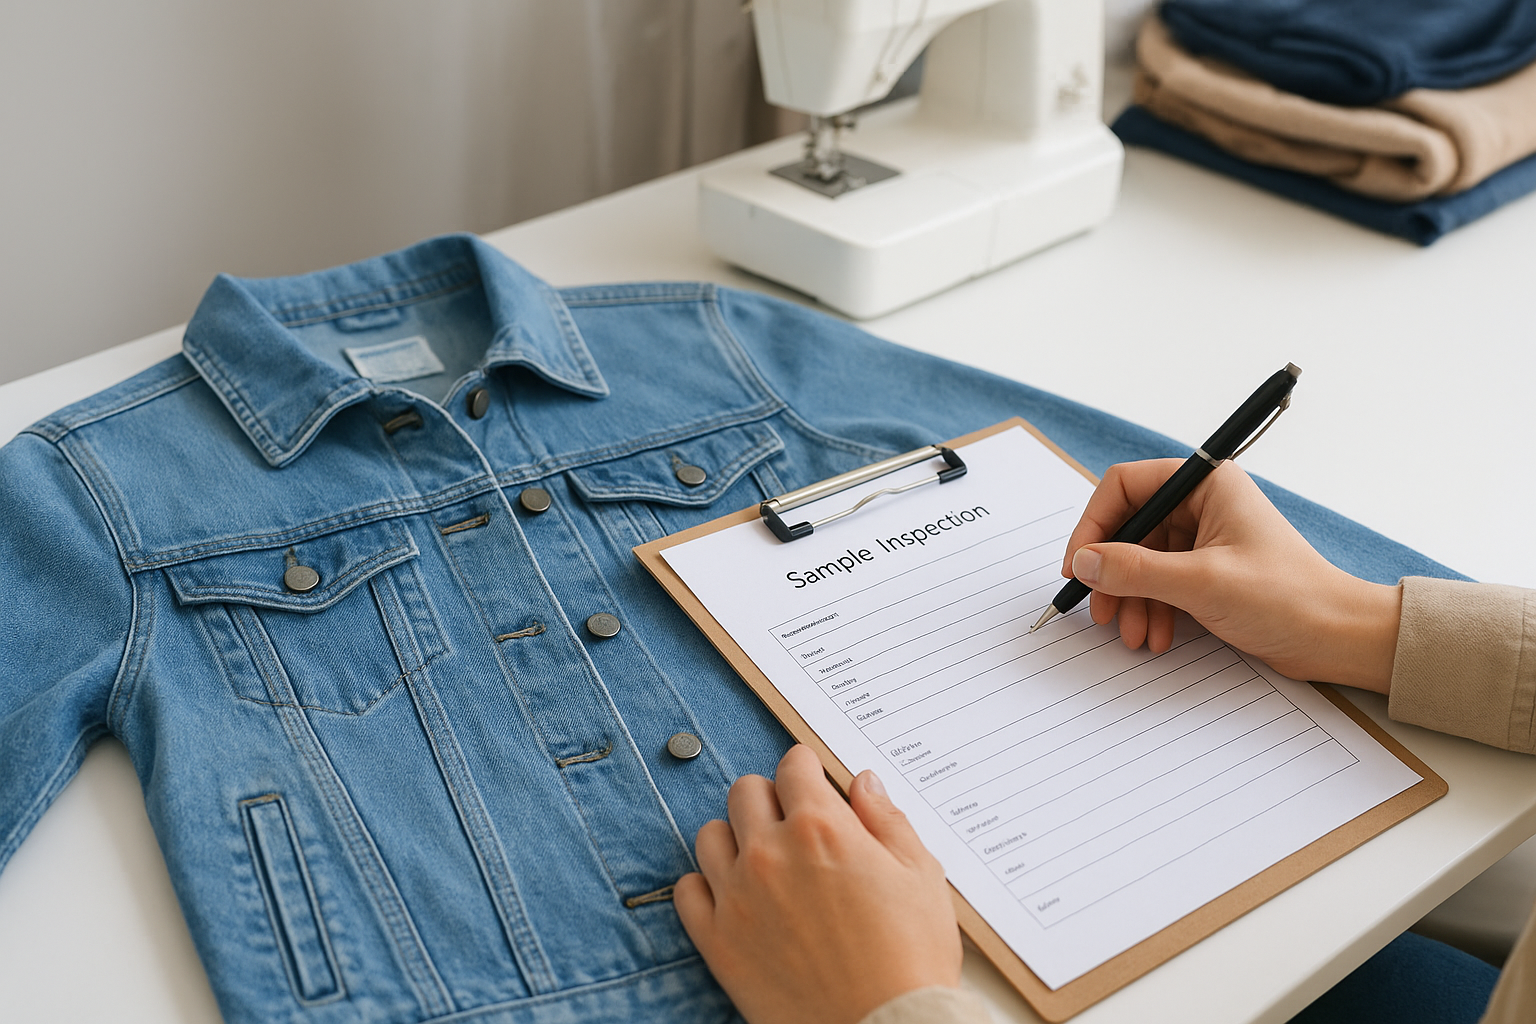
What to check on every sample
Reviewing a sample without a structured checklist means you will miss something. Go through each sample against your tech pack, not against your general impression of how the garment looks. Subjective reactions miss construction details that compound into serious problems at scale.
Check every sample against these specific points:
- Measurements: Compare all key measurements to your spec sheet by size and flag anything outside your accepted tolerance
- Fabric and weight: Confirm the composition and GSM match what you specified
- Stitching: Check stitch type, stitch count, tension, and consistency across every seam
- Trims: Verify label placement, hardware finish, zipper function, and button attachment strength
- Color accuracy: Compare against your approved Pantone reference in natural light
- Finishing: Inspect hems, bartacks, reinforcement points, and any print or embroidery placement
Send all corrections in one consolidated written document after each round rather than in separate messages. Piecemeal feedback leads to missed fixes and a longer, more expensive sample cycle.
Step 8. Produce, fulfill, and scale the brand
With a PP sample approved and a manufacturer confirmed, you're ready to place your bulk production order. This is the final major step in learning how to start a clothing brand from scratch, and it's where your planning either pays off or exposes the gaps you skipped earlier. Approve every detail in writing before production starts, including unit counts per size, colorways, trim specs, and expected ship date. Keep a production tracker updated throughout the run so you always know where your order stands.
Manage your bulk production order
Once production begins, your job is to stay in regular contact with your factory without checking in every single day. A weekly update is usually enough to catch delays before they compound. If you're working with an overseas manufacturer and can't conduct an in-person inspection, consider hiring a third-party quality control inspector to visit the factory during mid-production and before shipment.
Catching a defect mid-production costs a fraction of what it costs to reject a full shipment after it has already shipped.
Run through this checklist before you approve goods for dispatch:
- Confirm total unit count matches your purchase order exactly
- Pull a random inspection sample from the completed production lot
- Compare each pulled unit against your approved PP sample for measurement, construction, and finish
- Verify all packaging, labels, and hangtags are correctly applied and positioned
- Request a shipment document package including packing list, commercial invoice, and any certificates required for import
Set up fulfillment before stock arrives
Your fulfillment process needs to be ready before your goods land, not after. Whether you fulfill from home, a third-party logistics provider, or a warehouse, map out your pick-pack-ship workflow and test it with a small batch before your full inventory arrives. Customers who order on launch day expect a fast shipping confirmation, and a disorganized fulfillment setup generates refund requests faster than almost anything else.
Decide how you'll handle returns and exchanges before you go live. Write a clear return policy and add it to your website before your first order is placed.
Scale based on real sell-through data
Your first drop gives you actual numbers to work with, and those numbers should drive every decision about your next production run. Track your sell-through rate, which styles moved fastest, which sizes sold out first, and what your actual cost per order came out to after fees and shipping.
| Metric | What it tells you |
|---|---|
| Sell-through rate | Whether demand justified your order size |
| Top-selling sizes | How to rebalance your size run next time |
| Cost per order | Whether your pricing model is working |
| Return rate | Whether quality or sizing needs adjustment |
Reorder only what the data supports, and increase your production volume gradually as demand proves consistent.
Wrap-up and next steps
Learning how to start a clothing brand from scratch comes down to working through each step in the right order. You define your niche, lock in your business model, build your brand identity, map your costs, create your tech packs, find a manufacturer, develop samples, and then produce and fulfill with a plan tied to real data. None of these steps work well in isolation, but together they give you a clear path from idea to a brand that actually ships product.
The step most founders underestimate is finding a reliable manufacturing partner who communicates clearly and delivers consistent quality from sample through bulk. That relationship makes or breaks your first drop. If you need a manufacturing partner who supports sample development, private labeling, fabric sourcing, and production follow-up, contact Manludini to walk through what your first production run would look like.
0 comments