
Adding embroidery on clothes for beginners might seem intimidating at first, needles, hoops, stabilizers, different stitch types. But the truth is, hand embroidery is one of the most accessible ways to customize your own garments without any industrial equipment.
At Manludini, we handle embroidery as part of our garment manufacturing process for fashion brands producing at scale. We see every day how a few well-placed stitches can transform a plain piece into something with real character. That hands-on production experience is exactly what shaped this guide, practical knowledge from working with fabrics, threads, and finishes across thousands of garments.
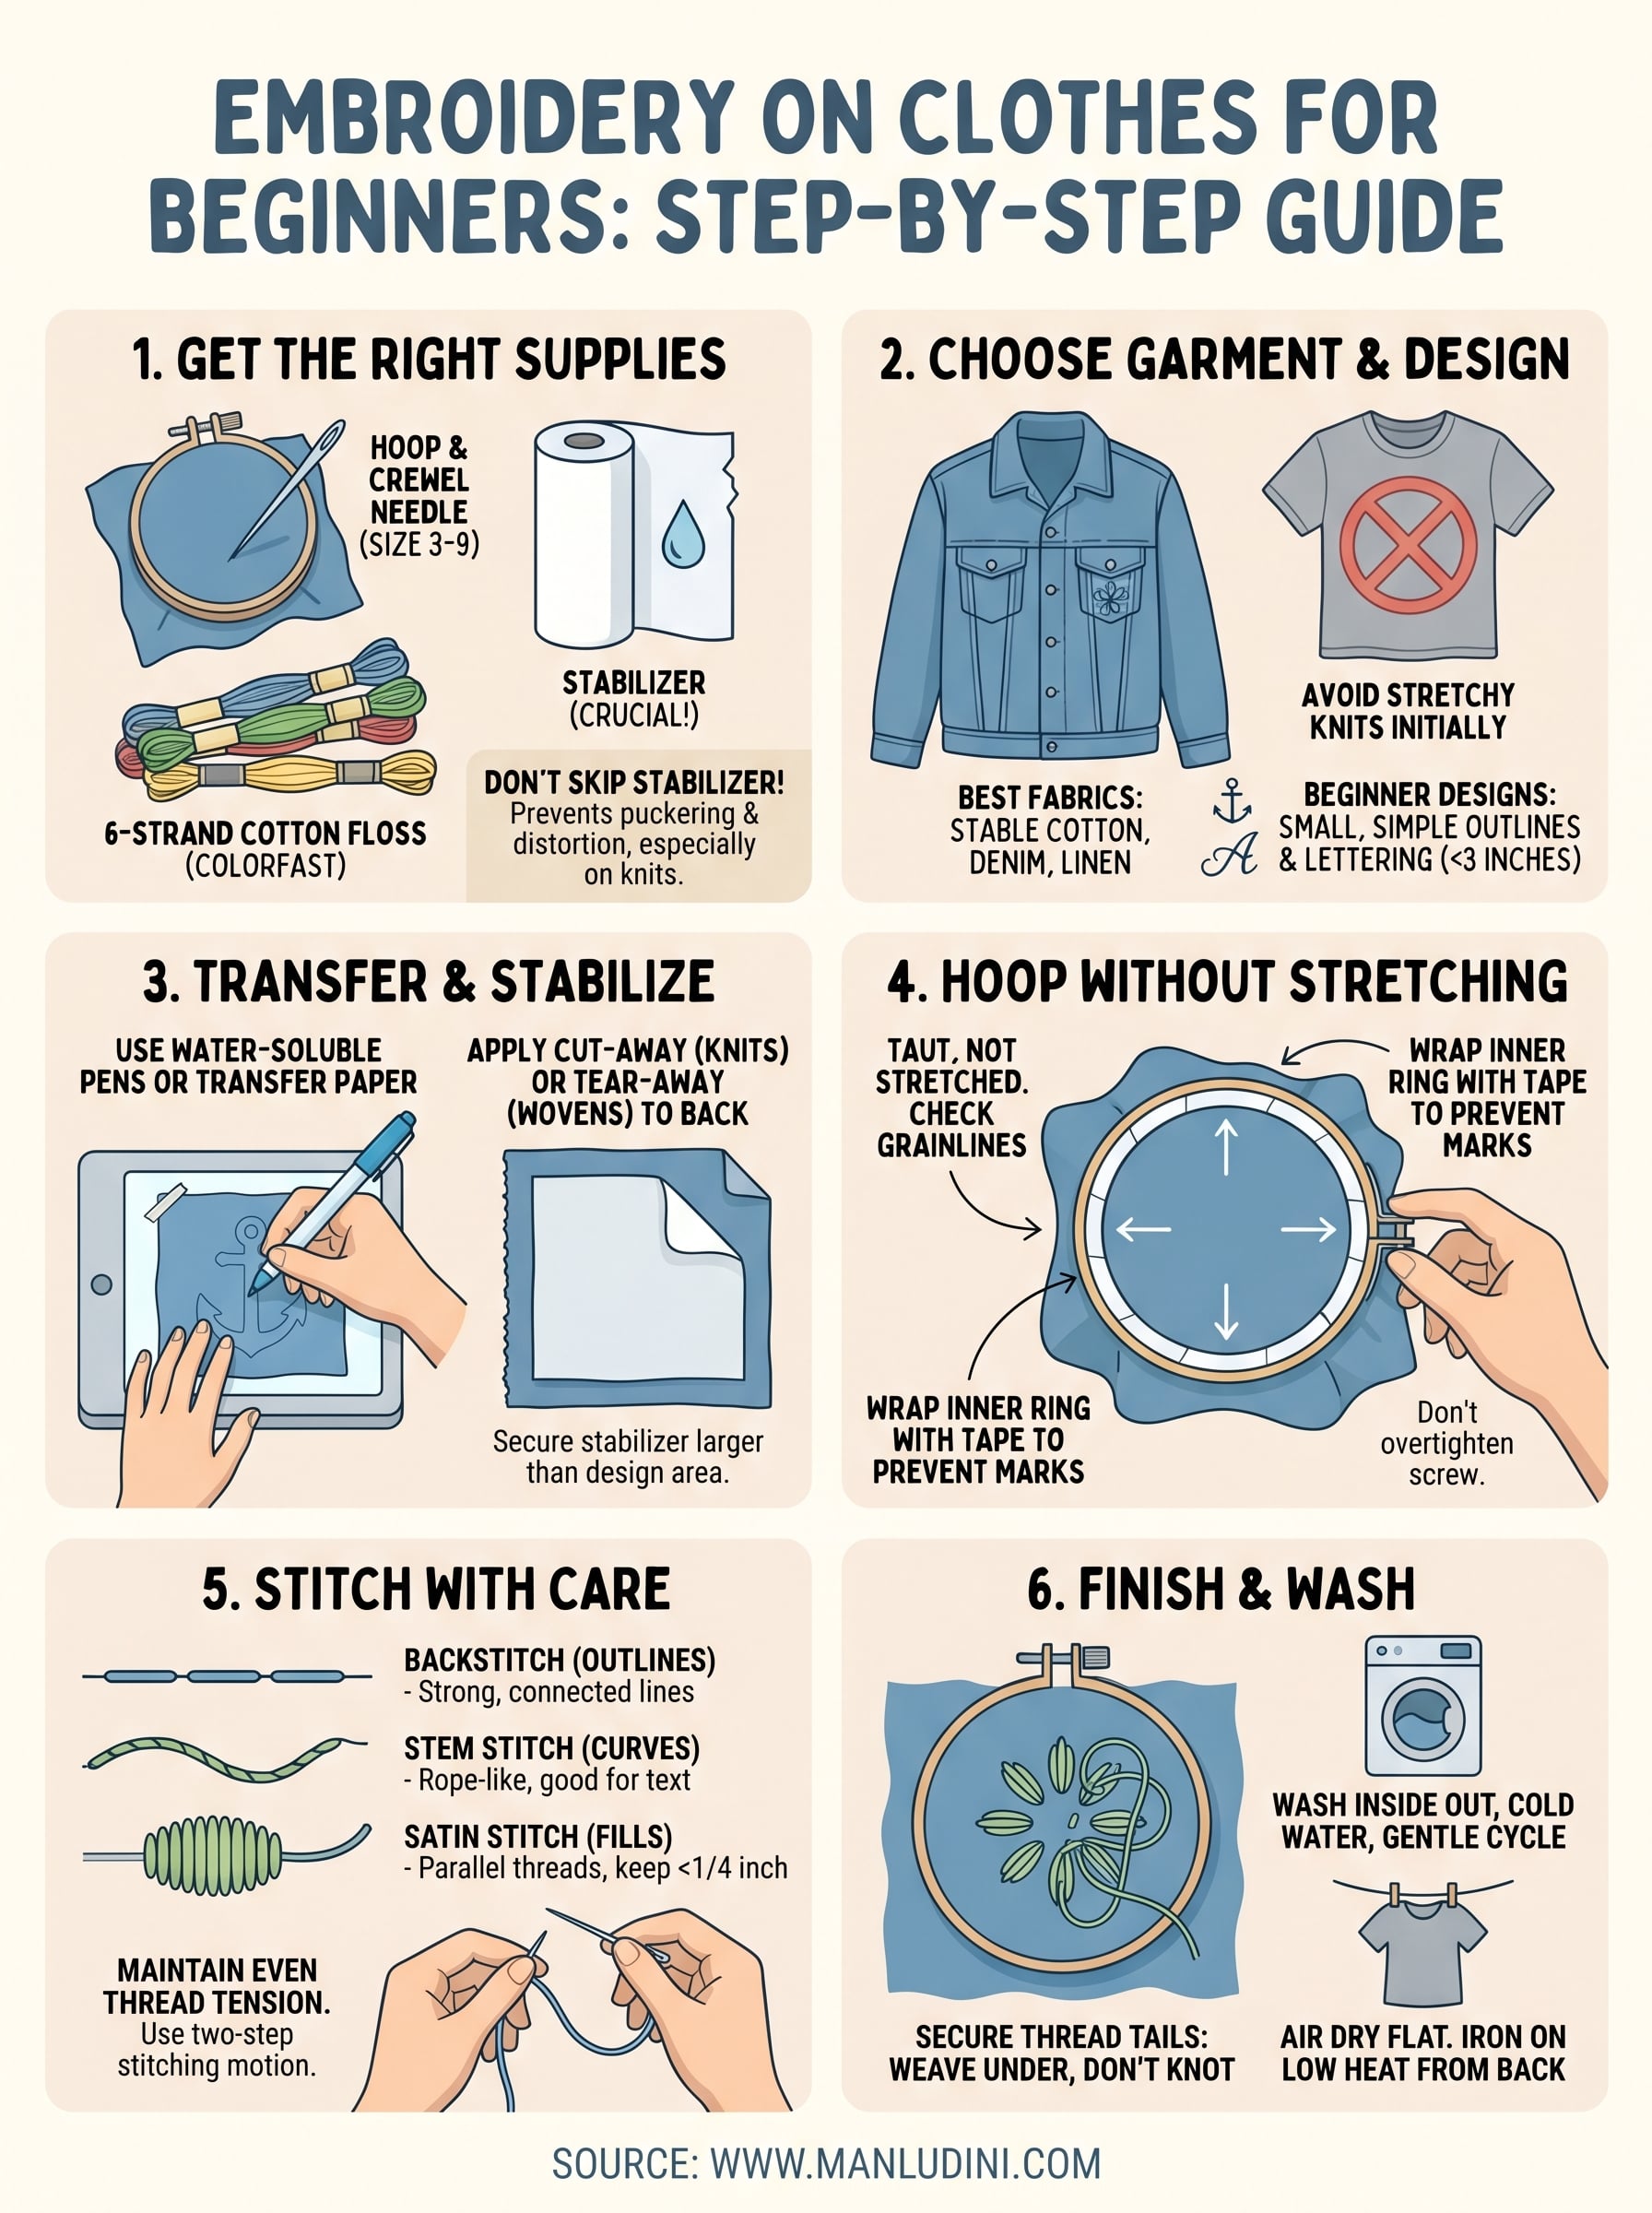
This step-by-step guide covers everything you need to get started: the right supplies (including stabilizers most beginners overlook), basic hand-stitching techniques that actually hold up on wearable garments, and tips for working with different fabric types without ruining them. Whether you want to add a small monogram to a collar or stitch a bold design across the back of a jacket, you'll find a clear path forward below.
What you need before you start
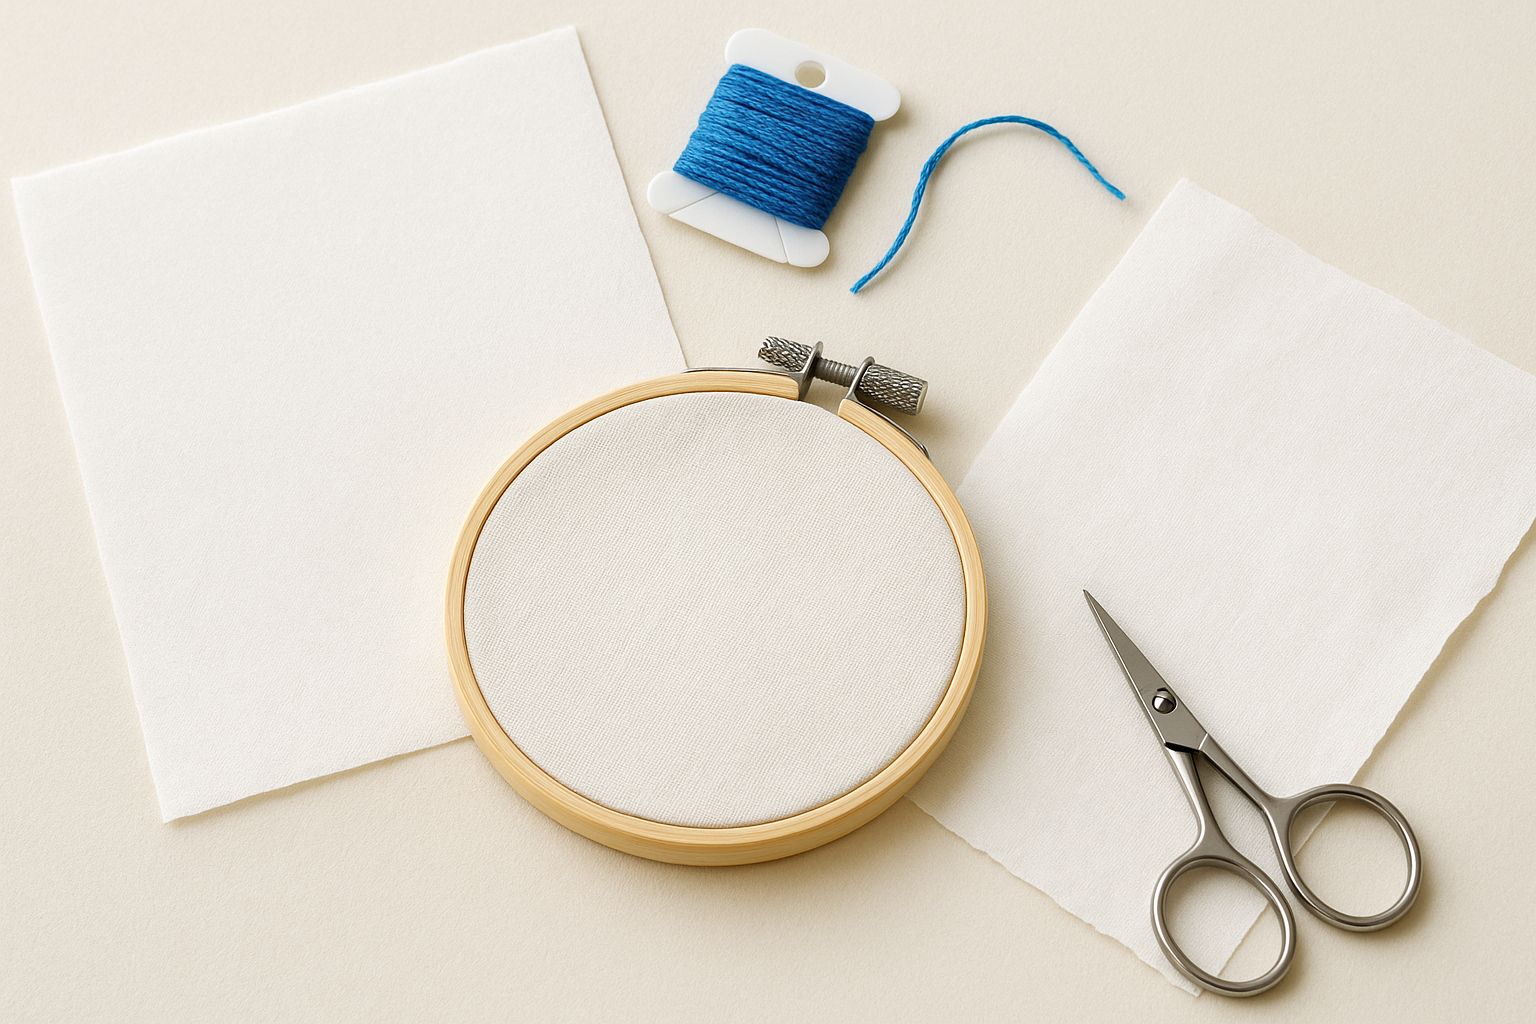
Having the right tools before you touch a single garment saves you from frustrating mistakes. Most embroidery on clothes for beginners fails not because of poor stitching, but because the wrong supplies were used from the start. Grab these items before you begin, and you'll avoid the most common beginner problems before they happen.
Needles, hoops, and thread
Your needle choice matters more than most guides admit. For hand embroidery on clothing, crewel needles in sizes 3 to 9 are the most versatile option since they have a long eye that holds embroidery floss without shredding it. Keep a few sizes on hand because thicker fabrics like denim need a larger needle, while lightweight cotton or linen works better with a finer one.
Thread selection is equally important. Six-strand cotton embroidery floss gives you flexibility because you can separate the strands and use fewer for finer detail work or more for bolder coverage. For clothing specifically, stick with colorfast threads so your design survives washing without bleeding onto the surrounding fabric.
Hoops keep your fabric taut while you stitch. A 4-inch to 6-inch wooden or plastic embroidery hoop covers most small-to-medium clothing designs without over-stretching the material. Avoid cheap plastic hoops with loose tension screws since they let the fabric slip mid-stitch and create uneven tension across your design.
Here's a quick reference for the core tools:
| Tool | Recommended Type | Why It Matters |
|---|---|---|
| Needle | Crewel size 5 to 7 | Fits floss, works on most fabrics |
| Thread | 6-strand cotton floss | Colorfast, separable for detail control |
| Hoop | 4 to 6 inch wood or plastic | Maintains even fabric tension |
Stabilizers: the one supply most beginners skip
Stabilizer is the single most overlooked supply when it comes to embroidery on clothing. Without stabilizer behind the design area, your stitches pull the fabric, distort the pattern, and create puckering that will not wash out. This is especially damaging on stretchy or lightweight garments where the fabric moves as you stitch.
Skipping stabilizer is the number one reason beginner embroidery ends up puckered and misshapen on a finished garment.
For most woven fabrics like cotton shirts or linen jackets, use cut-away or tear-away stabilizer placed directly behind the design area. Cut-away is more durable and suits garments that stretch or get heavy use. Tear-away removes more easily after stitching and works well on stable woven fabrics. If you're working on a stretchy knit like a t-shirt or sweatshirt, always choose cut-away stabilizer and consider adding a water-soluble topping on the front to prevent stitches from sinking into the fabric texture.
Scissors and transfer tools
Sharp embroidery scissors with fine pointed tips let you cut thread cleanly at the back without accidentally snipping the garment fabric underneath. Regular scissors drag and fray thread ends, which leads to messy backing and loose thread tails that unravel over time with washing and wear.
For transferring your design onto the garment, water-soluble fabric pens or chalk transfer paper give you clean, removable lines that disappear after washing or light dampening. Avoid regular ballpoint pens or permanent markers since those lines show through light-colored fabrics even after the embroidery is fully stitched and finished.
Step 1. Choose the right garment and placement
Not every garment is easy to embroider, and starting with the wrong fabric type will make the process harder than it needs to be. Tightly woven, stable fabrics like cotton, denim, linen, and canvas give your needle a consistent path through the weave and hold stitches firmly without distorting. Avoid starting your first project on stretchy knits like jersey or ribbed t-shirts since those fabrics shift under the needle and require extra stabilizer work that adds complexity before you've built any stitching confidence yet.
Best fabrics for beginners
When you're learning embroidery on clothes for beginners, the garment you pick sets the difficulty level for your entire first project. A cotton canvas jacket or a structured denim shirt gives you a forgiving surface that stays flat while you stitch. Pre-washed cotton garments are also a strong starting point because they've already shrunk to their final size, meaning your embroidery won't pucker or distort after the first wash.
Here's a quick breakdown of fabric choices ranked by how beginner-friendly they are:
| Fabric | Difficulty | Notes |
|---|---|---|
| Cotton canvas | Easy | Stable, holds stitches cleanly |
| Denim | Easy | Thick and forgiving for beginners |
| Linen | Easy to moderate | Slightly open weave, good needle visibility |
| Cotton jersey (t-shirt) | Moderate | Requires cut-away stabilizer |
| Stretch knit | Hard | Not recommended for first projects |
Where to place your design
Placement affects both how your design looks and how easy it is to execute. Flat areas with minimal seams nearby, like the chest pocket zone, upper back, or cuffs, give you a clean surface that fits inside a hoop without fighting against bulky seam allowances. Placing designs directly over thick seams on your first attempt puts uneven pressure on the fabric inside the hoop and distorts the finished piece.
Choosing a flat, seam-free area for your first design is the fastest way to get a cleaner result without changing anything else about your technique.
Mark your placement with a water-soluble pen before committing so you can step back and check the position on the actual body of the garment. A small piece of removable tape holding a printed template against the fabric helps you verify alignment from arm's length before you cut any stabilizer or start transferring your pattern.
Step 2. Pick a design that holds up to wear
Not every embroidery design translates well onto clothing. Designs with open outlines, simple fill areas, and manageable stitch counts tend to survive washing and repeated wear far better than dense, overly complex patterns that compress the fabric. When you're starting out with embroidery on clothes for beginners, choosing a forgiving design from the start saves you from spending hours on a piece that distorts or falls apart after a few washes.
The cleaner and simpler your design, the easier it is to execute cleanly and the longer it will hold up on a wearable garment.
Design types that work well on clothing
Outline-based designs are the most durable option for clothing because they rely on backstitch, stem stitch, or running stitch, all of which use fewer thread layers and put less stress on the fabric beneath. Geometric shapes, botanical motifs, and simple lettering are strong starting points because their clean lines are forgiving of minor tension inconsistencies that beginners encounter naturally while they're still building consistency.
Here's a breakdown of design types by how well they hold up on clothing:
| Design Type | Stitch Style | Wearability |
|---|---|---|
| Outline motifs | Backstitch, stem stitch | Excellent |
| Simple lettering | Backstitch, chain stitch | Excellent |
| Floral details | Satin stitch, lazy daisy | Good |
| Dense fill designs | Satin stitch blocks | Moderate, prone to puckering |
| Complex shading | Long and short stitch | Harder to control for beginners |
Size and stitch density matter
Small designs under 3 inches are the easiest to control on your first few projects because they fit inside a standard hoop without requiring repositioning mid-stitch. Repositioning a hoop mid-design is a common cause of hoop marks and uneven tension that shows clearly on lighter fabrics even after washing.
Keep your stitch density moderate as you work. Overpacking stitches into a small area pulls the fabric inward and creates a raised, stiff spot that feels uncomfortable against the skin and looks uneven from arm's length. If you're filling a shape with satin stitch, leave a small amount of the base fabric visible between rows rather than trying to cover every thread underneath.
Step 3. Transfer the pattern and stabilize fabric
Getting your design onto the garment cleanly before you stitch is one of the most important steps in embroidery on clothes for beginners. If your transfer lines are crooked or your stabilizer is applied unevenly, every stitch that follows will reflect those early mistakes. Taking five extra minutes here protects the hours you'll spend stitching later.
How to transfer your design onto fabric
Water-soluble fabric pens are the most reliable transfer method for light to medium-colored garments. Print or trace your design onto plain paper, tape it to a light source like a window or a light box, lay the garment flat over it, and trace directly onto the fabric following the lines you can see through the material. This works well for thin cotton and light linen fabrics where the paper lines are visible through the weave.
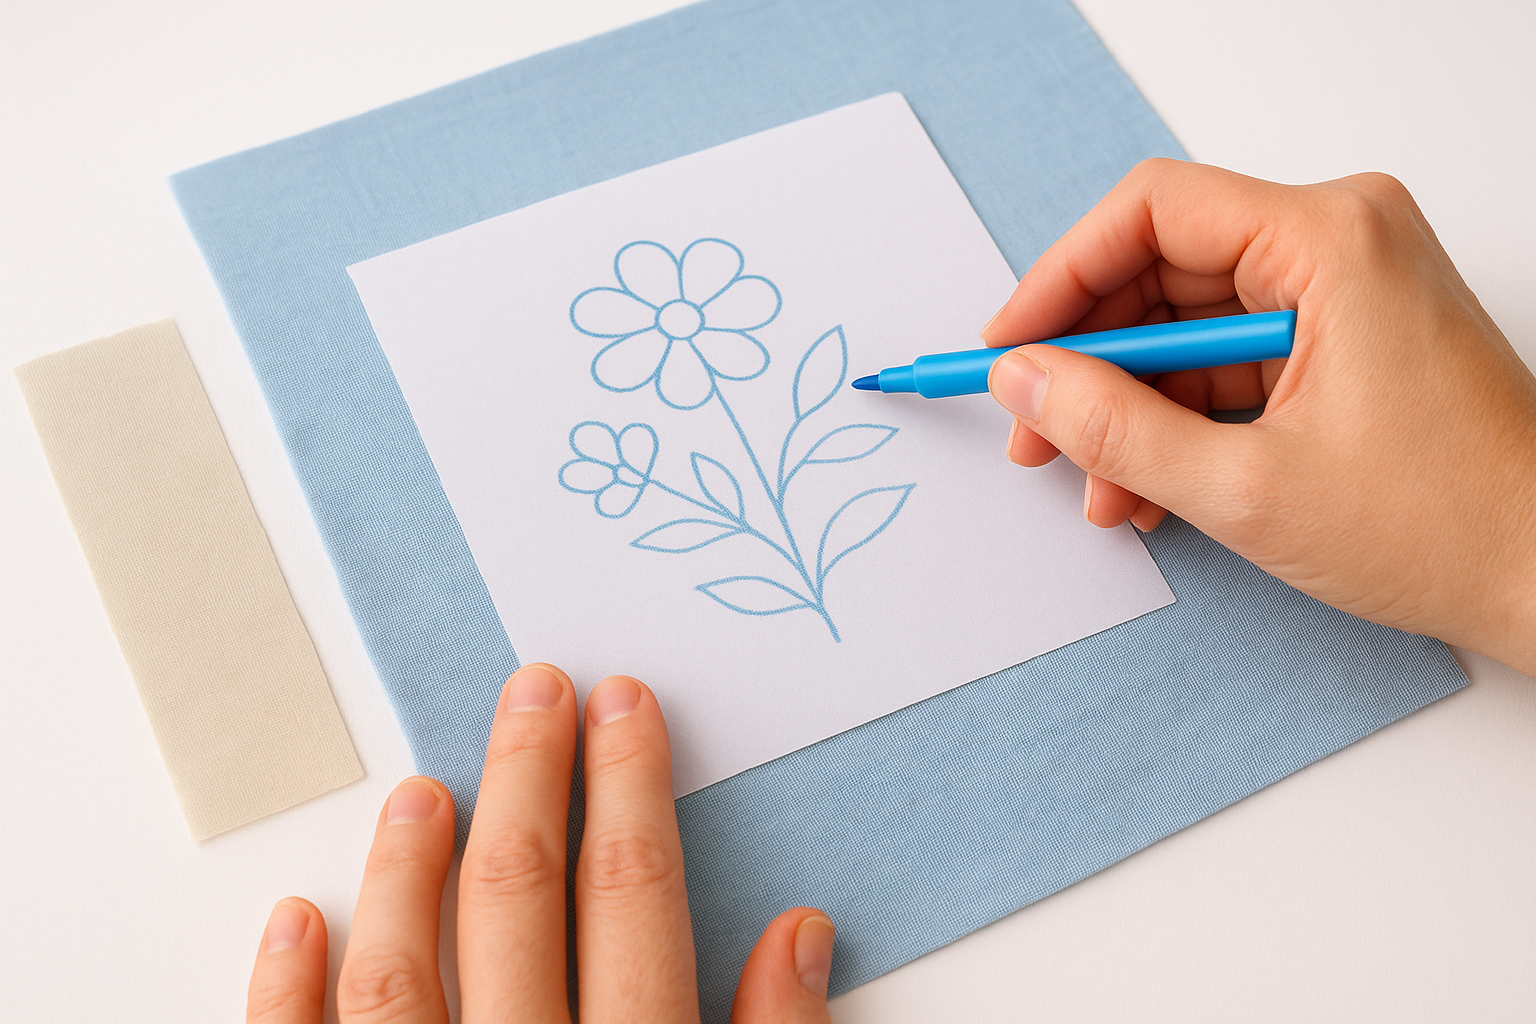
For darker or thicker fabrics where light won't pass through, use dressmaker's carbon transfer paper placed face-down between your printed design and the fabric. Press firmly with a stylus or an empty ballpoint pen to transfer the lines. Once you lift the paper, your design appears as a faint colored outline ready to stitch over.
Always test your transfer method on a scrap piece of similar fabric before applying it to your actual garment so you know how the marks will behave before washing.
How to apply stabilizer correctly
Cut your cut-away or tear-away stabilizer about one inch larger than your design on all sides. This gives the hoop enough stabilizer to grip firmly without leaving bare fabric edges at the tension ring. For woven fabrics like cotton or denim, pin or lightly iron a piece of tear-away stabilizer directly to the wrong side of the garment at the design area before you hoop the fabric.
For stretchy knits, skip pins and use a temporary spray adhesive to bond the cut-away stabilizer flat against the inside of the garment without creating drag or shifting. Hold the spray can about eight inches away and apply a light, even coat. Press the garment down firmly onto the stabilizer and smooth out any air bubbles from the center outward before the adhesive sets.
Step 4. Hoop or frame the fabric without stretching
Hooping clothing correctly is one of the steps that separates clean embroidery on clothes for beginners from distorted, puckered work that can't be fixed after stitching. Your goal when hooping is to hold the fabric taut but not stretched, which means there should be no slack in the material, but you also shouldn't be pulling it so tight that the weave distorts visibly before you even pick up a needle.
How to set the hoop tension correctly
Place the inner ring flat on a clean table and lay your stabilized garment over it with the right side facing up and your transfer design centered over the ring. Set the outer ring on top and press down evenly around the circumference. Tighten the screw to a firm but not maximum setting, then use both hands to gently tug the fabric edges outward from the hoop to smooth out any wrinkles without pulling the design off-center.
Tightening the hoop screw to its limit is one of the most common hooping mistakes, and it almost always causes the weave to distort, especially on lighter cotton fabrics.
Check that the grain lines of your fabric run straight inside the hoop, both horizontally and vertically. If the grain is twisted, even slightly, your finished stitches will sit at an angle relative to the garment once you remove the hoop, and that shift is permanent. Re-seat the fabric and check again before you begin stitching.
Avoiding hoop marks on finished garments
Hoops leave pressure rings on fabric when they sit in one position for too long, which is a common problem on finished garments, especially velvet, knits, and soft cotton. To reduce this, wrap the inner ring with a single layer of white cotton twill tape before you start your project. The tape adds grip without concentrating pressure into a narrow ring on the fabric surface.
When you take a break mid-project, loosen the outer hoop screw slightly so the fabric is no longer under active tension. This small habit protects delicate or napped fabrics from permanent ring marks and keeps your garment looking clean all the way to the finished piece.
Step 5. Stitch with clothing-friendly techniques
At this stage of embroidery on clothes for beginners, the stitches you choose determine how durable and comfortable your finished design feels on the body. Some stitches that look great in framed needlework create stiff, raised areas that dig into skin or break down quickly when a garment flexes and stretches through regular wear. Sticking to a small set of clothing-tested stitches keeps your work looking clean and feeling comfortable long after the first wash.
The core stitches that hold up on clothing
Backstitch is the most reliable outline stitch for clothing because it produces a solid, connected line with no gaps between stitches. Bring the needle up one stitch-length ahead, then insert it back into the end of the previous stitch to create an unbroken row. Stem stitch works similarly for curved lines and lettering, giving a slightly twisted rope-like appearance that reads sharply from arm's length on finished garments.
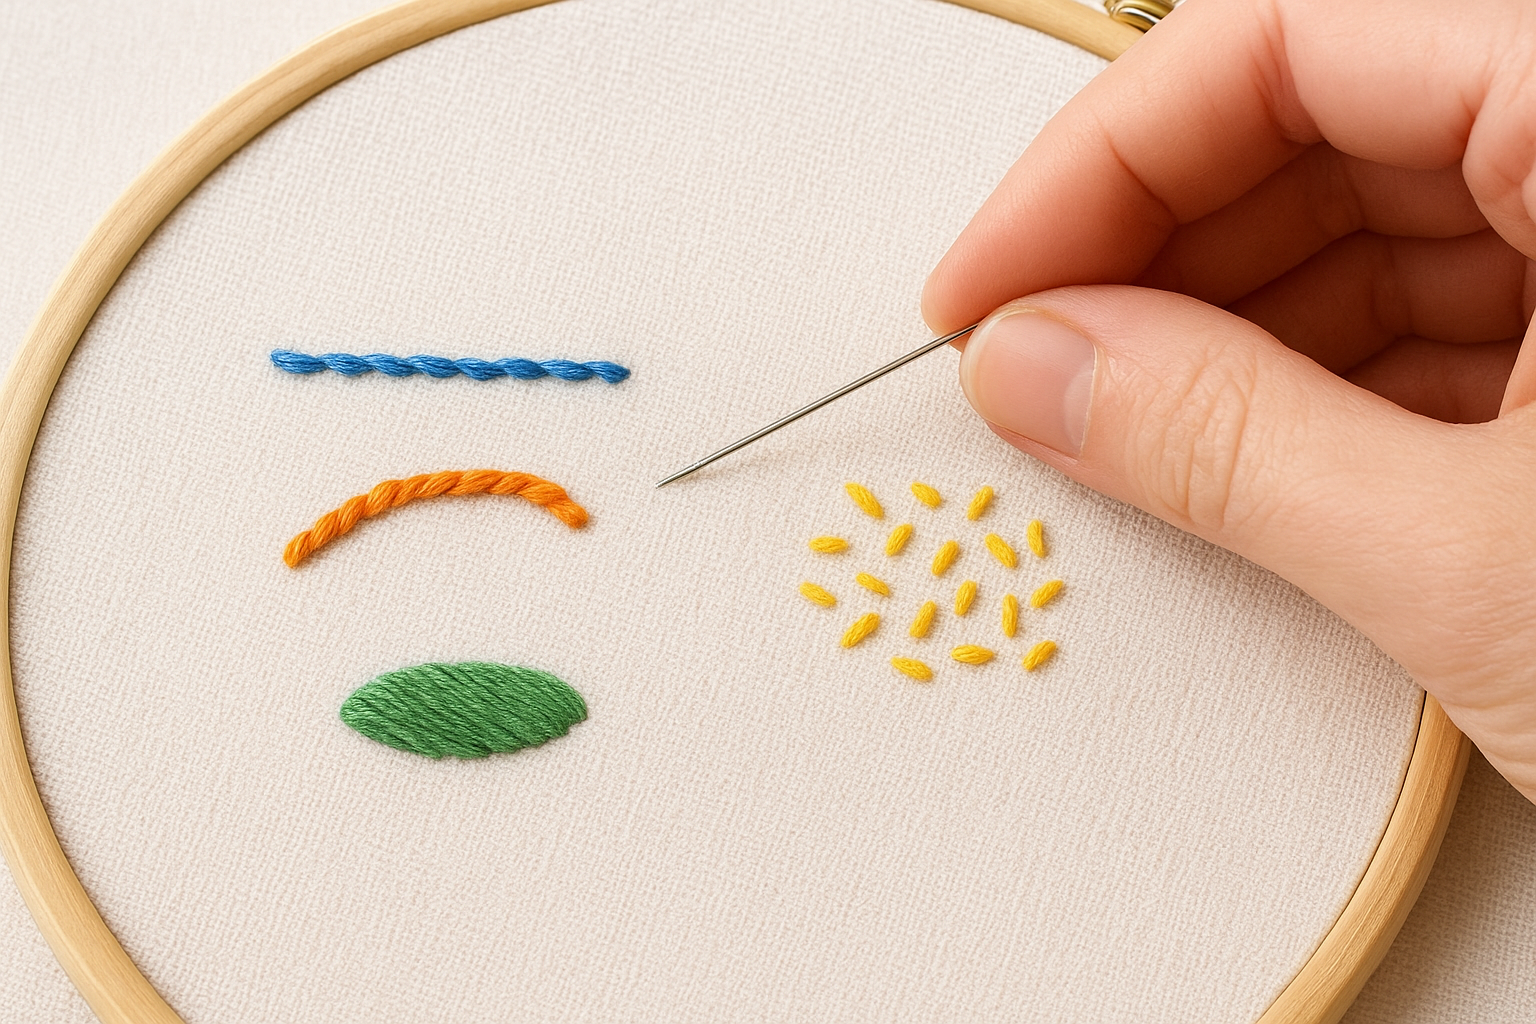
For filling small shapes, satin stitch lays parallel threads across an area to create smooth, solid coverage. Keep each stitch length under a quarter inch so the threads don't snag or lift away from the fabric with repeated wear. If you need to fill a larger shape, seed stitch, small scattered straight stitches placed at random angles, gives coverage without the dense thread buildup that causes puckering.
| Stitch | Best Use | Key Watch-Out |
|---|---|---|
| Backstitch | Outlines, lettering | Keep stitch length consistent |
| Stem stitch | Curves, script text | Maintain thread to one side only |
| Satin stitch | Small fill areas | Keep stitches under 1/4 inch |
| Seed stitch | Larger fill areas | Vary angles to avoid ridges |
How to control tension while stitching
Even thread tension is what separates flat, professional-looking embroidery from work that puckers or floats above the fabric surface. Pull each stitch through until the thread lies flat against the fabric but does not compress the weave beneath it. If you feel resistance as you pull, stop and check whether the stabilizer has shifted or the fabric is puckering inside the hoop before continuing.
Stitching with consistent, light tension from the very first stitch is far easier than trying to correct uneven tension after half the design is complete.
Work each stitch in two separate movements: push the needle down through the fabric, release it, then bring it back up from the underside. This two-step rhythm keeps your pulling angle consistent across every stitch and significantly reduces the uneven tension that beginners often create by scooping the needle in a single arc.
Step 6. Finish the back, wash, and care
The back of your embroidery is just as important as the front, especially on clothing that goes through regular washing and wear. A poorly finished backing allows thread tails to loosen over time, which pulls your stitches out from the front and ruins the design long before the garment wears out. Taking a few minutes to finish the back correctly protects everything you stitched in the previous steps.
Secure and trim the thread ends
Before you remove the hoop, thread your needle with each loose tail on the back and weave it under at least three to four existing stitches in different directions. This locks the tail without using knots, which create hard lumps that press through lightweight fabrics and feel uncomfortable against the skin. After weaving, trim the tail close to the last stitch using your fine-pointed embroidery scissors so nothing protrudes.
Weaving thread tails under existing stitches instead of knotting them keeps the back flat and prevents hard spots from forming on the inside of the garment.
Once all tails are secured, remove the tear-away stabilizer by holding the embroidery flat with one hand and tearing the stabilizer away in short, controlled pulls close to the stitch line. For cut-away stabilizer on knits, use scissors to trim it within a quarter inch of the stitched design edge. Leave a small margin rather than cutting flush against the stitches to avoid accidentally clipping any thread work.
Washing and ongoing care
Turn the garment inside out before every wash to protect the embroidery surface from direct agitation inside the machine. Use a gentle cycle with cold water and a mild detergent without bleach, since bleach breaks down cotton thread fibers quickly and fades colors unevenly. Skipping this step is one of the most common reasons why well-stitched embroidery on clothes for beginners degrades faster than it should.
Lay the garment flat to dry rather than using a dryer on high heat. High heat causes thread fibers to contract unevenly, which tightens the stitches against the fabric and creates puckering that was never there before the wash. For ironing, place a pressing cloth over the embroidery and use a low to medium heat setting, pressing from the back side only so you never flatten the texture of raised stitches.
Wrap-up and next steps
Embroidery on clothes for beginners becomes straightforward once you break it into clear stages: the right garment, a simple design, proper stabilizer, clean hooping, consistent stitching, and a solid finish. Each step builds directly on the previous one, so skipping any part of the process is what leads to the puckering, distortion, and thread failures that discourage most people from continuing past their first project.
Start with one small design on a stable cotton garment before moving to anything more complex. A single backstitch motif on a denim jacket pocket gives you real feedback on your tension, your transfer method, and how your stabilizer performs under actual washing conditions. Once you've completed that first piece, the next project will feel considerably more manageable.
If you're a brand or designer looking to scale embroidery into production, explore custom garment manufacturing at Manludini to see how we handle embroidery from sampling through bulk.
0 comments