
Heat transfer printing is one of the most widely used methods for applying graphics, logos, and custom artwork onto garments. If you've ever wondered how heat transfer printing works, the short answer is: a design is printed onto a special carrier material, then bonded to fabric using heat and pressure. But the full picture involves different transfer types, specific equipment, and steps that directly affect the quality and durability of your finished product. Understanding these details matters, especially when you're developing garments for your own brand and need consistent results across sampling and bulk production.
At Manludini, we work with fashion brands and startups through every stage of apparel manufacturing, from sample development to bulk production. Printing is a core part of that process. Whether a client sends a tech pack specifying heat transfers or needs guidance choosing the right decoration method, we coordinate the printing, pressing, and finishing steps alongside fabric sourcing and production follow-up. That hands-on experience is what shapes this guide, it's written from a manufacturing perspective, not a craft or hobby one.
This article breaks down the main types of heat transfer printing, the equipment each method requires, and a step-by-step walkthrough of the process from design file to finished garment. By the end, you'll have a clear understanding of which transfer method fits your project and what to expect when working with a production partner to get it done right.
Why heat transfer printing matters for apparel
Heat transfer printing gives apparel brands a practical way to apply detailed artwork, logos, and graphics onto fabric without the high setup costs or minimum order requirements that screen printing often demands. For brands just starting out or testing a new collection, that flexibility matters. Understanding how heat transfer printing works at a production level helps you make better decisions about which decoration method fits your timeline, budget, and quality expectations before you place a single order.
It gives you design flexibility without high minimums
One of the biggest reasons brands choose heat transfer printing is that it supports short runs and custom artwork without requiring the film positives, screens, and bulk ink preparation that screen printing needs. You can run a single sample with a full-color graphic, then scale that same design into bulk production with consistent visual results each time. That consistency is critical when you're building a brand identity and need every garment to look the same whether you're producing 50 units or 5,000.
Heat transfer printing is one of the few decoration methods that scales cleanly from a single prototype all the way to full production runs without significant setup changes.
For brands working on tight development cycles, this also means you can finalize artwork during the sample stage and apply the same transfer spec to bulk without restarting the decoration process. That saves time and reduces the risk of graphic inconsistencies between your samples and your final shipment.
It works across a wide range of fabrics and garment types
Cotton, polyester, blended fabrics, and performance textiles all accept heat transfers, though the specific transfer type and press settings vary depending on the substrate. This range makes heat transfer printing one of the more versatile decoration methods in apparel manufacturing. Whether you're decorating standard jersey t-shirts, hoodies, or technical activewear, there's a transfer method that fits the material.
That versatility also extends to placement. Unlike embroidery, which works best on flat, stable surfaces, heat transfers can go on curved seams, sleeves, and chest panels with the right application technique. Brands that need precise label placement or all-over graphic coverage find heat transfers easier to position and apply than several other decoration options.
It supports branded labeling and compliance requirements
Heat transfer printing isn't limited to the outside of a garment. Many brands use heat-applied care labels and neck labels as a direct replacement for woven or printed sewn-in labels, which reduces label scratching and gives the interior of the garment a cleaner finish. For brands selling into retail or direct-to-consumer channels, this detail affects how professional the product feels in the customer's hands.
Compliance labels for fiber content, country of origin, and care instructions can also be applied via heat transfer, which simplifies the labeling process during production. Working with a manufacturing partner that coordinates both the garment construction and the label application keeps these steps aligned and accurate across your full production run.
Understand the heat transfer process end to end
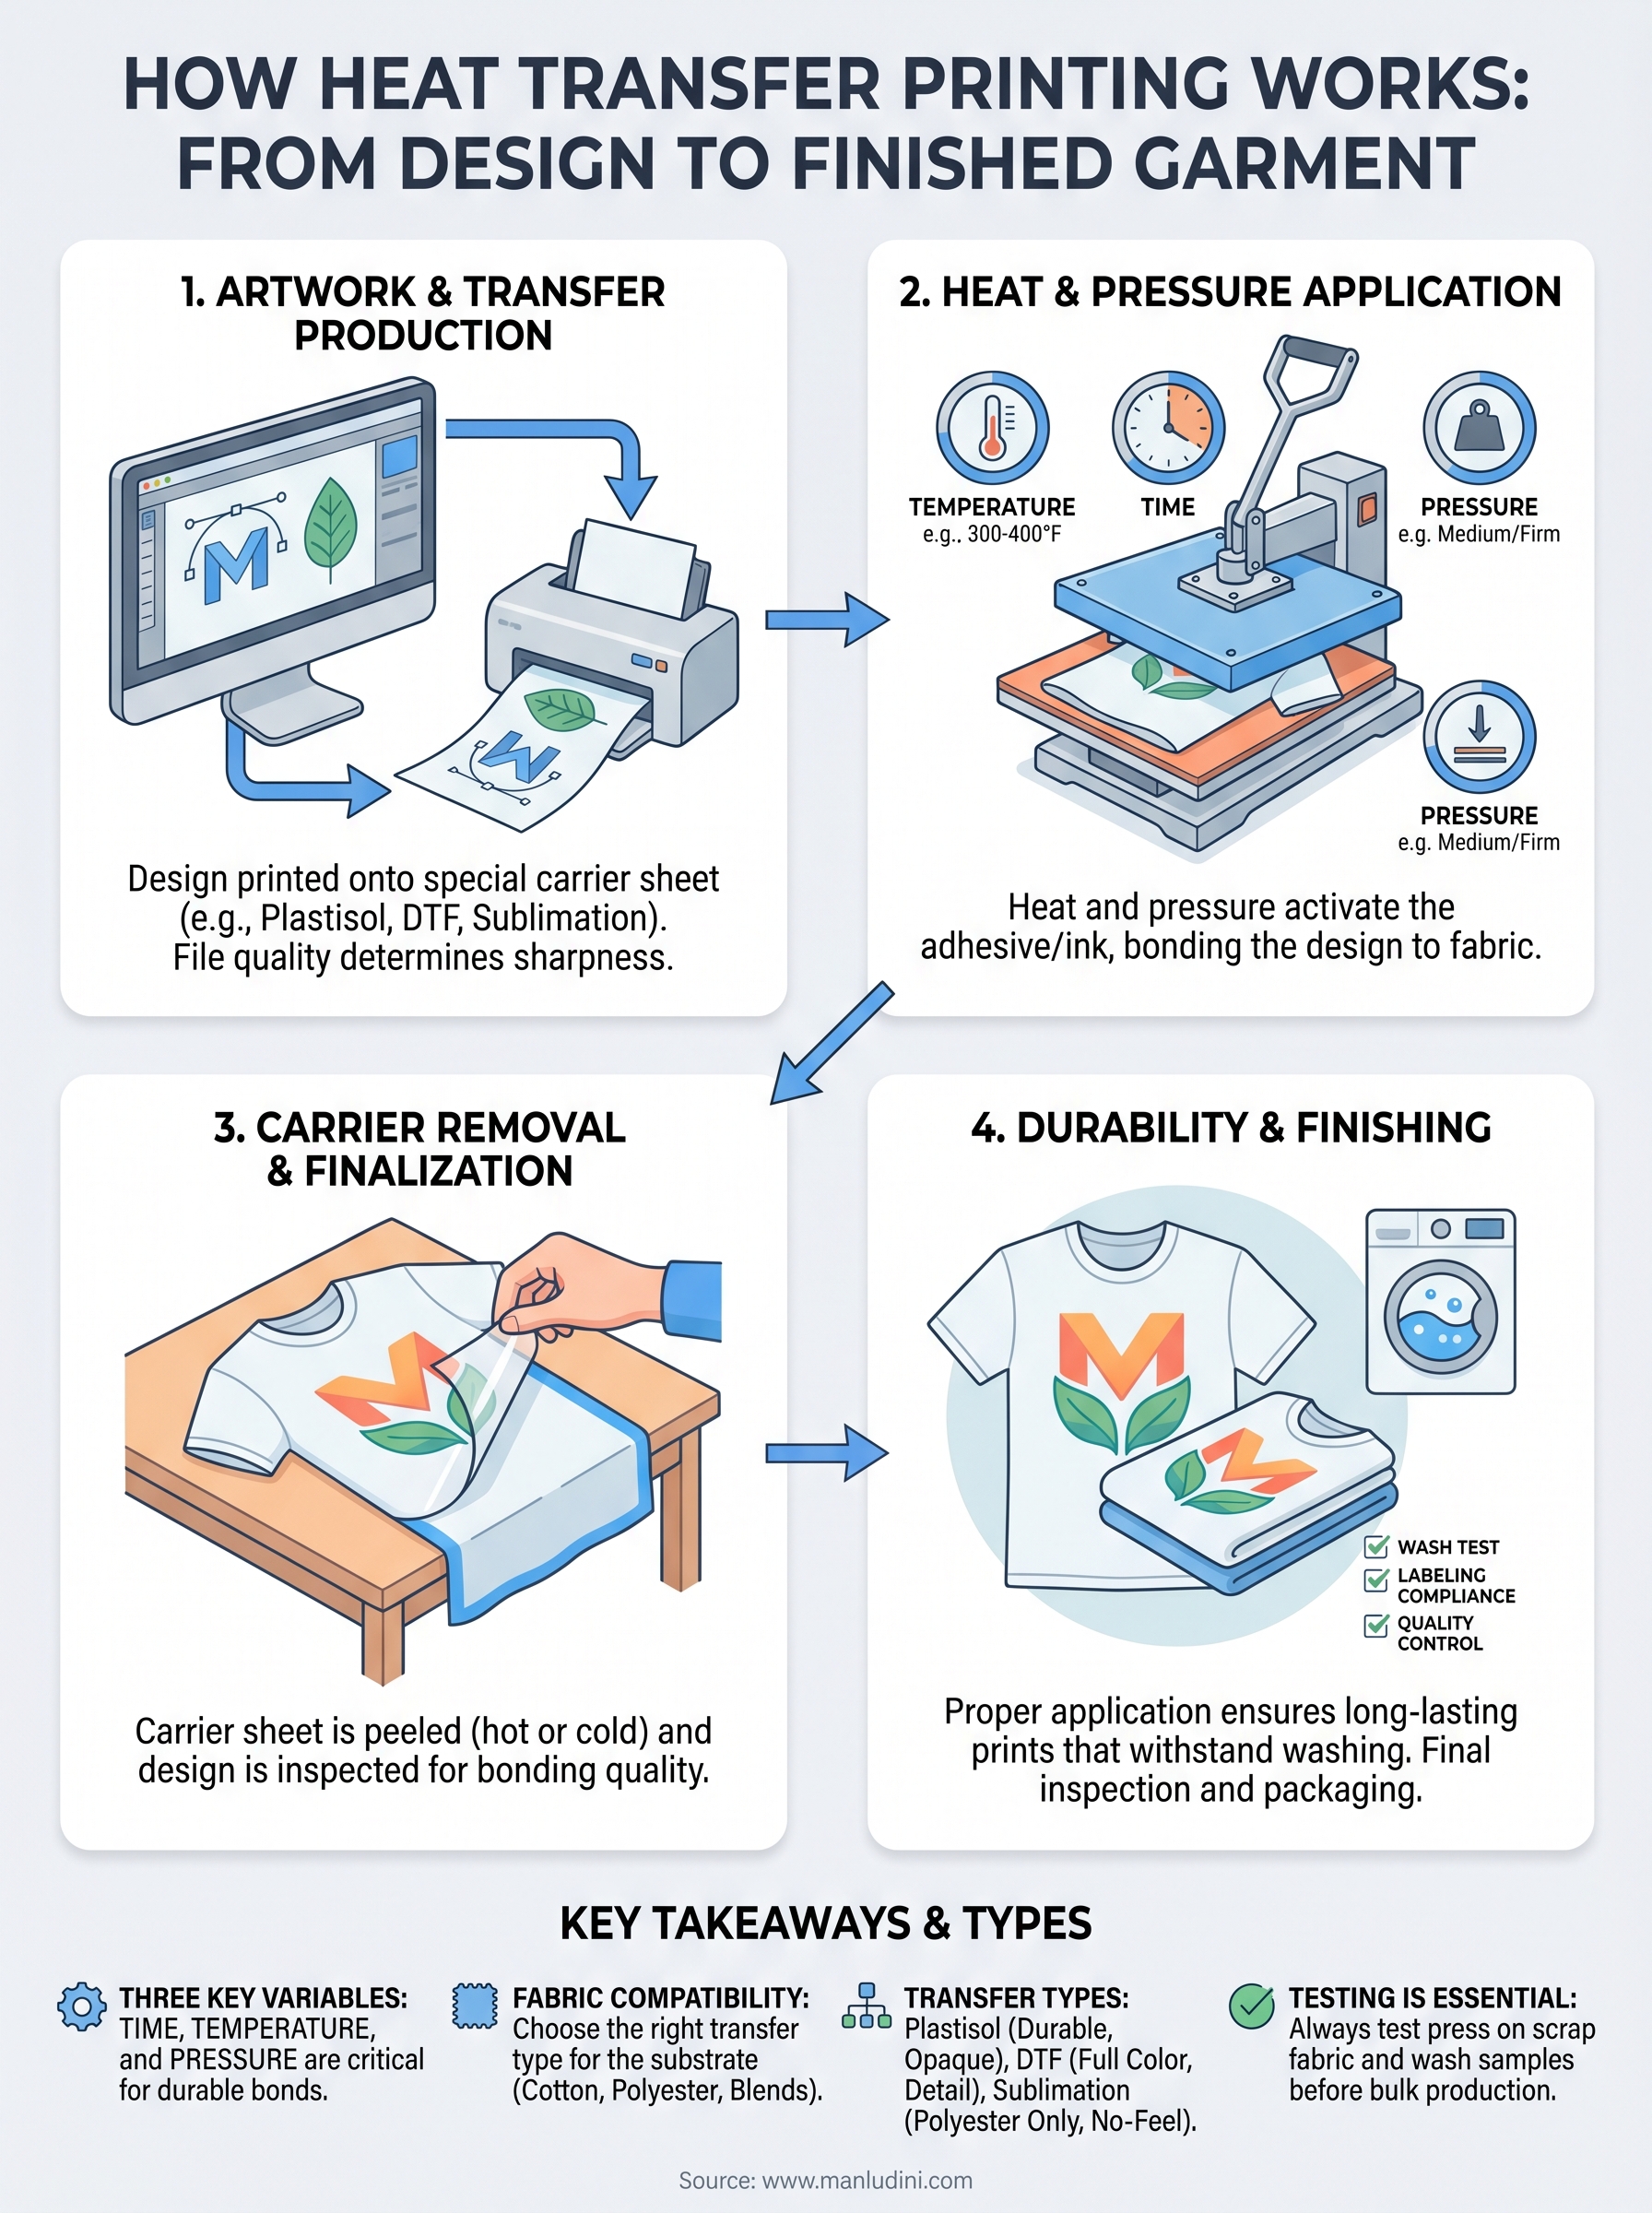
Before you choose a transfer type or set up a production run, it helps to understand how heat transfer printing works as a complete process. The method connects three stages: artwork preparation, transfer production, and application. Each stage feeds directly into the next, and a gap or error at any point affects the final result on the garment. Getting familiar with the full sequence helps you communicate more clearly with your production partner and catch potential issues before they reach the press.
How a design moves from file to fabric
The process starts with a print-ready artwork file, typically a vector file or high-resolution raster image with the correct color profile for the transfer method being used. That file gets printed onto a carrier sheet or film, which acts as a temporary substrate holding the design until it's applied to the garment. Depending on the transfer type, this carrier might be a wax-coated paper, a polyester film, or a specialty substrate that releases the design cleanly under heat.
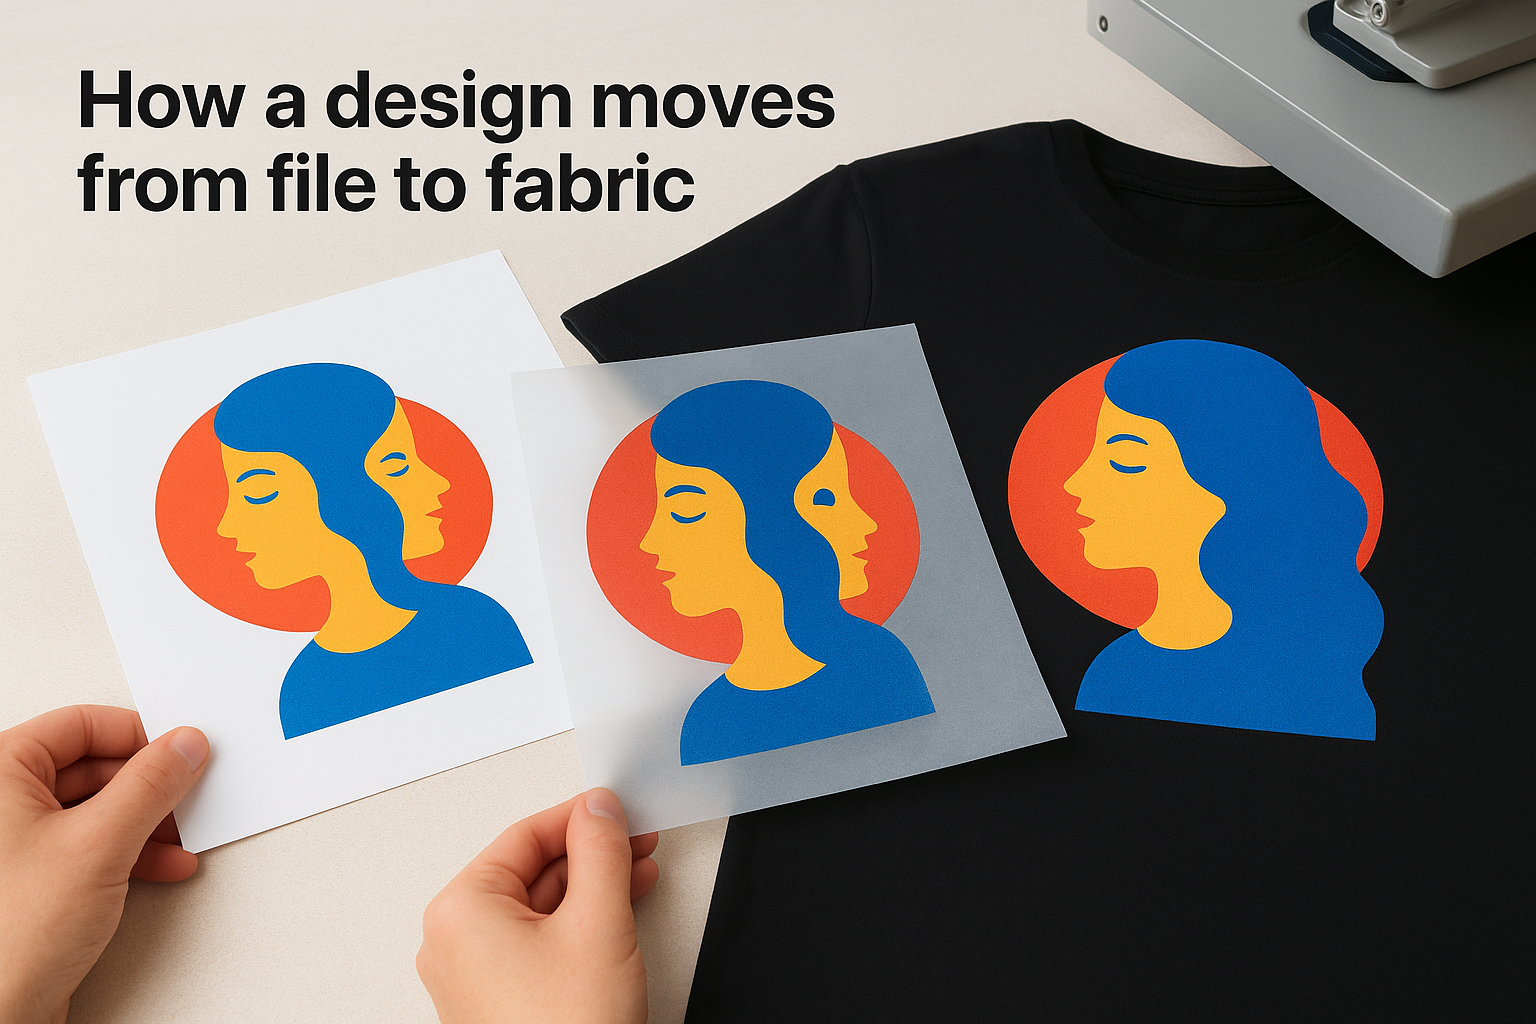
The quality of your source file directly determines the sharpness and color accuracy of your finished transfer, so working with properly prepared artwork from the start saves time across both sampling and bulk production.
Once the design is printed onto the carrier, it's ready to be applied. At this stage, the transfer and the garment are separate, and the transfer can be stored, shipped, or used in batches during production. This separation is one of the practical advantages of the method, it allows artwork production and garment construction to happen on parallel timelines rather than requiring both to be ready at the same moment.
What happens during bonding
When you place the transfer face-down on the garment and apply a heated press, the combination of heat and pressure activates the adhesive or ink layer on the carrier. The design releases from the carrier and bonds to the fabric fibers. The carrier sheet is then peeled away, either immediately while the transfer is still warm or after it cools, depending on the specific transfer type.
After peeling, the design sits on the surface of the fabric or partially penetrates the fiber structure depending on the transfer chemistry. Proper bonding produces edges that don't lift, colors that stay flat, and a finish that holds through repeated washing when the application settings are correct.
Compare the main types of heat transfer printing
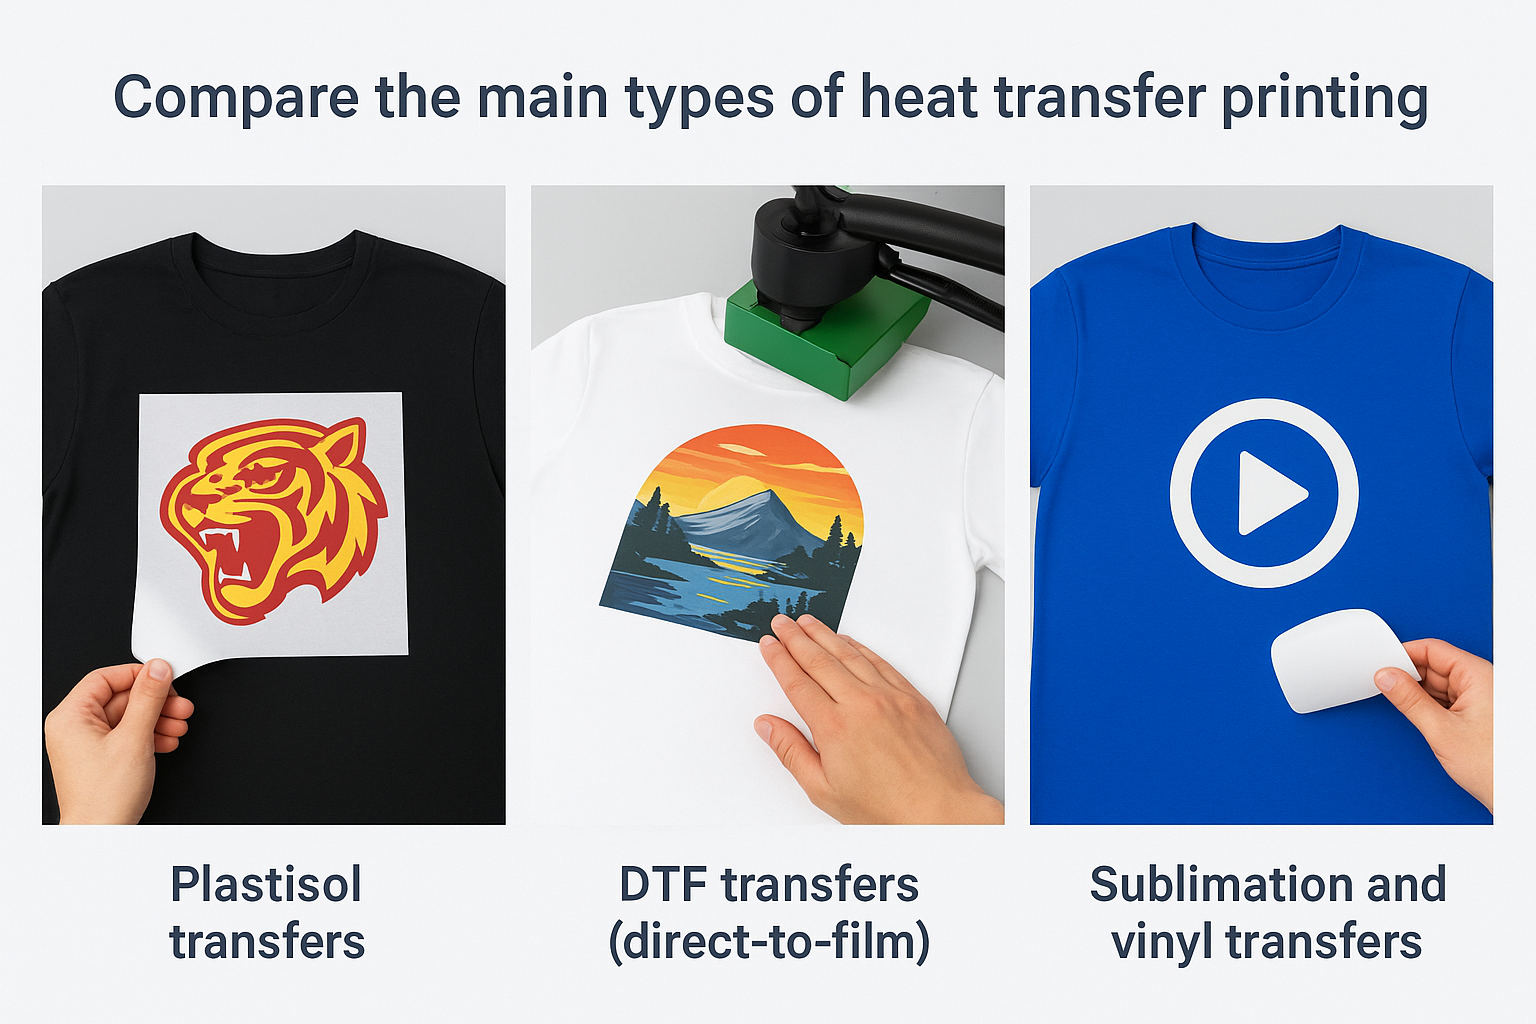
Not all heat transfers behave the same way, and choosing the wrong type for your fabric or artwork creates problems that are difficult to fix once production starts. Understanding how heat transfer printing works across the main transfer categories helps you match the method to your garment material, graphic complexity, and production volume before you finalize your decoration spec.
Plastisol transfers
Plastisol transfers use the same ink chemistry as screen printing, but the ink is printed onto release paper instead of directly onto the garment. You press the paper against the fabric, and the ink bonds to the fibers under heat. Plastisol transfers produce a thick, opaque print that holds up through heavy washing and works well on dark garments where color coverage matters.
The limitation is that fine photographic detail and soft gradients are harder to reproduce cleanly because the ink deposits as a solid surface layer. This method works best for bold graphics, team logos, and high-coverage designs on cotton or cotton-blend fabrics where durability is the priority.
Plastisol transfers are a reliable choice when you need durable, opaque color on dark substrates without investing in full screen printing setup costs.
DTF transfers (direct-to-film)
DTF printing applies a full-color design onto a polyester film using a specialized inkjet printer, then coats the print with a hot-melt adhesive powder before curing. The finished film bonds to nearly any fabric type, including cotton, polyester, nylon, and blended fabrics.
DTF handles fine lines, photographic images, and multi-color artwork without requiring separate screens or color separations, which makes it practical for short runs and sampling. It's become one of the most versatile options available for brands testing new designs before committing to bulk production.
Sublimation and vinyl transfers
Sublimation uses heat to convert dye-based ink directly into a gas that bonds with polyester fiber at a molecular level. The result is a print that becomes part of the fabric rather than sitting on top of it, which means it won't crack or peel over time. The trade-off is that sublimation only works on polyester or high-polyester blends, so it's not suitable for cotton-heavy fabrics or dark base colors.
Vinyl transfers start with a heat-reactive film sheet cut into a design using a digital cutter. Vinyl works well for simple shapes and bold lettering, but layering multiple colors adds press time and increases the chance of misalignment during application.
Know the equipment and materials you need
Understanding how heat transfer printing works in practice means knowing what tools and materials sit behind every finished garment. Each transfer type relies on a specific set of equipment and consumables, and using the wrong combination produces results that fail in the wash or look inconsistent across a production run. Getting familiar with the core setup requirements before you start helps you plan costs, avoid compatibility issues, and communicate clearly with whoever is pressing your garments.
Heat press machines
The heat press is the central piece of equipment in any transfer application setup. A clamshell press opens on a hinge and works well for flat garments like t-shirts and panels, while a swing-away press moves the top platen completely off the lower platen, which gives you better visibility for placement and reduces the risk of burning your hands during positioning. For curved or small areas like sleeves and collars, smaller specialty presses with compact platens handle the geometry more accurately than a standard flat press.
Buying an underpowered or poorly calibrated press is the fastest way to produce inconsistent transfers across a production run, so always verify your press holds a stable temperature across the full platen surface before you start.
Platens need to be flat and evenly padded to apply consistent pressure across the entire design. Uneven pressure causes partial bonding, which shows up as lifted edges or faded areas in the finished transfer.
Transfer media and consumables
Beyond the press itself, you need the carrier sheets or films specific to your chosen transfer type. Plastisol transfers come pre-printed on release paper, DTF transfers use polyester film coated with hot-melt adhesive powder, and sublimation requires dye-sublimation ink printed onto sublimation paper. Using generic or mismatched substrates affects ink release, adhesion quality, and color accuracy in ways that are hard to fix after the fact.
Supporting consumables include Teflon cover sheets that protect the transfer surface and garment from direct platen contact, heat-resistant tape for holding small transfers in position during application, and a silicone pad or foam mat under delicate garments to distribute pressure evenly. Keeping these materials on hand and replacing worn pads or cover sheets regularly keeps your output consistent from the first unit to the last.
Apply a heat transfer to fabric step by step
Knowing how heat transfer printing works in theory is one thing. Executing it correctly on an actual garment is where the details matter. Every step in the application sequence builds on the one before it, and skipping or rushing any part of the process produces results that look fine off the press but fail within the first few washes. Follow these steps in order and you'll get consistent, production-quality results whether you're pressing a single sample or running through a batch of units.
Prepare your garment and workspace
Start by pre-pressing the garment for three to five seconds before you apply the transfer. This removes moisture and wrinkles from the fabric, which would otherwise create uneven surfaces that prevent the transfer from bonding flat. A damp or wrinkled garment is one of the most common causes of partial adhesion and bubbling in finished transfers, and pre-pressing costs you almost no extra time.
Set your garment flat on the lower platen and smooth out any folds or bunching before the press closes. If you're working with a thick seam or a zipper near the placement area, use a small silicone pad underneath the fabric to level the surface and distribute pressure evenly across the full design area.
Position and press the transfer
Place your transfer face-down on the garment in the exact position you want it. Use heat-resistant tape to hold small or lightweight transfers in place if they shift when you lower the platen. Cover the transfer with a Teflon sheet to protect the carrier and the garment surface from direct contact with the platen.
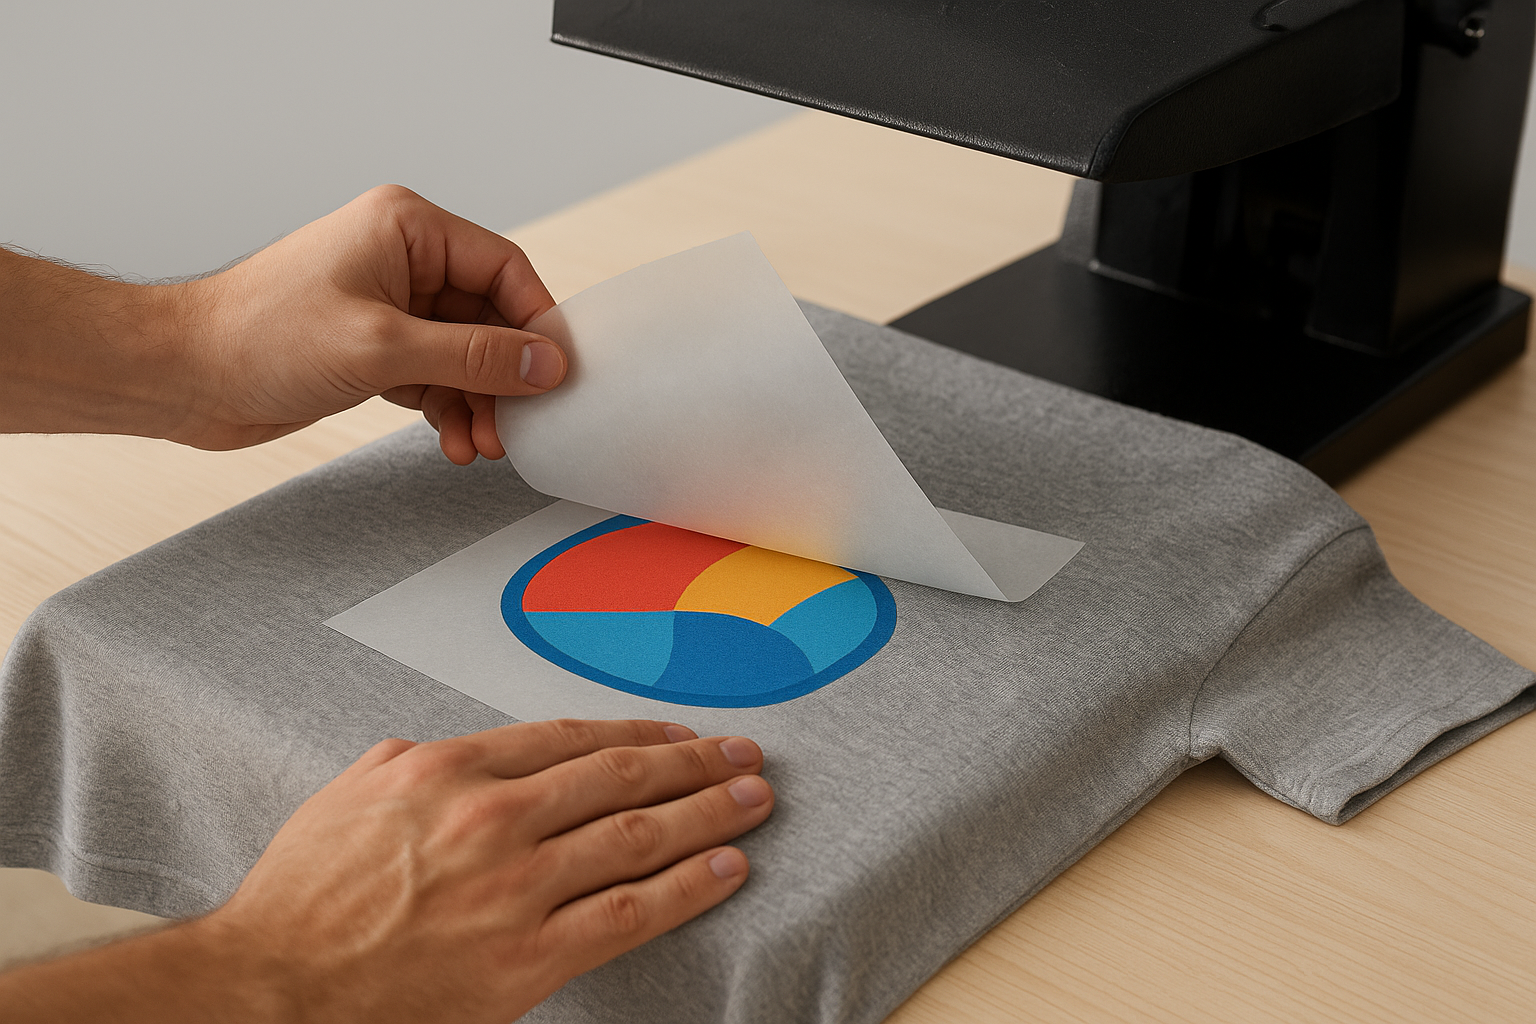
Consistent placement across a production run is easier when you mark the garment position with a simple paper template before pressing each unit.
Close the press firmly and hold it for the time and temperature your specific transfer type requires. Do not lift the press early to check the transfer, since breaking the press cycle mid-bond weakens adhesion and often leaves incomplete areas in the design.
Peel and inspect the finished print
Once the press cycle finishes, lift the platen and peel the carrier sheet according to the manufacturer's instruction, either hot or cold. Peel slowly at a low angle rather than pulling straight up, which reduces the risk of lifting ink from the fabric.
After peeling, inspect the design immediately for lifted edges, missing areas, or color inconsistency. If you spot a problem, you can often re-press the affected area before the garment cools completely, but this window is short, so check every unit right off the press.
Dial in time, temperature, and pressure
Understanding how heat transfer printing works at a technical level comes down to three variables: time, temperature, and pressure. Each one affects how the transfer bonds to the fabric, and adjusting any single variable without accounting for the others throws off your results. Treating these three settings as a coordinated system rather than separate dials keeps your output consistent from the first unit to the last.
Understand what each variable controls
Temperature determines whether the adhesive or ink layer activates fully during the press cycle. Too low and the transfer bonds weakly, leaving edges that lift after the first wash. Too high and you scorch the fabric, flatten the garment texture, or cause colors to bleed beyond their intended boundaries. Most plastisol and DTF transfers fall in the 300 to 330 degree Fahrenheit range, while sublimation typically requires higher heat, around 380 to 400 degrees Fahrenheit, to drive the dye fully into the polyester fiber.
Time is how long you hold the press closed with heat and pressure applied. Short press cycles leave the transfer partially bonded, which shows up as dull colors or lifting edges. Longer cycles on sensitive fabrics like performance textiles can crush the hand feel or cause heat damage. Most transfer types need between 10 and 20 seconds, but always check the manufacturer's specification for your exact transfer product rather than relying on general guidelines alone.
Pressure affects how evenly the transfer contacts the fabric surface. Uneven pressure produces inconsistent bonding, with some areas sticking cleanly and others peeling away. Press pressure is typically described as light, medium, or firm, but calibrating your actual press with a measurement tool is more reliable than using those labels on their own.
Weigh your press pressure with a silicone pressure gauge pad before you start a production run, since platens drift out of calibration over time even on quality machines.
Use a test press to verify your settings
Before pressing any full production batch, run a test press on a scrap piece of the same fabric you're using for the actual garments. Wash that test piece once and inspect the result before you commit to the full run. Fabric composition, garment thickness, and ambient humidity all shift how a transfer bonds, so validating your settings on the actual substrate protects you from reprinting an entire batch due to a setting that looked correct on paper but failed on the material.
Plan for durability, wash care, and compliance
A transfer that looks sharp off the press but fails after three washes is a product defect, not a decoration method problem. Part of understanding how heat transfer printing works in a production context means knowing that durability comes from the combination of correct application settings, the right transfer type for your fabric, and wash care instructions that match the decoration's actual limitations. Planning for all three before bulk production starts keeps returns and reprints off your plate.
Test wash performance before bulk production
Before you ship a full order, wash at least three to five pressed samples from your production batch and inspect them closely after each cycle. Look for edge lifting, cracking, color fading, or loss of adhesion across the full design area. One wash cycle is not enough to validate a transfer spec, since many adhesion failures appear between the third and fifth wash as the ink layer loses its bond under repeated mechanical stress.
Run your wash test on the same garment fabric and at the same wash temperature your end customer will actually use, since testing under softer conditions than real use gives you misleading results.
When you find a failure, trace it back to press time, temperature, or pressure settings before assuming the transfer product is defective. Most durability problems are application issues that a calibrated re-press can resolve before you commit to the full run.
Meet labeling and compliance requirements
If you're selling into US retail or shipping garments internationally, care labels and fiber content disclosures are legal requirements, not optional finishing details. Heat-applied labels can carry all of this information, but the label artwork needs to include the correct regulatory language before production starts, covering fiber percentages, care symbols, and country of origin. Getting this wrong delays customs clearance or triggers a recall on finished goods.
Coordinate your label artwork and placement specification with your manufacturing partner during the sampling stage so the label is validated alongside the rest of the garment. Changing label content after bulk production begins means reprinting labels, re-pressing, and potentially holding finished inventory until the correction clears review. Treating labeling as part of the full decoration spec from the start avoids that cost and keeps your production timeline intact.
Troubleshoot common heat transfer printing issues
Even when you understand how heat transfer printing works, problems show up in production. Most issues trace back to one of three causes: incorrect press settings, mismatched transfer type for the fabric, or a preparation step that got skipped. Identifying the root cause quickly saves you from pressing an entire batch with a flaw that only shows up after the garments ship.
When transfers lift or peel after washing
Lifting edges are almost always a bonding failure caused by insufficient heat, time, or pressure during the press cycle. Start by rechecking your press temperature with an independent laser thermometer, since platens drift out of calibration and the display reading is often inaccurate. If the temperature checks out, increase your press time by two to three seconds and test again on a scrap piece of the same fabric before touching production units.
Fabric moisture is a second common cause that gets overlooked. Pre-pressing the garment removes residual moisture that prevents clean adhesion. If you skipped the pre-press step or your production space is humid, that moisture creates a barrier between the transfer and the fiber, and the result is lifting edges that look fine immediately after pressing but fail within the first wash cycle.
A single re-press on a lifted transfer rarely holds long-term. Fix the root setting before continuing the run rather than correcting individual units.
When colors look dull or faded off the press
Dull or muted color output usually points to a temperature that's too low for the transfer chemistry to activate fully. This is especially common with DTF and sublimation transfers, where the ink or dye needs to reach a precise threshold to bond at the correct saturation. Pull up the manufacturer's recommended temperature range for your specific transfer product and verify your press is actually reaching that temperature across the full platen surface, not just at the center.
A second cause is a worn or dirty Teflon cover sheet sitting between the platen and the transfer. Over time, Teflon sheets absorb ink, lose their release properties, and create uneven heat distribution across the design. Replace your cover sheet regularly and check it before each production batch. Fresh Teflon sheets cost almost nothing compared to reprinting a run that comes out with inconsistent color across every unit.
Key takeaways and next steps
Understanding how heat transfer printing works gives you a real advantage when developing garments, because you can match the right transfer type to your fabric, set your press correctly the first time, and catch durability problems before they reach your customer. The difference between a transfer that lasts and one that fails after a few washes almost always comes down to three controllable variables: temperature, time, and pressure applied consistently across every unit in your run.
Whether you're pressing your first sample or scaling into bulk production, the process rewards preparation. Validate your settings on the actual fabric you plan to use, test wash performance before committing to a full run, and treat labeling as part of your decoration spec from the start. If you're ready to move your project from artwork to finished garments, work with a manufacturing partner at Manludini who handles printing, production, and export from one place.
0 comments