
A clothing label does more than display your brand name, it tells your customer they're holding something intentional, something built with care. Whether you're launching your first collection or refreshing an existing line, knowing how to make custom clothing labels gives you direct control over how your brand looks and feels in someone's hands. And you don't need a massive budget or a design degree to get started. From simple at-home methods like stamping and iron-on transfers to professionally manufactured woven and printed labels, there's a path that fits every stage of growth.
This guide walks you through the full range of options, DIY techniques you can try today, digital design tools for creating label artwork, and what professional manufacturing looks like when you're ready to scale. We'll cover materials, printing methods, design tips, and the practical steps behind each approach so you can pick the route that matches your budget and order size.
At Manludini, we help brands develop custom labels, trims, and packaging as part of our apparel manufacturing support. We've seen firsthand how the right label can elevate a garment, and how confusing the process can feel without clear guidance. This article pulls from that hands-on production experience to give you something genuinely useful, whether you're making labels at your kitchen table or placing your first factory order.
What to decide before you make labels
Before you dive into design software or request quotes from suppliers, a few key decisions will shape which production method works for you. Rushing into label-making without thinking these through can cost you time and money on samples or orders that don't fit your actual needs. The choices you make here will determine everything from your artwork file requirements to your minimum order quantities, so work through them first.
What type of label do you need
Most garments carry more than one label, and each serves a different purpose. Your main brand label typically sits at the back neck or waistband and carries your logo and brand name. Care and content labels display fabric composition, washing instructions, and country of origin, and in many markets these are legally required. Size labels are usually sewn inside a seam or attached to the main label, while hang tags are separate paper or card pieces attached before the garment ships.
Knowing which label types you need before you start helps you budget correctly and prevents you from ordering one label type and realizing mid-production that you forgot the care instructions entirely. Each label type has different sizing, material, and content requirements, so treat them as separate projects even if you're producing them at the same time.
A missing or incorrect care label can create compliance issues in markets like the US and EU, where fiber content and care instruction labeling is regulated.
What material fits your garment
Label material affects how a label looks, feels, and holds up after washing. Woven labels use threads woven into a ribbon base, giving them a premium, tactile finish that survives repeated washing well. Printed satin or cotton labels are softer against the skin and work well for lightweight or children's garments where texture matters. Heat transfer labels apply directly to the fabric with no physical label, which suits activewear or minimalist branding.
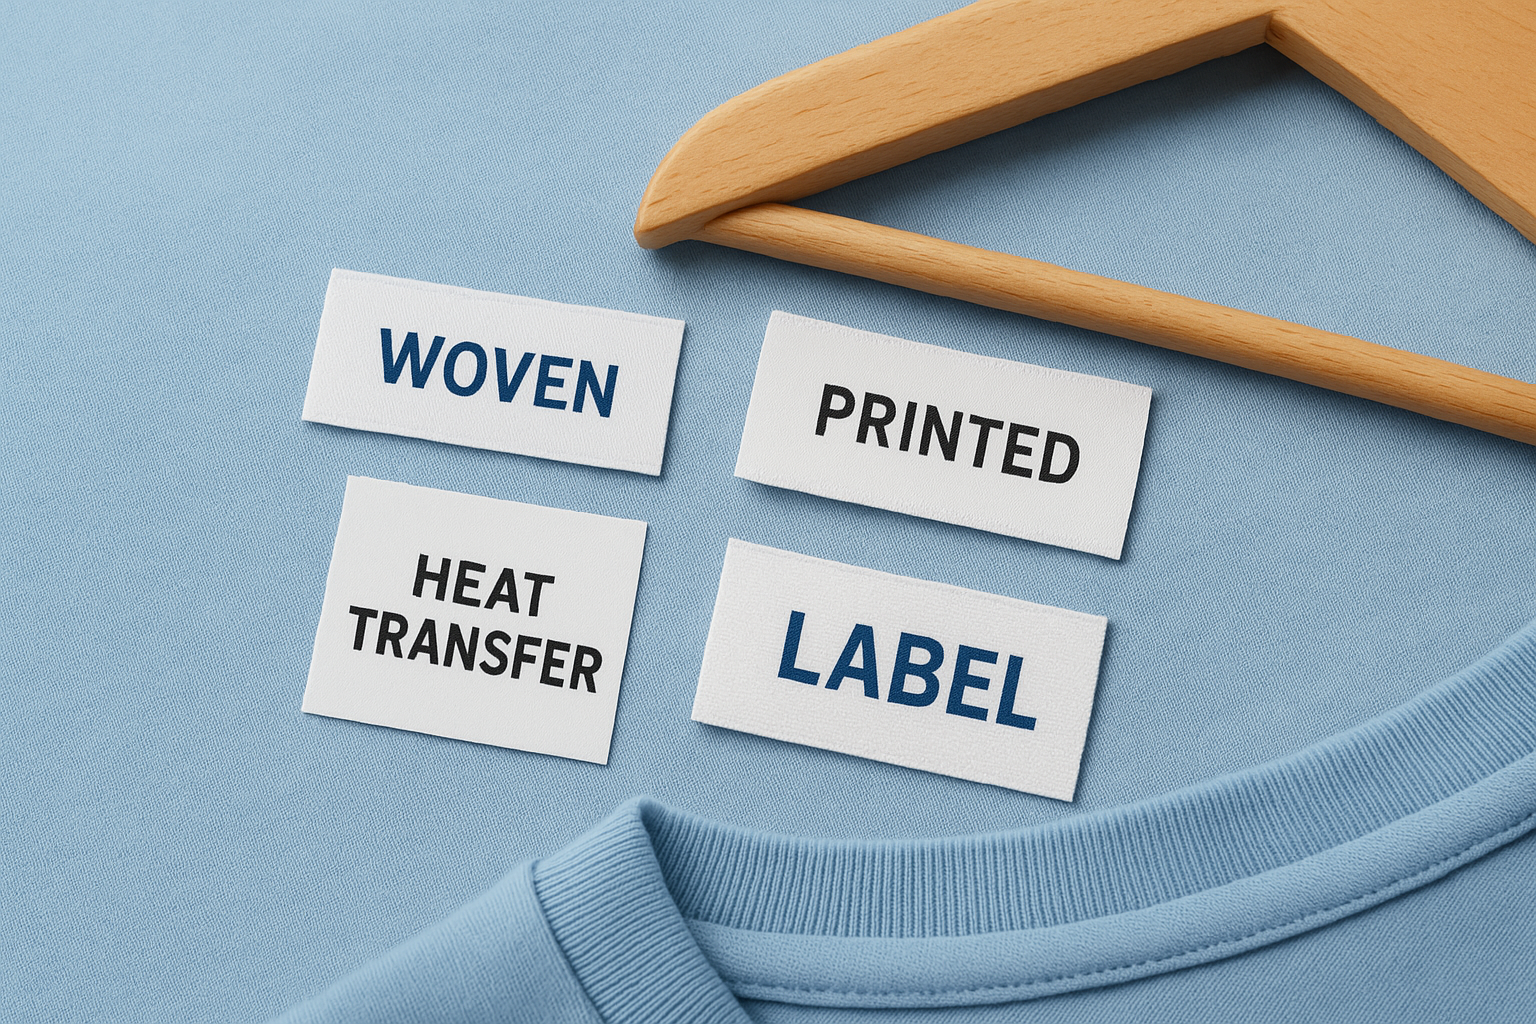
Consider where the label sits on the garment. A neck label in a structured jacket can handle a stiffer woven construction, but a label inside a baby onesie needs something soft and non-irritating. Your garment type and target customer should guide this choice as much as your budget does.
What quantity you're working with
Your order volume is one of the most practical filters for deciding how to make custom clothing labels. If you need fewer than 50 labels for a test run or a market stall, DIY methods like inkjet printing on fabric sheets make sense. Professional label suppliers typically have minimum order quantities starting around 100 units for printed labels and 200 or more for woven labels, though this varies by manufacturer.
Knowing your quantity upfront also changes your cost-per-label calculation significantly. DIY labels carry higher per-unit material costs, but you avoid setup fees. Factory orders have higher upfront costs but drop sharply in per-unit price at volume.
| Order size | Recommended approach |
|---|---|
| 1 to 50 labels | DIY printing, stamping, or iron-on transfers |
| 50 to 200 labels | Print-on-demand label services |
| 200+ labels | Printed or woven factory labels |
What information goes on each label
Every label needs a content plan before you open a design file. For a brand label, that usually means your logo, brand name, and possibly a website or country of origin. Care labels require specific information for fiber content, wash temperature, drying method, and country of origin, all confirmed against the regulations in your target market.
Write out the full text for each label type before you start designing. This one step prevents multiple artwork revisions later when you discover mid-design that your care instructions don't fit the label size you chose.
Step 1. Plan your label set and sizing
Before you touch any design file, you need to know what labels your garment requires and what size each one should be. Skipping this step is one of the most common reasons brands end up with labels that look right on screen but feel wrong once sewn into a finished garment. Sizing affects readability, sewability, and how the label lays against the fabric, so lock these details down before you start any artwork.
Standard label sizes by type
Different label types have established size ranges based on where they sit on the garment and how much information they carry. Knowing these ranges gives you a realistic starting point for your artwork dimensions and prevents you from designing something a sewing operator can't attach cleanly. The table below covers the most common sizes brands use across garment types.
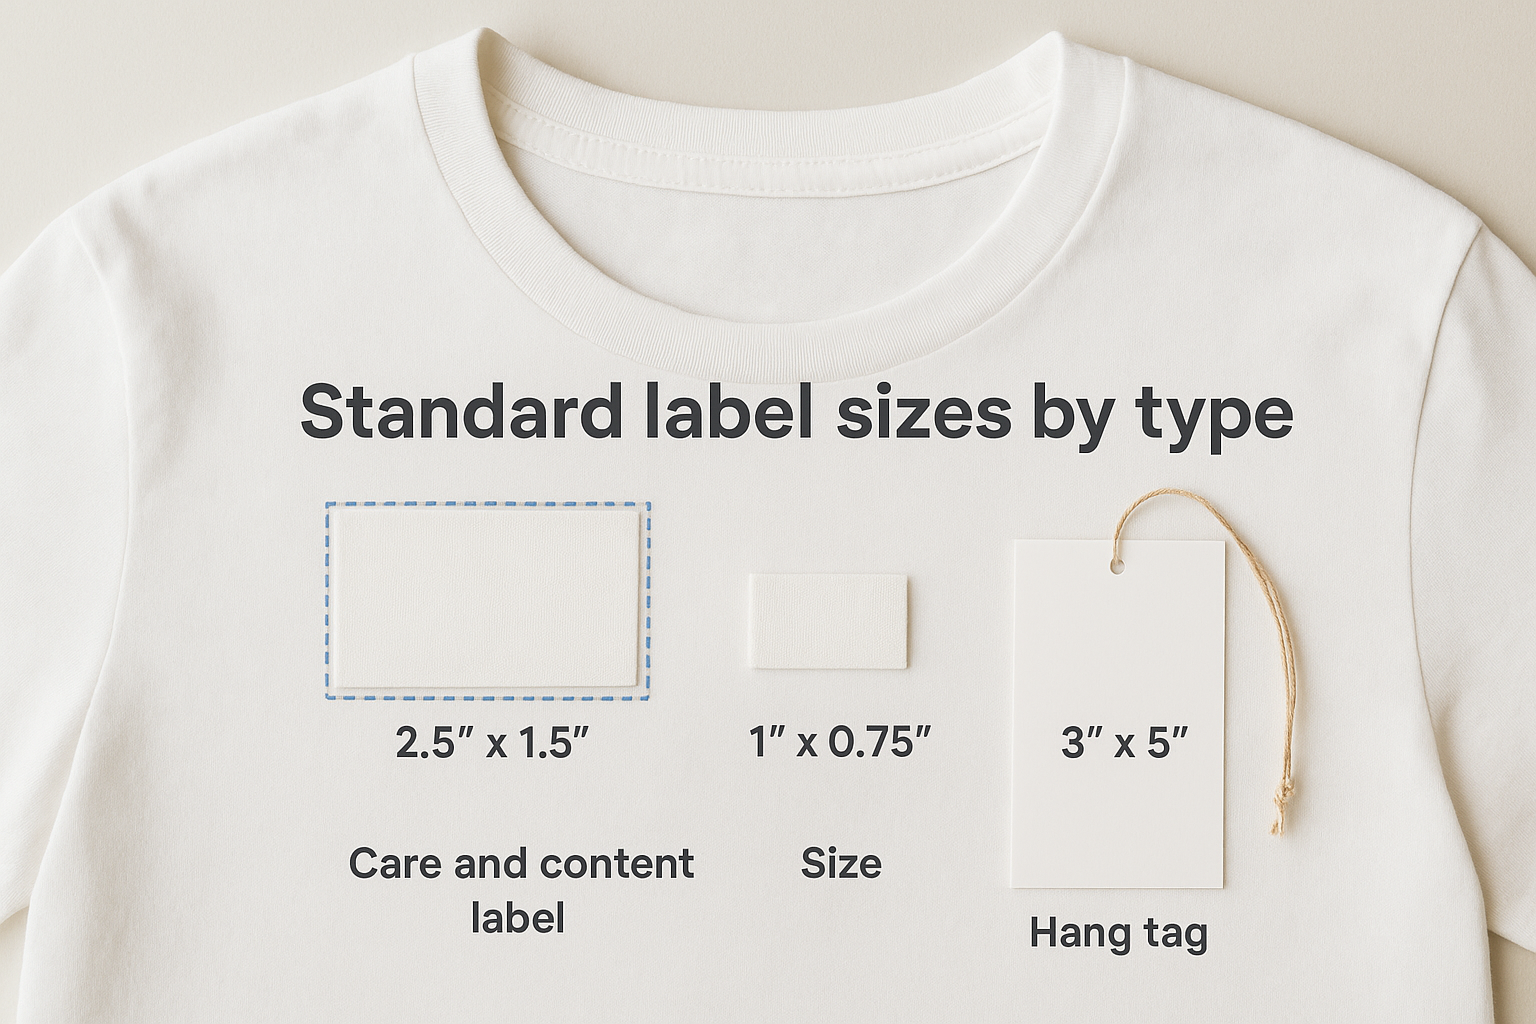
| Label type | Common size range | Typical placement |
|---|---|---|
| Back neck / brand label | 1.5" x 1" to 2.5" x 1.5" | Inside back neckline |
| Care and content label | 1.5" x 2" to 2" x 3" | Inside side seam or back hem |
| Size label | 0.75" x 0.5" to 1" x 0.75" | Attached to or below brand label |
| Hang tag | 2" x 3.5" to 3" x 5" | Exterior, attached by string or pin |
If your care label text runs long, increase your label height before reducing your font size, since text below 6pt becomes difficult to read after multiple washes.
Build a simple label spec sheet
Once you have your sizes confirmed, document every label in a spec sheet before you start designing or requesting quotes. A spec sheet keeps your details consistent across suppliers and saves you significant time when you're figuring out how to make custom clothing labels for the first time. Each entry should cover the label type, finished size, material, attachment method, and the text or artwork it carries.
Use this template as a starting point for each label in your set:
- Label type: (e.g., back neck brand label)
- Finished size: width x height in inches or cm
- Material: (woven / printed satin / heat transfer)
- Attachment: (sew-in / iron-on / hang tag loop)
- Content: (logo only / logo + care text / size only)
- Quantity needed:
Filling this out for every label before you open a design file will prevent you from resizing artwork mid-project or discovering a forgotten label type once production has already started.
Step 2. Design your label artwork
Your artwork file is the foundation of every label method in this guide. Whether you're printing at home or sending files to a factory, the quality of your design directly determines the quality of your finished label. Getting your file set up correctly before you start saves you from reprints, rejected submissions, and labels that come back blurry or off-color after production.
Set up your file correctly
Most professional label suppliers require vector artwork saved as an Adobe Illustrator (.ai) or PDF file, with all fonts converted to outlines and colors specified in CMYK or Pantone values. If you're working on a DIY label method, a high-resolution PNG or TIFF file at 300 DPI minimum will produce clean print results on most home printers and fabric sheets. Use the exact finished dimensions from your spec sheet as your artboard size so the design scales without distortion.
Converting fonts to outlines before exporting prevents font substitution errors when your file is opened on a supplier's machine.
Confirm these core file specs before sending artwork to anyone:
- File format: .ai or .pdf for factory orders; .png or .tiff at 300 DPI for DIY
- Color mode: CMYK for printed labels, Pantone for woven labels
- Fonts: converted to outlines or embedded
- Artboard size: matches your confirmed label dimensions exactly
- Bleed: add 0.125" on all sides for cut or folded labels
Keep your design simple and readable
Knowing how to make custom clothing labels that look professional comes down to restraint in the design stage. Small label surfaces punish crowded layouts, so limit your artwork to your logo, brand name, and any required regulatory text such as size or country of origin. Avoid thin serif fonts below 7pt, fine lines under 0.5pt, and gradients if you're ordering woven labels, since looms reproduce solid shapes and block lettering far more cleanly than complex, multi-toned artwork.
Before you finalize anything, print your design at 100% scale on regular paper, cut it to the finished label dimensions, and hold it against the actual garment. This five-minute check surfaces sizing issues, readability problems, and proportion mismatches before you commit to an order. Catching a problem at this stage costs you a sheet of paper rather than a resampling fee.
Step 3. Make DIY labels at home
DIY label-making works well when you need small quantities quickly, and three methods cover most home production scenarios: inkjet printing on printable fabric sheets, rubber stamping on twill tape, and iron-on transfers. Each approach uses materials you can source without a specialized supplier, and all three let you produce a finished label without minimum order requirements or production lead times. Choose based on how professional you need the result to look and how much washing your garment will go through.
Print on printable fabric sheets
Printable fabric sheets are pre-treated cotton or satin sheets backed with a removable paper carrier, and you feed them through a standard inkjet printer the same way you would print on regular paper. Print your label artwork at 100% scale using your confirmed label dimensions, let the sheet dry for at least 30 minutes, peel the carrier, heat-set with a dry iron for 30 seconds, then cut your labels with sharp scissors or a rotary cutter.
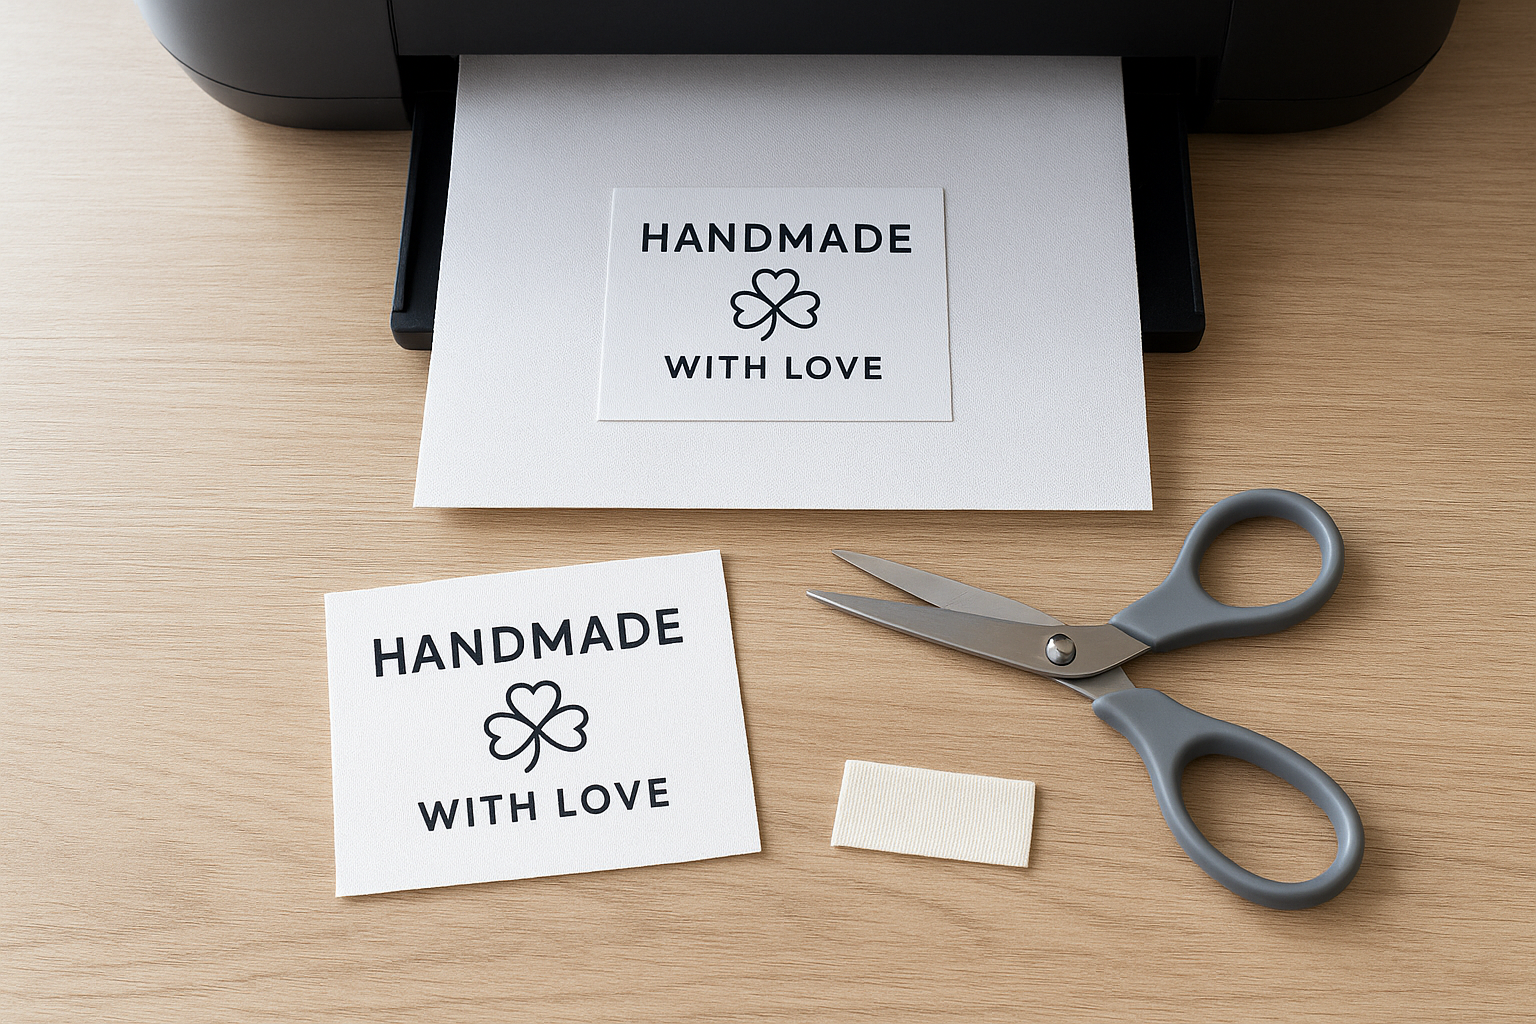
Wash a test label in cold water before cutting and attaching the full batch, since this tells you immediately if the ink bleeds or fades before the label is sewn into a garment.
Use this checklist before you start your print run:
- Set your printer to best quality or photo mode
- Use pigment-based ink cartridges, not dye-based, for better wash resistance
- Print a test page on regular paper first and cut it to your finished label size
- Heat-set with a dry iron on the cotton setting before washing
Stamp labels on twill tape
Rubber stamping on cotton twill tape is the simplest and lowest-cost DIY method, and it produces a label with a handmade character that suits smaller or artisan brands well. Cut twill tape to your planned label length, stamp your logo or brand name using a fabric ink pad, let it dry fully, then fold and sew the tape into your garment seam. Fabric ink pads bond with natural fibers and hold reasonably well through gentle washing cycles, making this a practical option for low-volume runs.
Understanding how to make custom clothing labels this way works best for inside seam labels, folded neck labels, or packaging inserts where the label won't face repeated machine washing. Keep your stamp design simple since detailed logos lose definition against twill tape texture and risk smudging on the first print.
Step 4. Order printed labels from a service
When your quantity moves past what DIY methods can handle comfortably, ordering from a printed label service gives you cleaner results, faster turnaround, and a more consistent finish across your full run. This approach sits between home production and full factory manufacturing, which makes it a strong fit for brands in the 50-to-500 unit range who need professional output without the longer lead times or higher minimums that woven label factories typically require.
Choose your supplier and file format
Printed label services generally fall into two categories: online print-on-demand platforms that specialize in labels and custom packaging, and dedicated garment label suppliers who focus specifically on sew-in and hang tag production. For understanding how to make custom clothing labels at this scale, garment-specific suppliers are the better choice because they stock fabrics like satin, taffeta, and cotton twill that are designed to be sewn into clothing and washed repeatedly.
Most services accept print-ready PDF or high-resolution PNG files. Before you upload anything, confirm the supplier's required color profile (CMYK is standard for printed labels), their minimum resolution (300 DPI at finished size), and whether they want bleed added to your artboard. Request a digital proof before approving production, since colors on screen can shift noticeably in physical print output.
Ask your supplier for a physical strike-off before approving a large run, since a printed sample shows exactly how your artwork reproduces on the specific fabric they use.
Submit your order and review your proof
Once your file is ready and your supplier confirmed, fill out the order form carefully and double-check every field before submitting. Specify the exact label size from your spec sheet, the material type, the folding style if applicable (center fold, end fold, or Manhattan fold), and the quantity per label type. Errors in the order form are one of the most common causes of production delays at this stage.
Review your digital proof against this checklist before you approve it for print:
- Logo and text are sharp with no pixelation or blurring
- Colors match your brand values as closely as possible in CMYK
- Label dimensions match your spec sheet exactly
- All required text, including care information or size, is present and legible
- No content is clipped at the edges
Step 5. Produce woven labels with a factory
Woven labels represent the most durable and professional label option available, and understanding how to make custom clothing labels at this level requires working directly with a manufacturer rather than a print service. Thread-woven construction means your logo and text are built into the fabric itself rather than printed on top, which gives woven labels a tactile quality that printed labels cannot replicate and a lifespan that holds up through commercial laundering cycles. This route makes sense once your quantities reach 200 units or more, since most woven label factories require this as a baseline minimum to justify the loom setup involved.
Prepare your factory brief
Your factory needs specific information before they can produce a sample, and a clear brief prevents back-and-forth that delays production. Send your artwork file in vector format with Pantone color codes for each thread color, your confirmed label dimensions from the spec sheet you built in Step 1, the fold style you want (center fold is standard for back neck labels), and your target quantity. Keep your design to four thread colors or fewer, since each additional color increases cost and complexity on the loom.
Use this template when submitting your woven label brief:
- Label type: (e.g., back neck brand label)
- Finished size: width x height
- Fold style: center fold / end fold / straight cut
- Thread colors: list each Pantone code
- Base fabric: natural (cotton) / damask / satin weave
- Quantity:
- Required delivery date:
Request a woven sample before approving bulk production, since thread color rendering on a loom differs from what your Pantone reference looks like on screen or on paper.
Review your sample before approving bulk
When your factory sends a physical woven sample, check it against every point in your spec sheet before giving production approval. Confirm the dimensions match your specified size, the thread colors align with your Pantone references under natural light, and the text is fully legible at the finished label size. Hold the sample against the garment and fold it to simulate how it will sit once sewn in.
Approve in writing with a clear reference to the sample you received, and ask your factory to retain the approved sample on file so the bulk production run has a confirmed benchmark to match against.
Next steps for your label plan
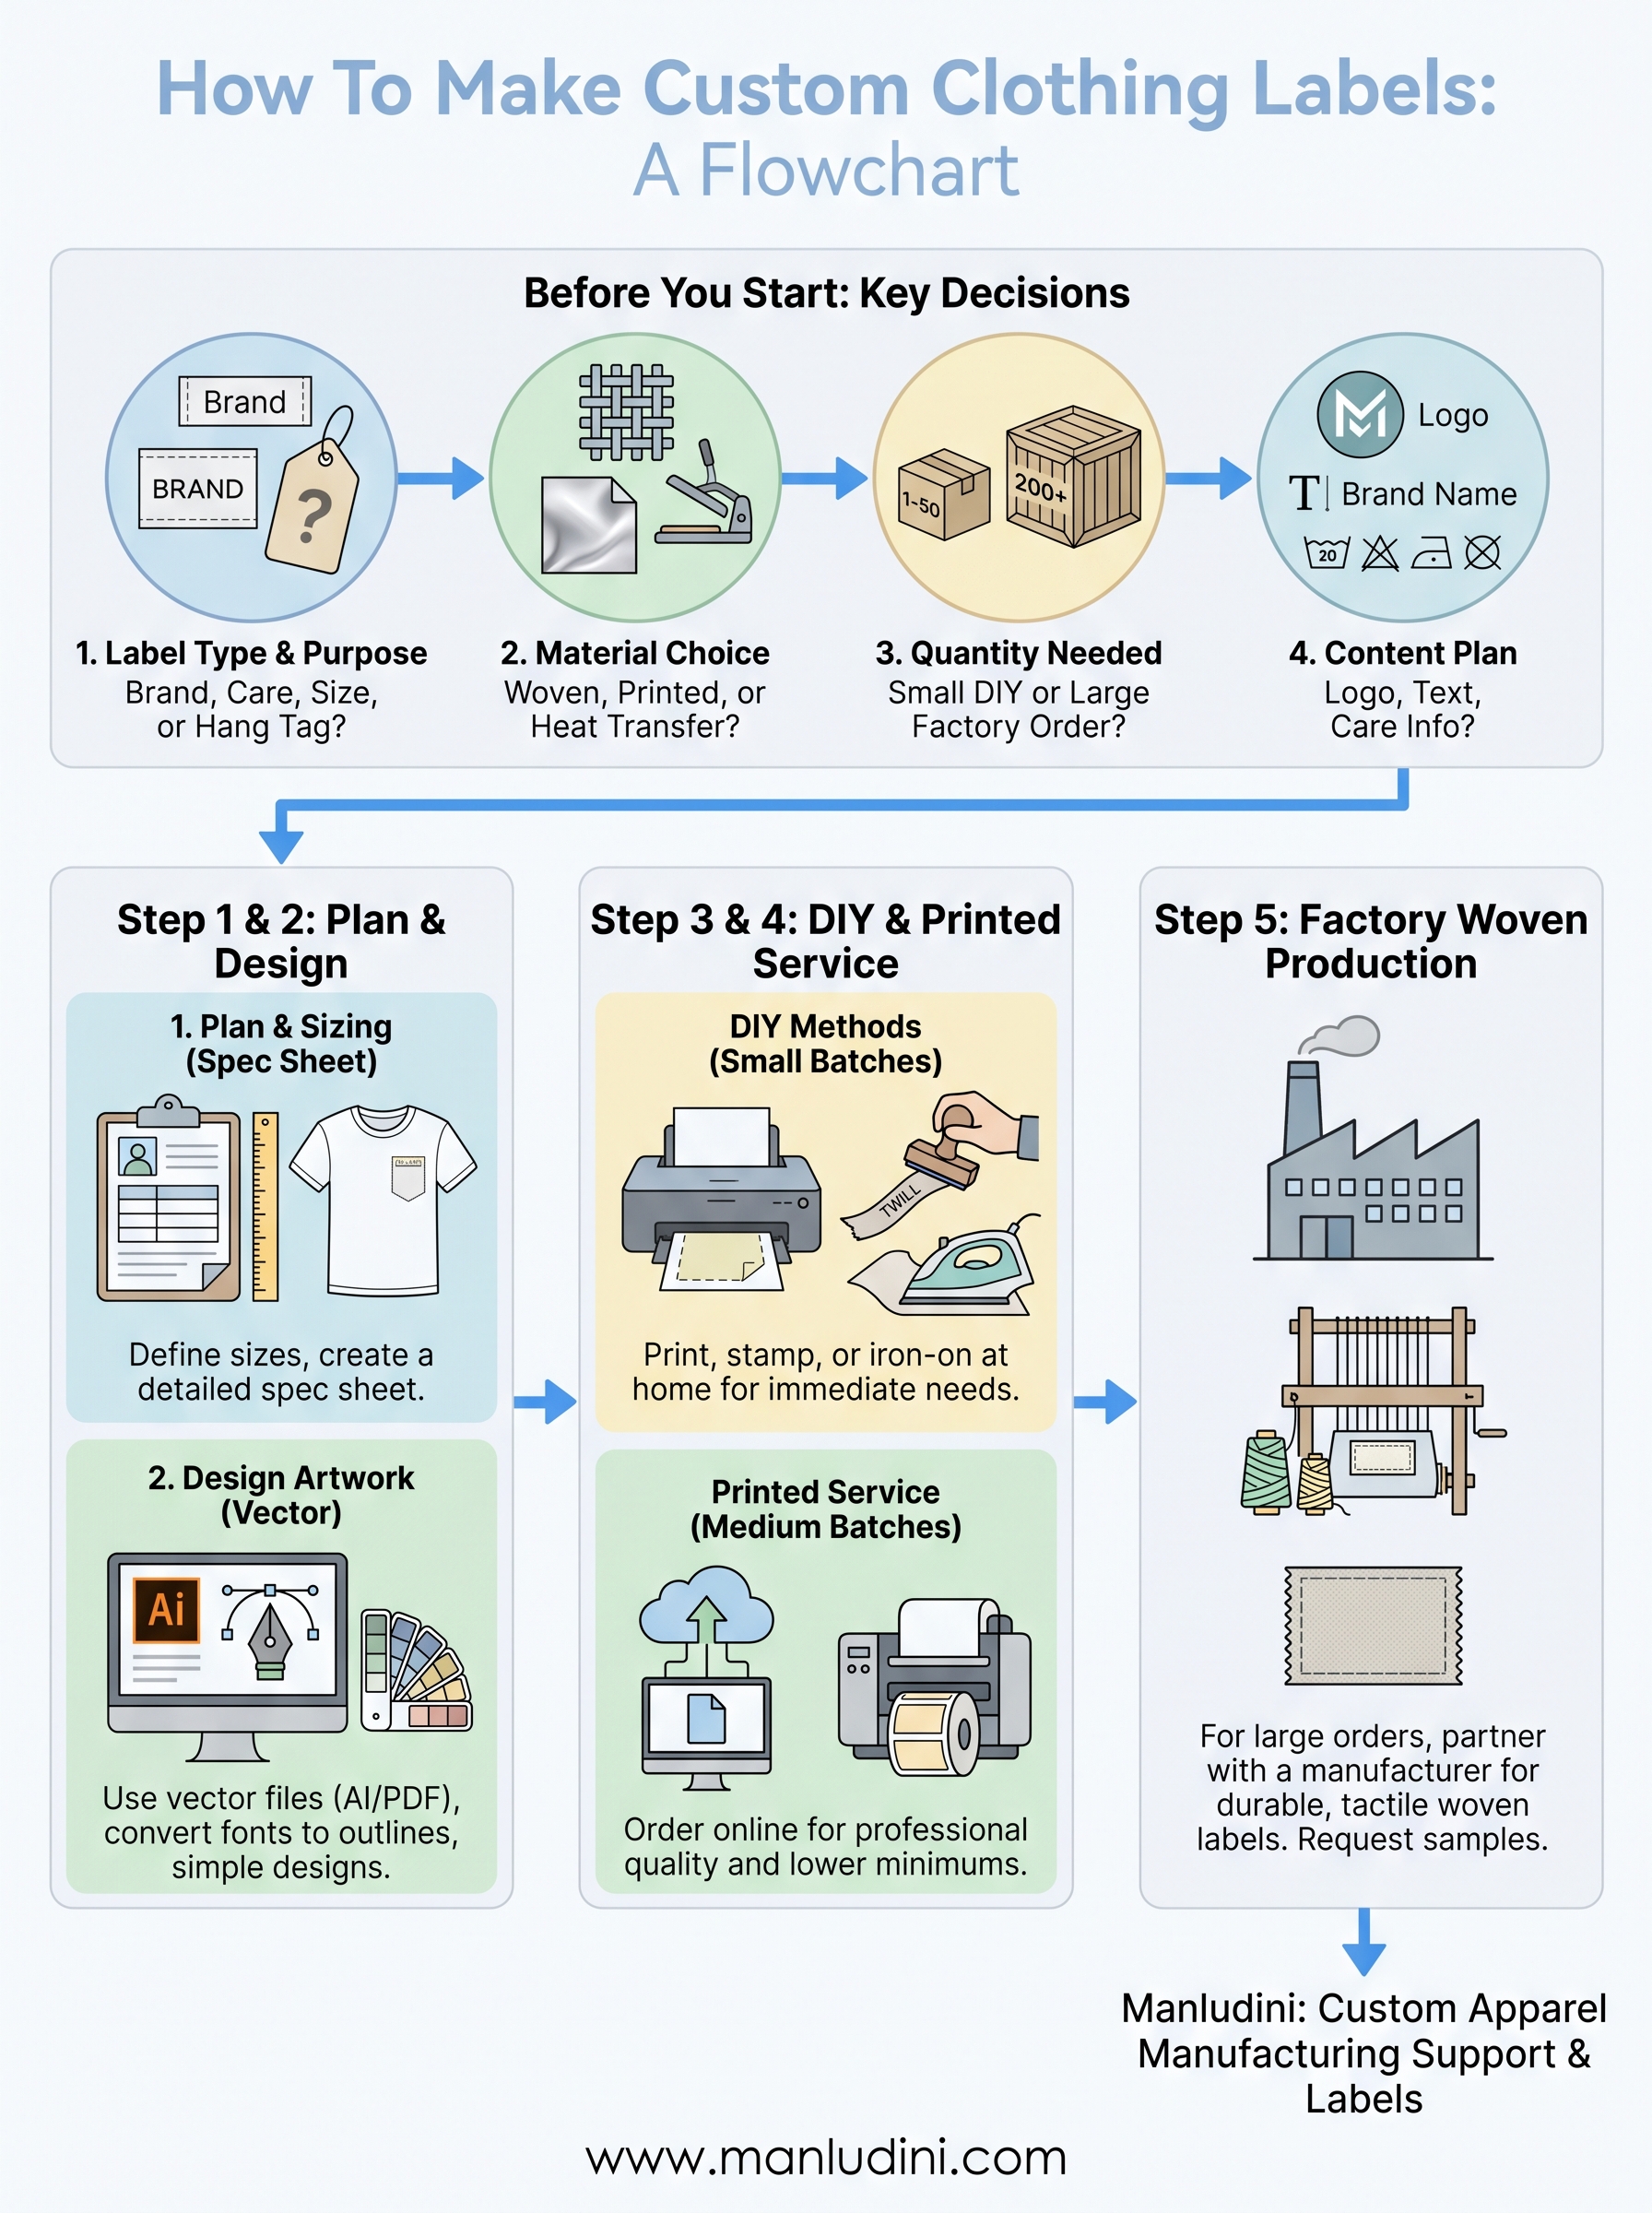
Now that you have a complete picture of how to make custom clothing labels, the next move is to pick one method and start. If you're testing a new style, begin with a DIY print run or a small order from a printed label service to confirm your design works on the actual garment before committing to factory quantities. Your spec sheet and artwork file are the two assets worth building carefully from the start, since every method in this guide depends on both.
When you're ready to scale and your quantities justify factory production, working with a manufacturer who handles labels as part of a broader production package saves you coordination time and keeps your brand presentation consistent across every garment in the run. Manludini supports custom label development alongside sample and bulk production, so your labels and garments move through production together. Start your label and production brief with Manludini and get your next collection moving.
0 comments