
The activewear market keeps growing, and the barrier to entry has never been lower. But knowing how to start an activewear brand and actually pulling it off are two very different things. Most founders get stuck somewhere between picking a niche and figuring out how to get their first samples made, and that gap is where brands quietly die before they ever launch. The ones that make it treat production planning as seriously as brand identity, and they line up their manufacturing partner early.
This guide walks you through every stage of building an activewear brand from scratch, niche selection, product development, fabric choices, branding, manufacturing, and realistic startup costs. No fluff, no generic advice. Just the decisions you actually need to make and the order you should make them in.
At Manludini, we work directly with emerging brands to develop samples, source performance fabrics, and handle bulk production with flexible minimums and hands-on support. We wrote this because we've seen firsthand what separates brands that launch successfully from those that stall out at the idea stage, and we want to help you be in the first group.
What you need before you start
Starting an activewear brand without preparation is one of the fastest ways to burn through your budget and lose momentum before you reach sampling. Before you figure out how to start an activewear brand, you need to get three foundational things in order: your finances, your basic legal setup, and a rough product direction. Skipping any of these will create problems later that are much harder and more expensive to fix.
A realistic timeline and financial runway
Most first-time founders underestimate how long the development cycle takes. From your first contact with a manufacturer to finished bulk production, expect a minimum of four to six months if everything goes smoothly. That timeline assumes you already have your designs or reference samples ready when you start. If you still need to develop tech packs or work through fabric approvals, add another four to eight weeks on top of that.
Your financial runway needs to cover not just production costs, but also your time during development, brand setup, and pre-launch marketing.
Here is a rough breakdown of where your early money goes:
| Category | Typical early-stage cost range |
|---|---|
| Sample development (per style) | $150 - $400 |
| Bulk production (minimum order) | $2,000 - $8,000+ |
| Fabric and trim sourcing | $300 - $1,500 |
| Branding (logo, labels, packaging) | $500 - $2,000 |
| Legal and business registration | $200 - $800 |
| Marketing and photography | $500 - $3,000 |
These numbers vary significantly depending on your manufacturer, country of production, and how complex your styles are. Build in a 15 to 20 percent buffer for unexpected costs, because there will always be at least one surprise expense during sampling or production.
Legal and business setup basics
Getting your business structure in place before you spend money on production protects you and makes supplier relationships cleaner. Register your business as an LLC or equivalent in your state before signing any supplier agreements or placing deposits. You should also apply for a federal Employer Identification Number (EIN) through the IRS, which most manufacturers and suppliers will request when you set up accounts. Trademark your brand name early as well - filing an application with the USPTO before you launch gives you protection from day one rather than scrambling to protect it after you have inventory in hand.
A rough product direction before you talk to manufacturers
Manufacturers need more than a concept to give you accurate pricing and lead times. Before you reach out to anyone for sampling, you need at least a clear style direction: the category you are starting with (leggings, sports bras, shorts, tops), the performance features you want (compression, moisture-wicking, four-way stretch), and your target retail price point. You do not need a finished tech pack at this stage, but having reference images or competitor products you want to improve on will make every conversation with a manufacturer faster and more productive.
Knowing your product direction also helps you avoid one of the most common early mistakes, which is ordering too many styles at once. Start with two to four core styles that represent your brand clearly and can be produced within your budget. Spreading your first run across eight or ten styles splits your budget too thin and leaves you with shallow inventory across every SKU. Keep it tight, prove the product works with your audience, then expand from there.
Step 1. Define your niche and ideal buyer
The activewear market is crowded, and trying to appeal to everyone is the fastest way to stand out to no one. Your niche is not just a product category - it is the specific intersection of who you are selling to and what problem your product solves for them. Before you move forward on how to start an activewear brand, nail this step completely, because every product decision, pricing decision, and marketing decision you make will flow from it.
Narrow your category before you broaden it
Most founders want to launch with leggings, sports bras, shorts, and tops all at once. That spread works against you early on. Pick one or two product types that your target customer buys repeatedly and builds their workout wardrobe around. If you are targeting high-intensity training athletes, start with compression shorts and a fitted tank. If you are targeting yoga practitioners, start with high-waist leggings and a longline bra. Knowing your category also tells your manufacturer exactly what fabric weights, stretch ratios, and construction details to prioritize from the first sample.
The brands that scale fastest usually start with a single hero product that earns trust before they expand their range.
Your niche also sets your competitive angle. Competing on price alone against established brands is a losing strategy for a new founder, so decide early what makes your product different: superior fit for a specific body type, sustainability-focused fabrics, a bold design direction, or performance features that existing brands underserve. That angle drives your pitch and your product brief.
Build a detailed buyer profile
Vague personas produce vague products. You need to know who specifically is buying from you - not just "women who work out" but "women aged 25 to 38 who train four or more times a week and prioritize fit and durability over price." That level of specificity shapes your fabric choices, price point, sizing range, and product descriptions. Use this template to document your buyer before you finalize any designs:
- Age range and gender identity
- Primary fitness activity (running, CrossFit, yoga, cycling, etc.)
- Biggest frustration with current activewear (poor waistband, fading fabric, no pockets)
- Typical spend per piece (budget, mid-range, or premium)
- Where they shop (online direct, boutiques, Amazon)
- What drives their purchase decision (fit, sustainability, brand values, aesthetics)
Filling this out forces you to make real decisions rather than keep your options open. Every answer becomes a spec or a selling point that you carry directly into product development.
Step 2. Pick your business model and startup budget
Your business model determines everything that follows: how much capital you need, which manufacturers you can work with, and how fast you can scale. Before you go deeper into how to start an activewear brand, decide how you will bring product to market and build a budget that actually fits that model. Skipping this step leads founders to underestimate costs or pick a manufacturing approach that does not match their financial reality.
Choose between custom manufacturing and private label
These are the two main routes for new activewear founders, and they come with very different costs and timelines. Custom cut-and-sew manufacturing means you develop original styles with a factory - your own patterns, fabrics, and construction details from scratch. Private label means you select existing garment blanks from a supplier, add your branding, and sell them as your own. Custom gives you full control over fit and design. Private label gets you to market faster and cheaper, but you share styles with other brands.
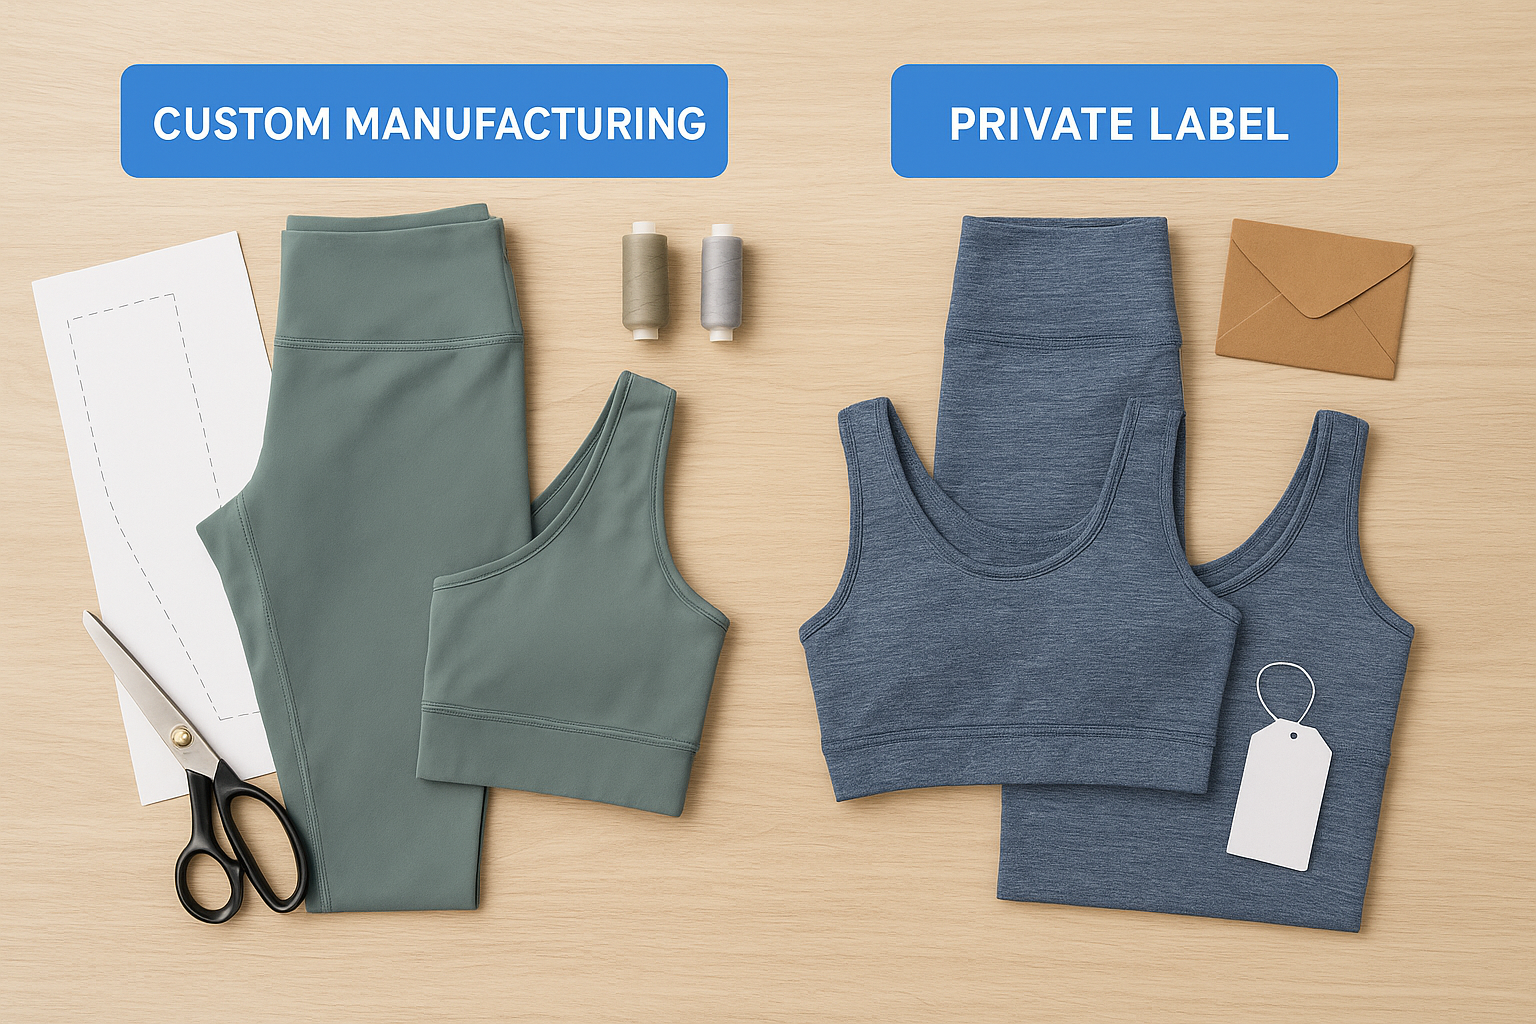
For most founders who want a distinctive product, custom cut-and-sew is the better long-term choice, even if the upfront cost is higher. Private label works well for testing demand quickly or launching a simpler complement to an existing product line.
If your brand identity depends on a specific fit, fabric, or performance feature, private label will almost always fall short of what you actually want.
Map your budget to your model
Once you know your model, assign real numbers to each line item before you contact a single manufacturer. Use this budget template as your starting point and adjust based on your scope:
| Budget line | Custom cut-and-sew | Private label |
|---|---|---|
| Sampling per style | $150 - $400 | $50 - $150 |
| Bulk production (per run) | $3,000 - $10,000+ | $1,000 - $4,000 |
| Fabric and trims | $300 - $1,500 | Minimal |
| Branding and packaging | $500 - $2,000 | $300 - $1,000 |
| Photography and launch | $500 - $3,000 | $500 - $2,000 |
Total realistic starting budgets range from roughly $5,000 to $8,000 for a lean private label launch and $10,000 to $20,000 or more for a custom cut-and-sew collection of two to four styles. These figures assume you are handling your own marketing and not outsourcing design work. Know your number before you start talking to factories, because manufacturers will ask, and your answer directly shapes what they offer you.
Step 3. Design your first collection and finalize specs
Design is where most new founders lose time and money because they start conversations with manufacturers before they have anything concrete to share. Knowing how to start an activewear brand means understanding that your designs need to be documented precisely before sampling begins - not described verbally, not sketched loosely on paper. Clear specifications protect you from receiving samples that miss the mark and requiring multiple costly revision rounds.
Build your tech pack from the start
A tech pack is the document your manufacturer uses to build your garment. It tells them exactly what to make, how to make it, and what the finished product should measure. Without one, you are relying on the factory to fill in the gaps, and those gaps become the source of most sample problems.
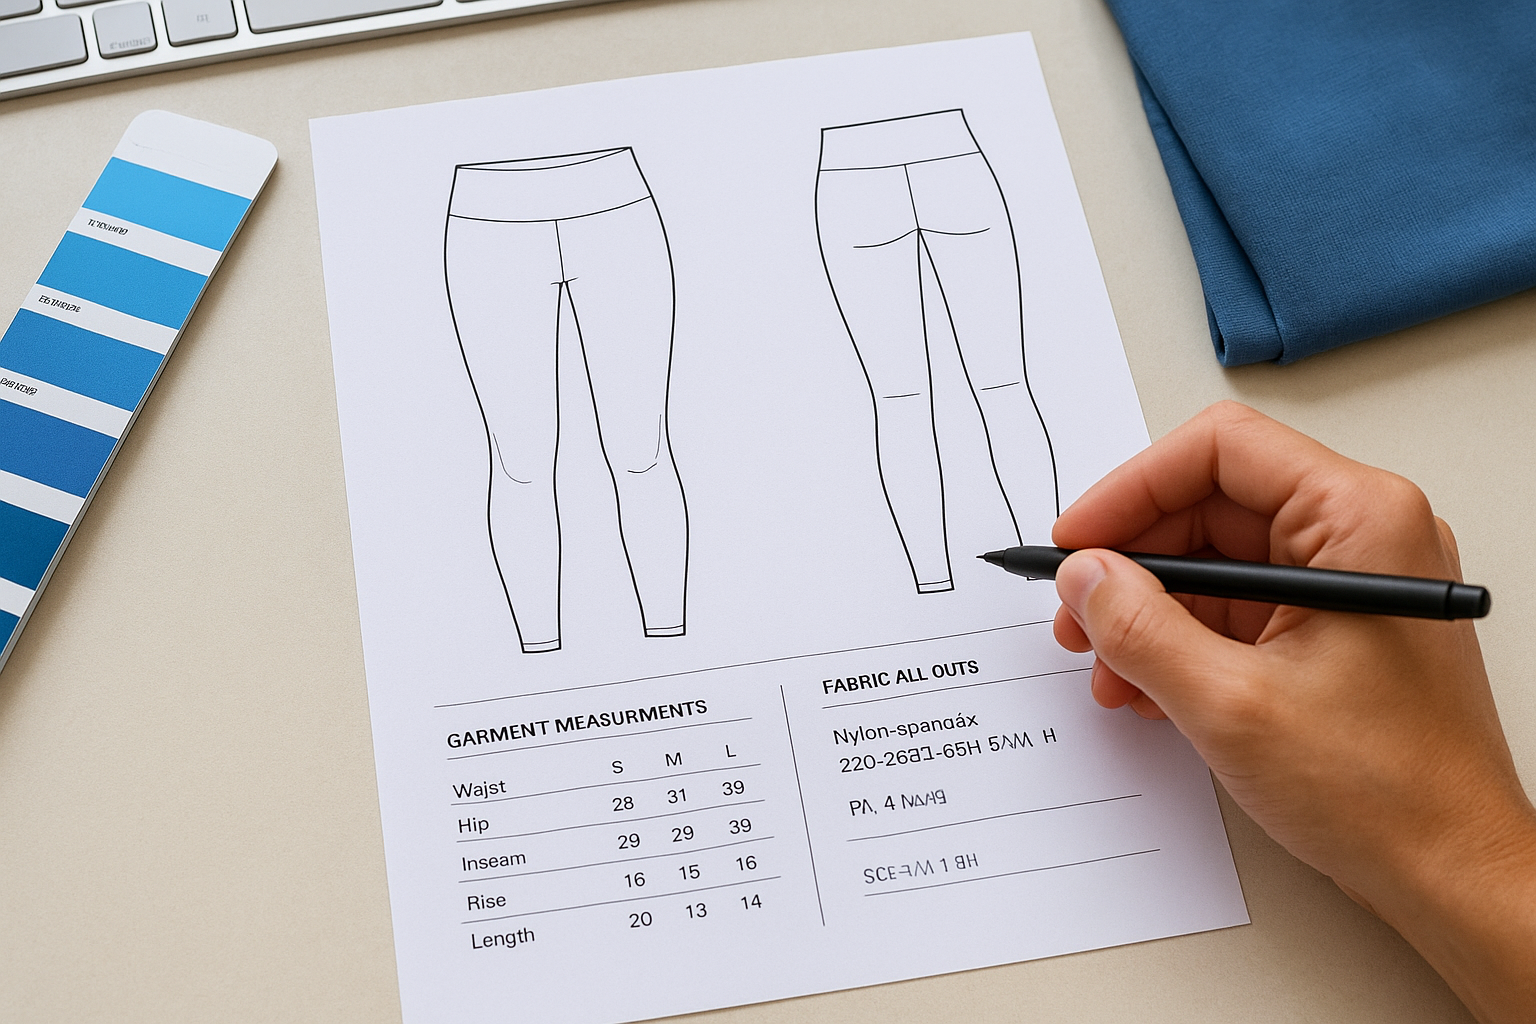
A well-built tech pack cuts your sampling rounds down and gives you something concrete to compare your sample against when it arrives.
Your tech pack does not need to be a professional CAD file to be useful. A clean, complete document covering the following information will serve you well with most manufacturers:
- Technical flat sketch (front and back views showing seam placement, stitching, and panels)
- Garment measurements by size across key points (waist, hip, inseam, rise, length)
- Fabric callouts with weight, composition, and stretch percentage for each panel
- Trim details (waistband type, gusset construction, bra cup or liner specs if applicable)
- Label and branding placement with exact positioning and dimensions
- Colorway information using Pantone codes or fabric swatch references
If you are not a designer, hire a freelance technical designer to translate your reference garments or sketches into a proper flat. This is one of the best early investments you can make because it pays back in fewer sampling errors.
Lock in your fabric and construction specs
Your fabric choices define how your garment performs and feels, and they need to be locked in before sampling, not after. For activewear, you are typically selecting fabrics by weight (measured in GSM), fiber composition, and stretch recovery. A four-way stretch nylon-spandex blend at 220 to 250 GSM is a common starting point for leggings, while lighter 180 GSM fabrics work better for tops and shorts.
Specify your construction details with the same precision. Stitch type, seam finish, and panel bonding all affect comfort and durability during movement, and each of these is a line item your manufacturer needs to see before they cut fabric for your first sample.
Step 4. Source materials and manage sampling to bulk
Sourcing materials and running sampling rounds is where knowing how to start an activewear brand stops being theoretical and becomes entirely hands-on. Your fabric choices and your manufacturer's execution will define the actual product your customer receives, so treat this stage with the same discipline you applied to your tech pack.
Vet your fabric supplier before committing
Performance fabrics for activewear typically come from mills in China, Taiwan, or South Korea. Request sample yardage before placing any bulk fabric order, and test it yourself for stretch recovery, opacity under tension, and moisture response during actual movement. A fabric that looks right on a swatch card can still pill, sag, or turn transparent when worn, and you need to catch that before your manufacturer cuts an entire run.
When you brief a fabric supplier, give them the exact specs from your tech pack: fiber composition, GSM, stretch percentage, and finish. Ask for a minimum of two to three fabric options at your target spec so you have a real comparison to make an informed choice from, not just one option to accept or reject.
Approving fabric and trims before sampling begins saves you at least one full revision round and keeps your timeline from slipping by weeks.
Run your sampling rounds with a clear feedback process
Your first sample will not be perfect, and that is expected. Plan for one to three sampling rounds depending on the complexity of your styles. After each sample arrives, document your feedback in writing before you contact your manufacturer. Use this feedback template for every round to keep changes clear and traceable:
| Point | Issue found | Requested change |
|---|---|---|
| Waistband width | 1 inch too narrow | Increase to 3 inches per spec |
| Inseam length | 0.5 inch short on size M | Adjust to spec sheet measurement |
| Stitching | Visible tension on side seam | Recheck thread tension settings |
| Fabric opacity | Transparent at hip under stretch | Switch to approved fabric option B |
Send this table with every round so changes are documented and traceable back to a specific round. Verbal feedback gets lost or misinterpreted, while written feedback creates a record you both reference when the next sample arrives.
Once your sample passes your standards, request a pre-production sample from the bulk run before your manufacturer cuts all units. This confirms the production line is calibrated to your approved spec before your full order is committed.
Next steps to launch with confidence
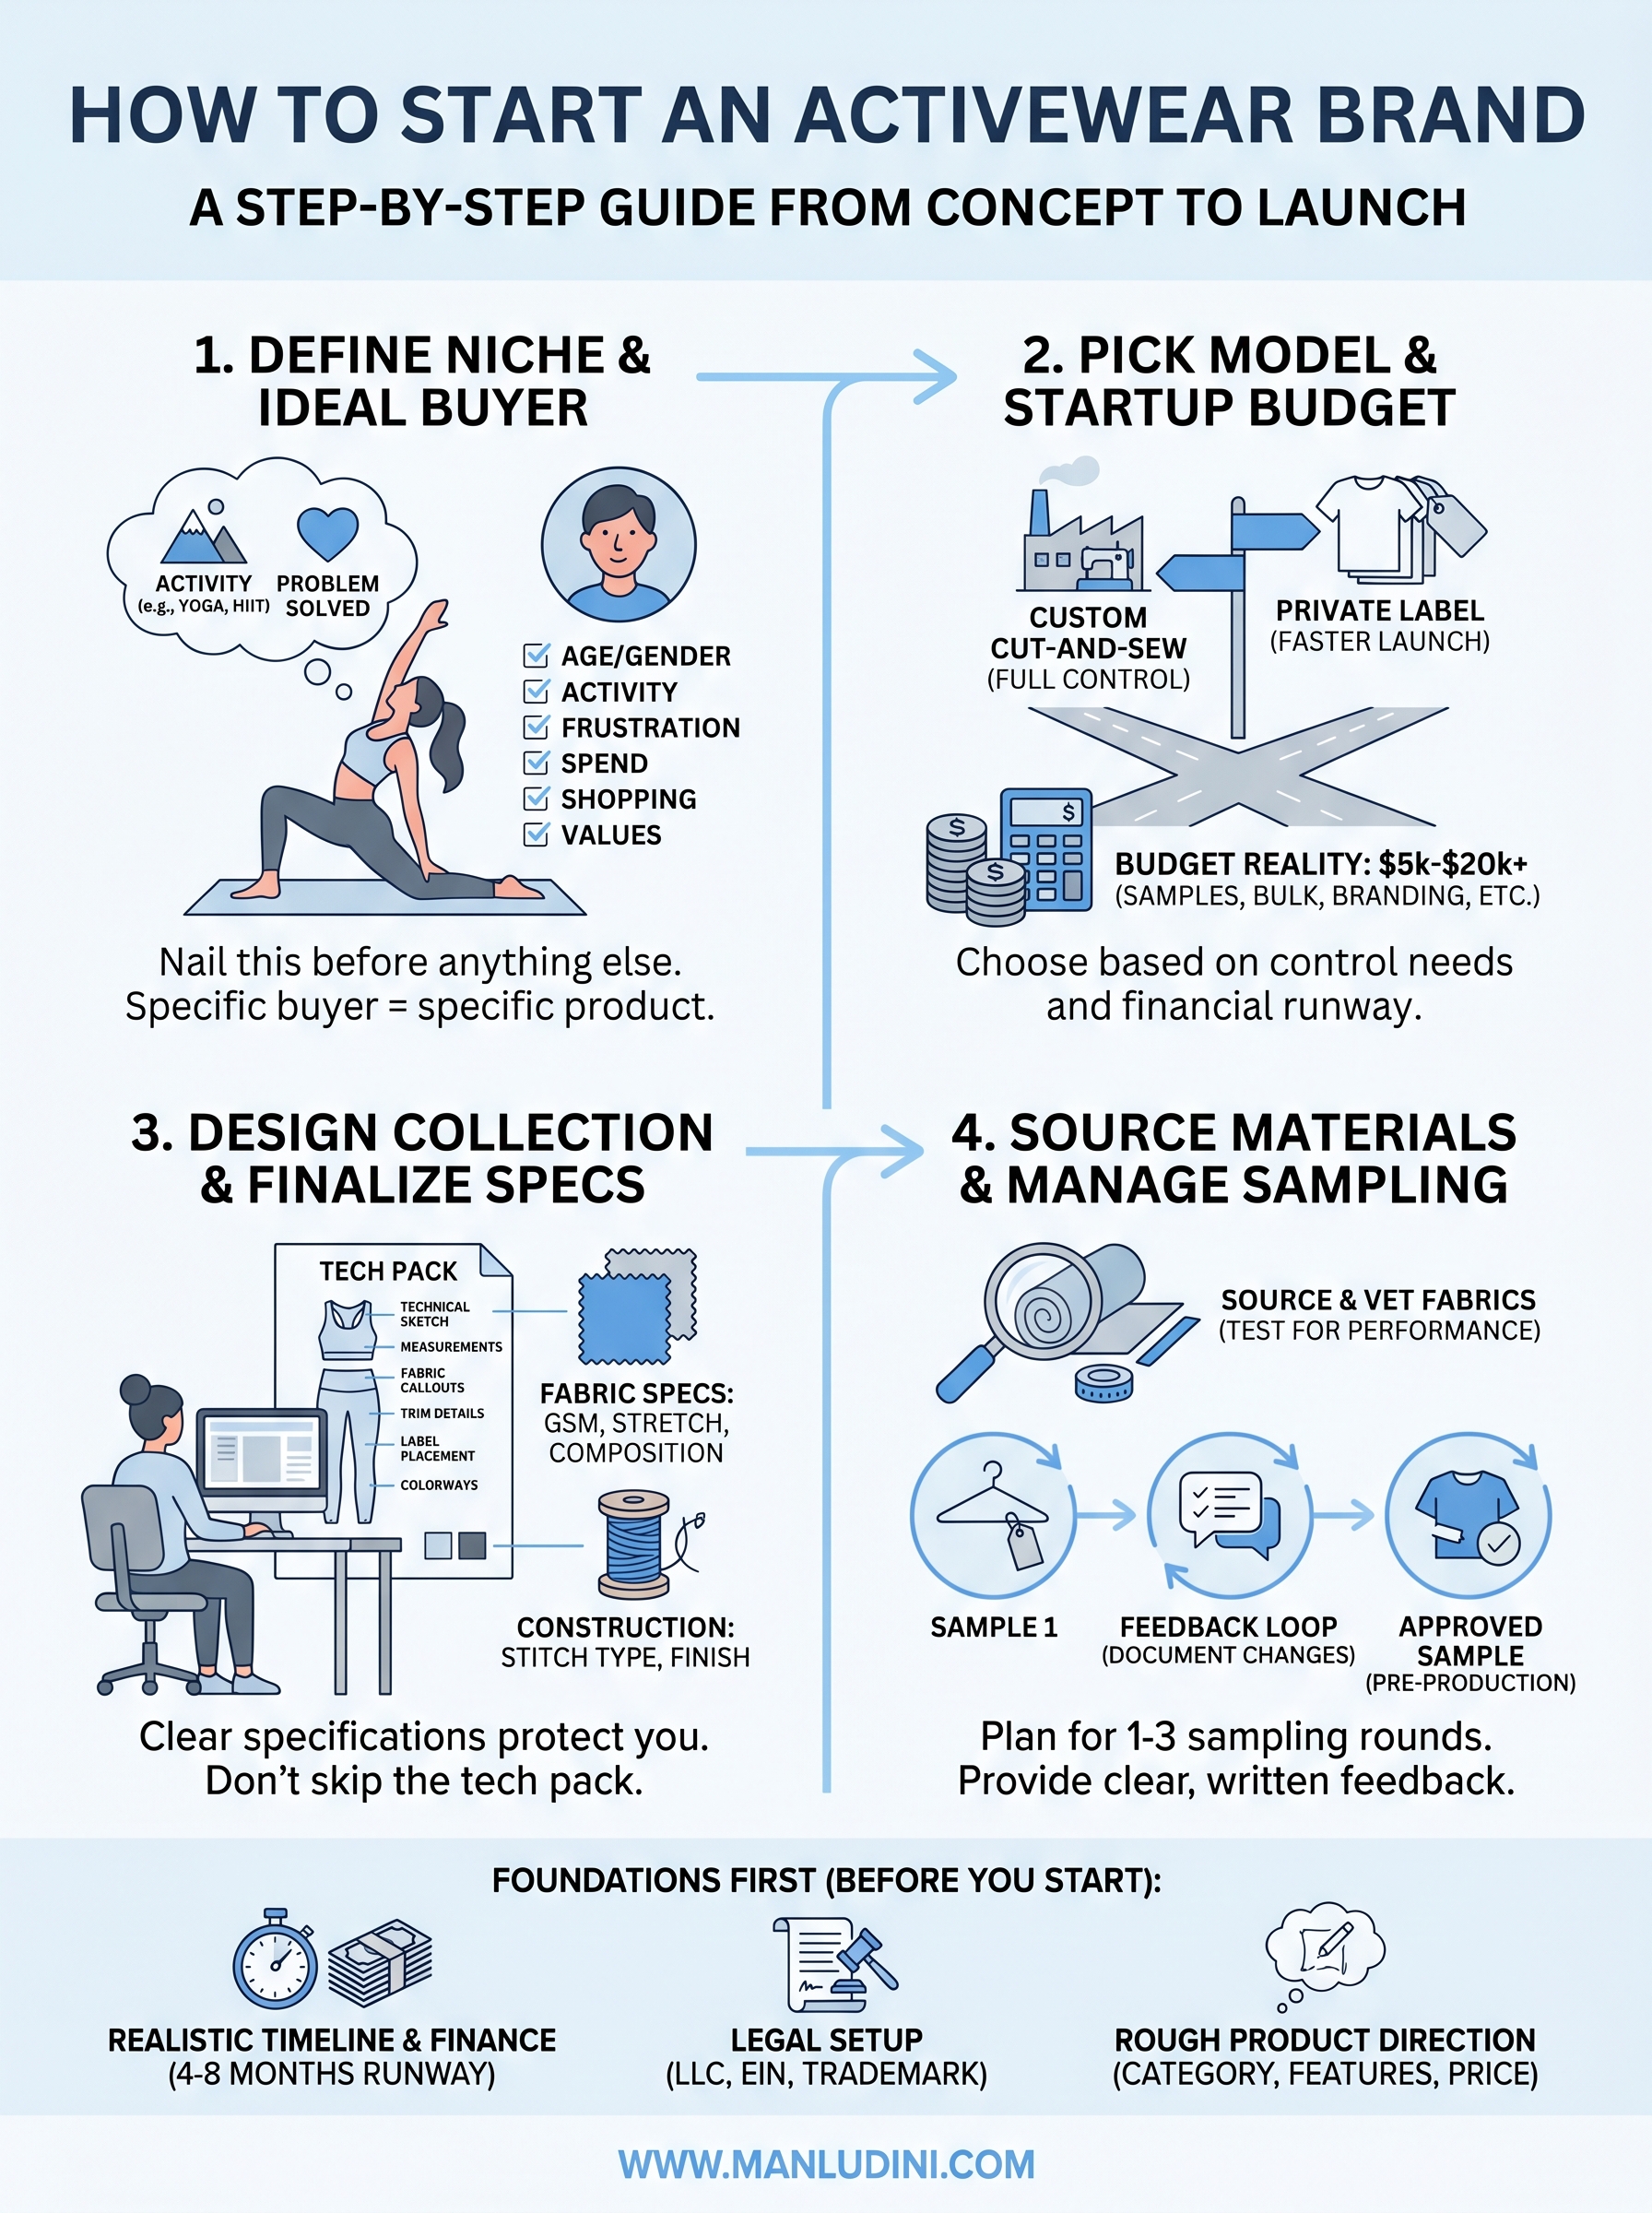
You now have a complete roadmap for how to start an activewear brand, from locking in your niche and budget to building your tech pack and running sampling rounds. The biggest mistake founders make at this point is waiting until everything feels perfect before reaching out to a manufacturer. The development process itself teaches you things no amount of planning can, and the sooner you start that cycle, the sooner you build real momentum.
Take the steps in order. Define your buyer, pick your model, document your specs, and then find a manufacturing partner who communicates clearly and supports your timeline. Every decision you delay adds weeks to your launch date. Start with two to three core styles, validate them with real customers, and build from there.
If you are ready to move from planning to production, work with Manludini on your first collection and get direct factory support from sampling through bulk.
0 comments